The ATSF & SP Railroad
By Gary Schrader
I moved into my present house in 1973, when I moved to San Jose, Ca., as part of the big “Silicon Valley” boom. The house was brand new, and I chose it because it had an unfinished upstairs of about 800 square feet. It was obvious to me that this was meant to be used as a train room, since California houses do not have basements. It took me about two and a half years to finish it off with insulation, wiring, heating and air conditioning to make a first rate home for my trains.
At that time, I was an experienced HO Scale modeler. I started a really complex HO layout in my “vast” new space. By the time 1981 rolled around, it had begun to dawn on me that I might not live to be 200 yrs old, which it appeared would be necessary in order to finish my grand plan. I simply loved super-detailing too much to compromise and proceed faster. It was time to re-think what I was doing.
In 1981, the NMRA National Convention was held in San Mateo, near my home, so I attended it. That was the first time I had seen actual scale O Scale models, and I was blown away by the size and heft of them, not to mention the detailing possibilities. Here was a possible solution to my problem. O Scale would impose a simpler layout on me due to the obvious space requirements of the scale, while allowing free reign for my detailing desires. I bought an Athearn ATSF Fe-24 automobile car kit and some real working knuckle couplers to try it all out. That is all it took. I was hooked.
I immediately sold and traded all my rather sizeable collection of HO for O Scale, and tore down the HO layout. After extensive planning, I started building my first O Scale layout. It ran three times around the room with an 18 inch elevation change up and back down. I learned a great deal about doing O Scale from that layout. Much to my surprise, I found modeling and running in O Scale to be quite different from HO. The eight times greater mass and better rolling characteristics make the experience unlike HO, so I needed to change some of my ideas again. This first layout was a valuable learning tool and was featured in an O Scale Railroading article back in June of 1987. However, what I had learned was that I did not like grades or hidden trackage, both of which were in abundance on this layout. Now that I had learned what I really wanted, it was time to start over once again.
The present layout was started in 1991 after a period of planning using a computer CAD drawing system to completely lay out, not only the track plan, but also all the benchwork and roadbed. This planning effort saved a huge amount of time in the actual construction of the layout and resulted in the best use of space I could get in the available room.
I had come to realize that what I wanted in a layout was a place to display my models and occasionally watch trains run. Realistic prototype operation does not really matter much to me, so a double track loop around the room serves for running trains and a large yard and engine facility serves as a great place to display my super-detailed models. There are no grades and no hidden track, only one short tunnel. After 15 years, I am still satisfied with the track plan, so I have to believe it is right for me.
The benchwork is standard L-girder with 5/8” plywood subroadbed and Homabed roadbed. All track is hand laid steel rail on wood ties using HO size spikes, which are pretty close to scale size for O Scale. Since I use at least 2 spikes per tie, the resulting track is plenty strong enough to walk on, as I have proven on numerous occasions. The mainline rail is code 148. All other rail is code 125. Every piece of rail has its own feeder soldered on the bottom, out of sight, before it is spiked in place. Nowhere will you find any unsightly feeders soldered to the sides of rail. I also do not use rail joiners. I just use a few extra spikes at the ends of each rail and have never had any go out of alignment.
All my switches are number 8. They look much better than the 4’s and 6’s commonly used and never give operating problems with long passenger cars and long wheelbase engines. The slight amount of extra space they need is a good investment in reliable operation over the years. I use Right of Way nickel silver cast switch points and frogs on all switches. They really speed up track laying and have very nice bolt detail cast in. PFM Fulgurex slow motion switch machines power the points from under the roadbed.
I have used command control ever since moving to O Scale. Originally, I used the old Keller system including sound. Later, I moved to Locolinc, a radio controlled system still popular in garden railroading. That served me very well for about 12 years. A few years ago, I switched to DCC using the NCE radio control system and Digitrax decoders. The capabilities and flexibility of DCC is just amazing. It adds a lot to the joy of running trains. Since DCC allowed me to match the running characteristics of all my engines, I can double, triple, or quadruple head with any combination of engines I choose.
My primary love is super-detailing steam engines and rolling stock. My philosophy is that if you could see it on the prototype, it should be on the model. However, I do not waste time on details no one will ever see or on operating hatches, doors, etc. Who actually opens and closes those things on a model anyway? I sure don’t. Once the model is on the track, all those operating doors and hatches go completely unused, so why have them? But all rolling stock gets air hoses and cut levers. In addition, passenger equipment gets steam lines and working diaphragms. Engines get water hoses and air lines between the engine and tender. All other visible details are added in addition to those basics.
In addition to all my own painting and weathering, I now make most of my own decals. Significant computer skills carried over from my engineering career coupled with an ALPS printer allow me to make the lettering just as accurate as the rest of the model. I use the same technology to make signs, advertising, carpets, drapes, photos, and many other details for buildings. There is no end of usefulness for the computer in model railroading these days.
Obviously, I model both the Santa Fe and the Southern Pacific. No specific region is modeled, but the era is fairly tight. It ranges from 1947 to 1951, the usual steam to diesel transition period, which is so popular with model railroaders. Most motive power is steam, although a few favorite diesels are allowed.
The present layout was first shown in 48/ft O Scale News in issue 157, August 2000. At that time, there was almost no scenery and many unpainted brass engines. Now, most of the scenery is in, and no unfinished models are allowed on the layout. That makes for some pretty dramatic changes in this latest update. I hope you enjoy the photo tour of my layout. The photo locations are marked on the track plan, so you can see where they were taken, and the captions explain what you are seeing in each photo. The ATSF & SP is open for layout tours every February during O Scale West, along with about 30 other layouts. I hope to see you there one of these days.
Photos of the layout
photo 1 ⤵ 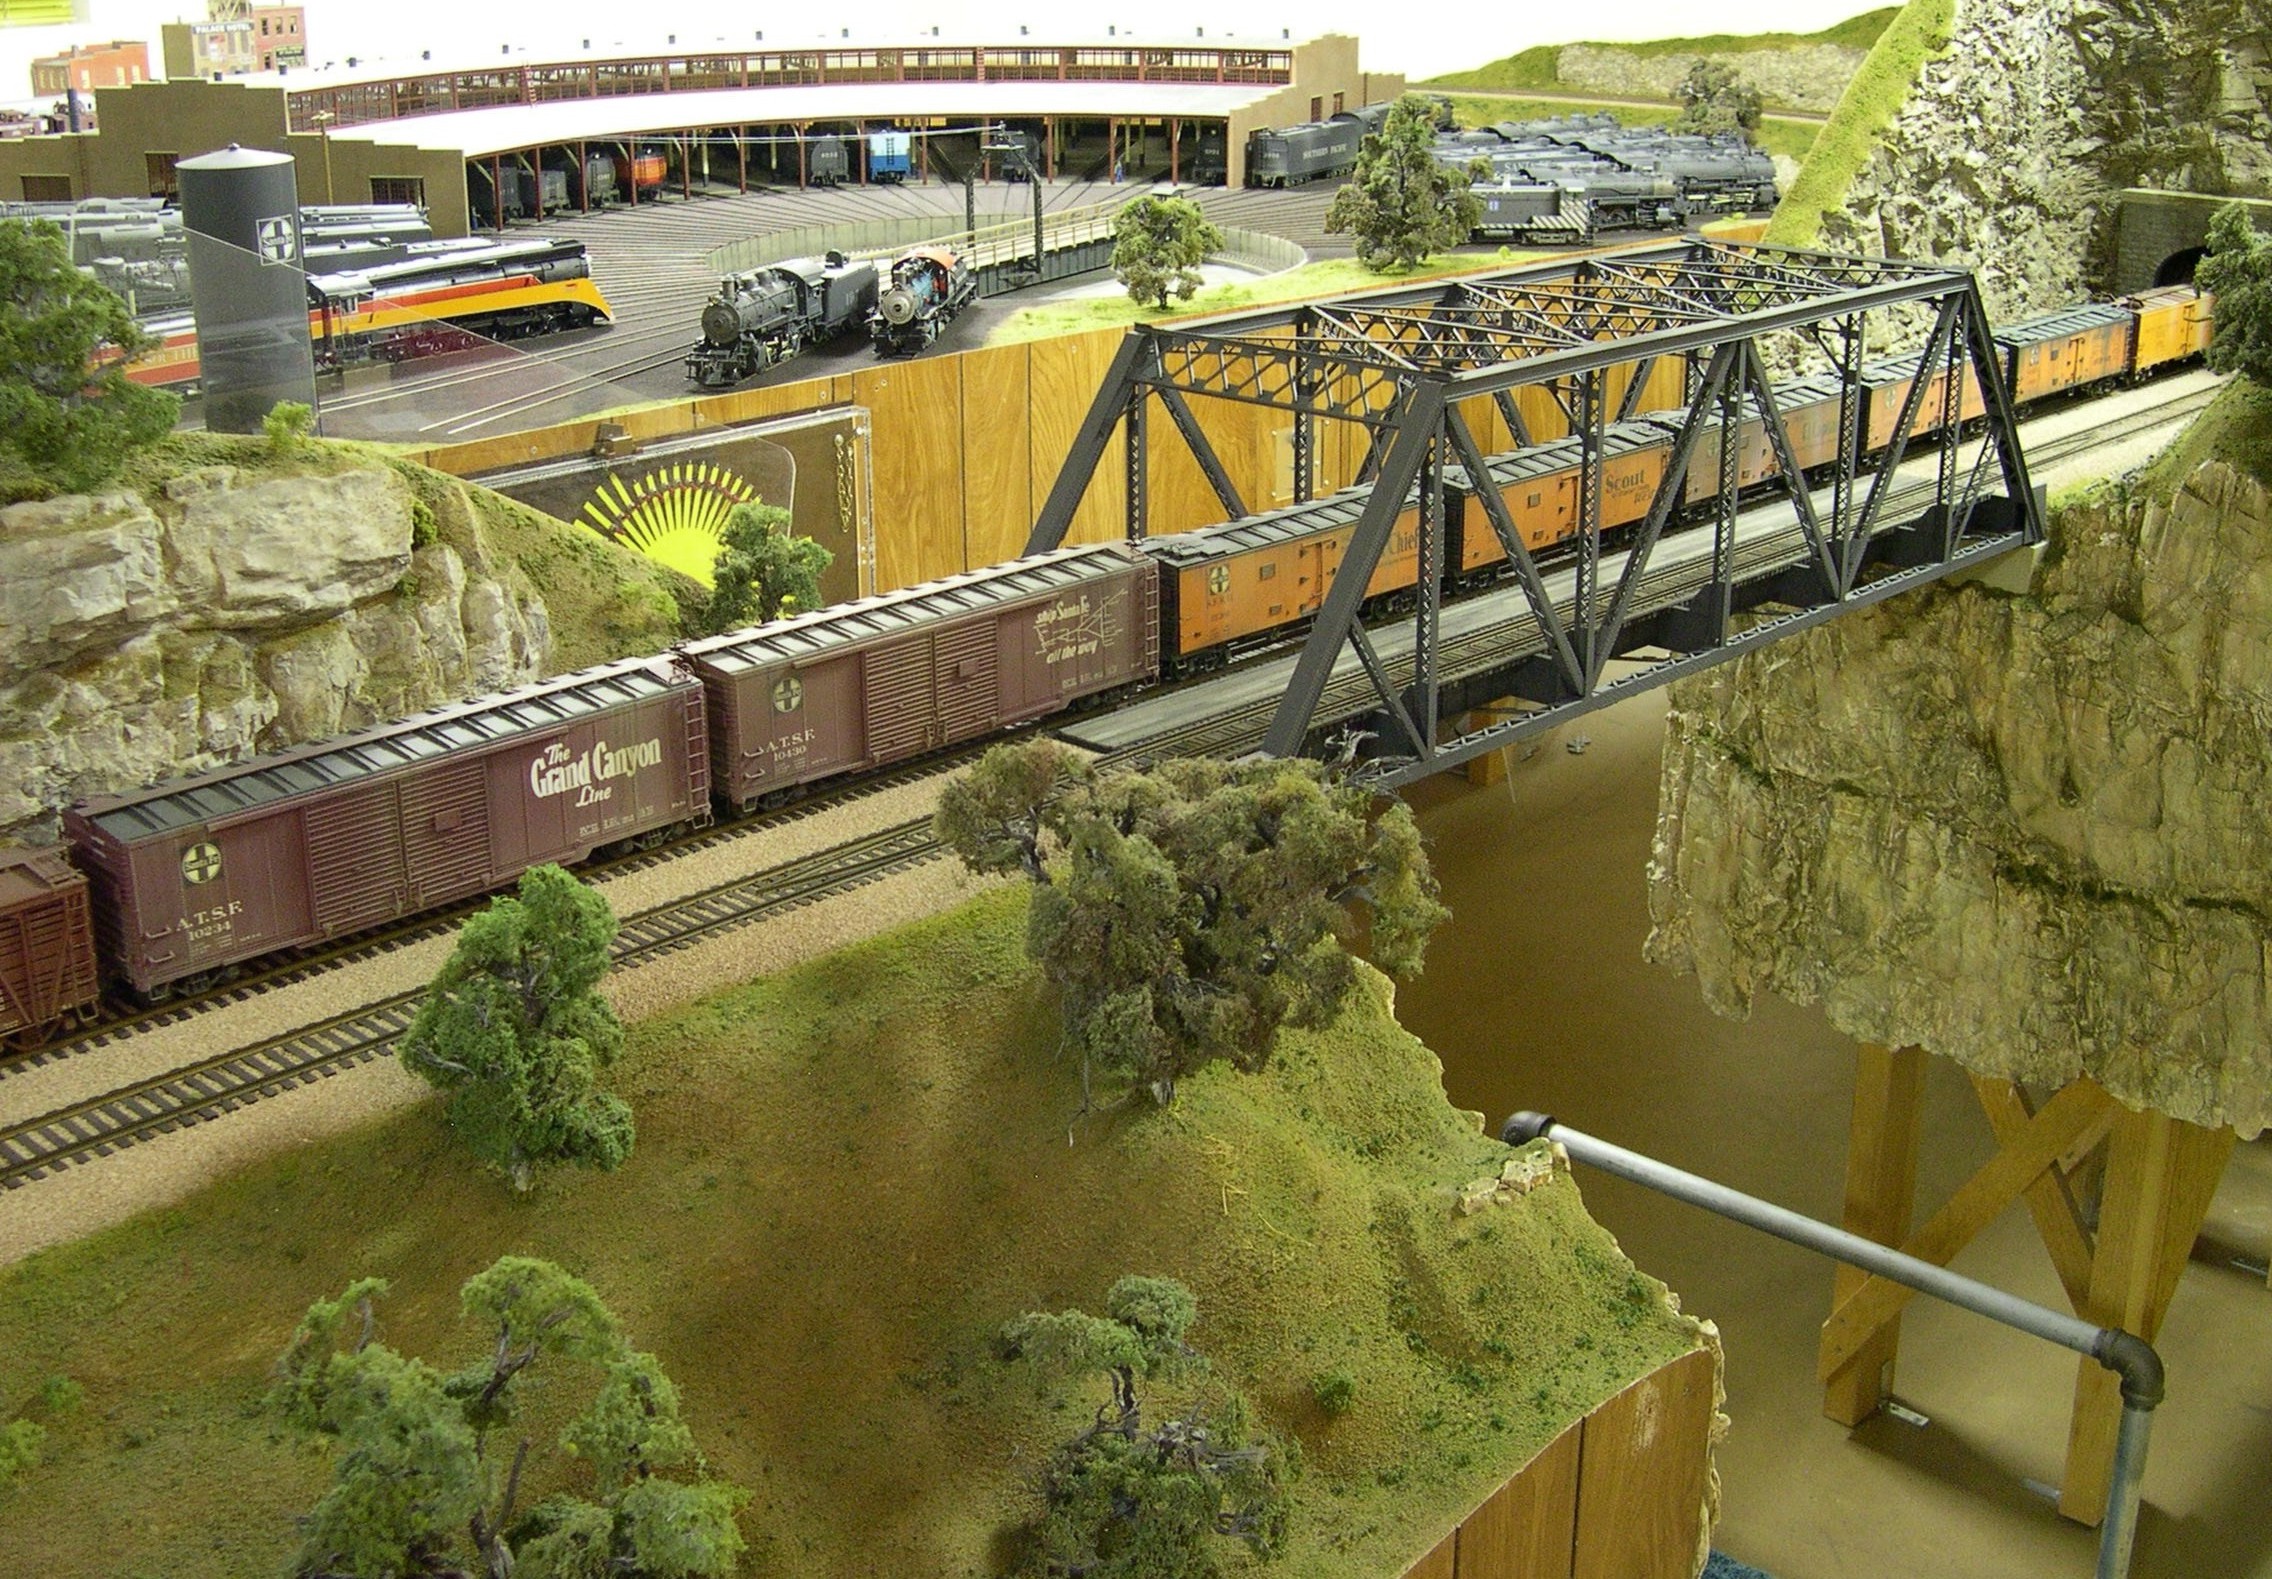 This is one of the first views one gets upon entering the train room. The steel truss bridge being crossed by the Santa Fe freight train is easily lifted out when the layout is not being operated and serves as the duck under during operations. It is an Atlas bridge with a rebuilt deck. Beyond is the large engine terminal with a 14 stall roundhouse.
photo 2 ⤵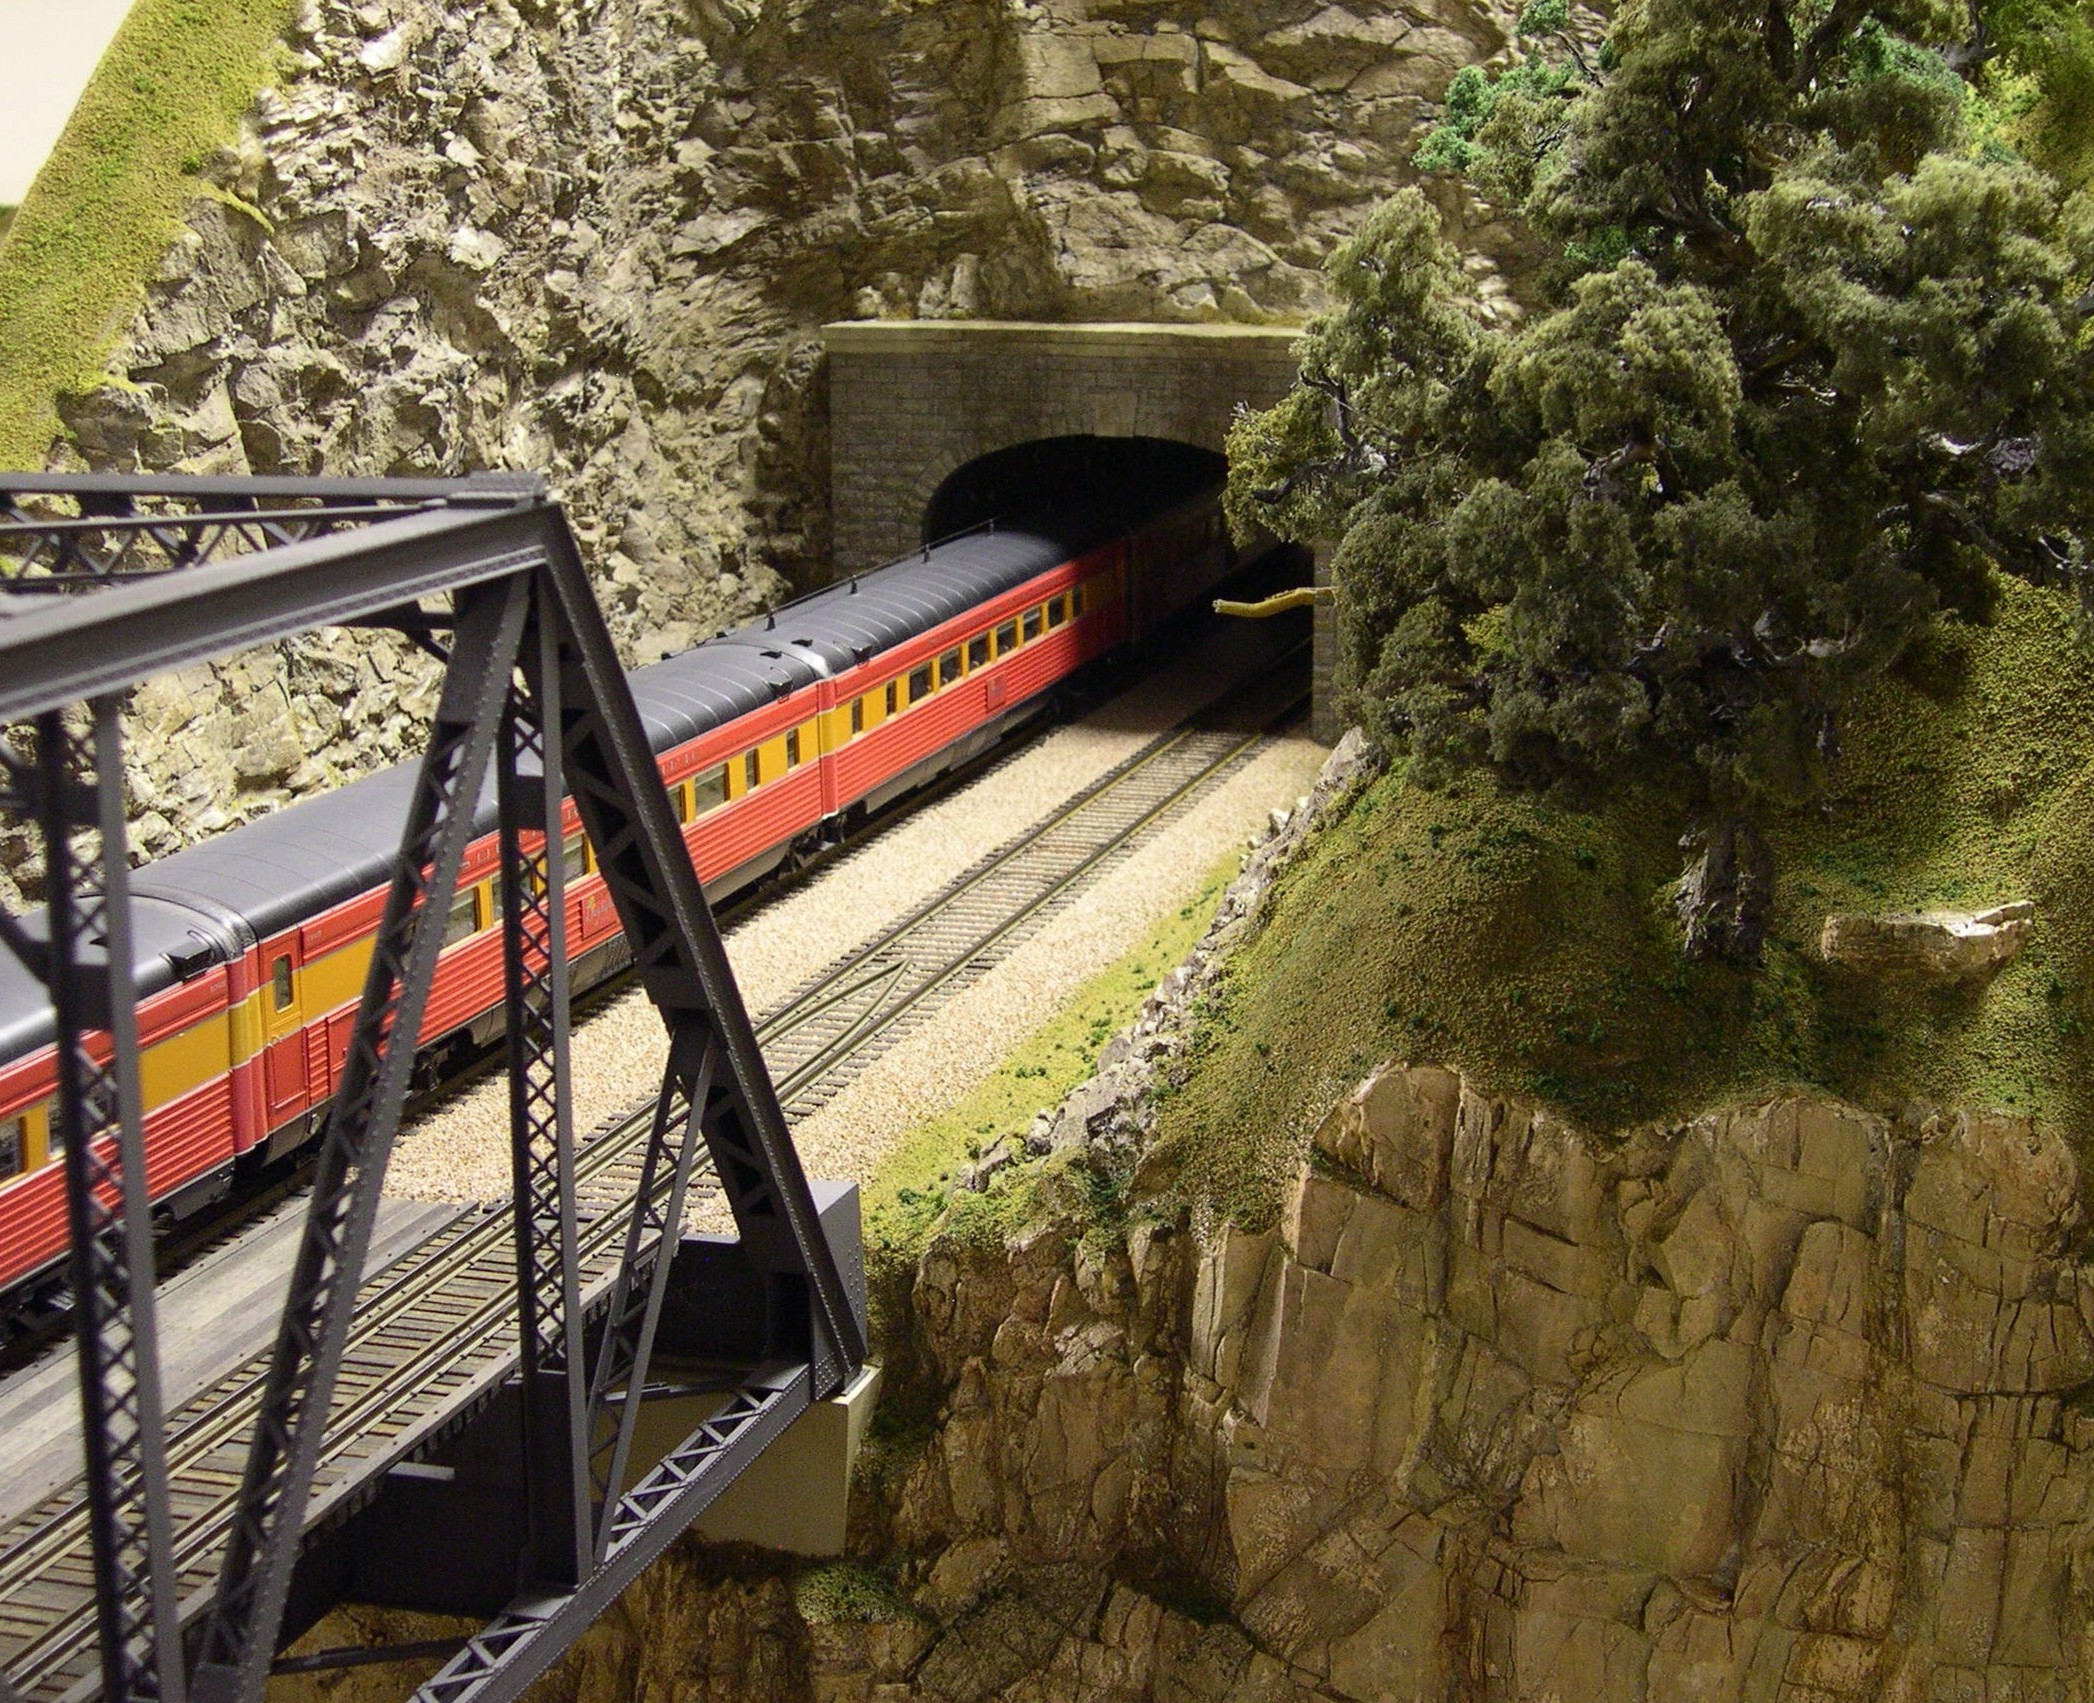 The tunnel and truss bridge at the duck under form a favorite train watching spot. This view of the Daylight streaking out of the tunnel and crossing the truss bridge shows why. The Daylight train is by Pecos River Brass. It has been re-lettered for the post 1947 era and has complete interior detail.
photo 3 ⤵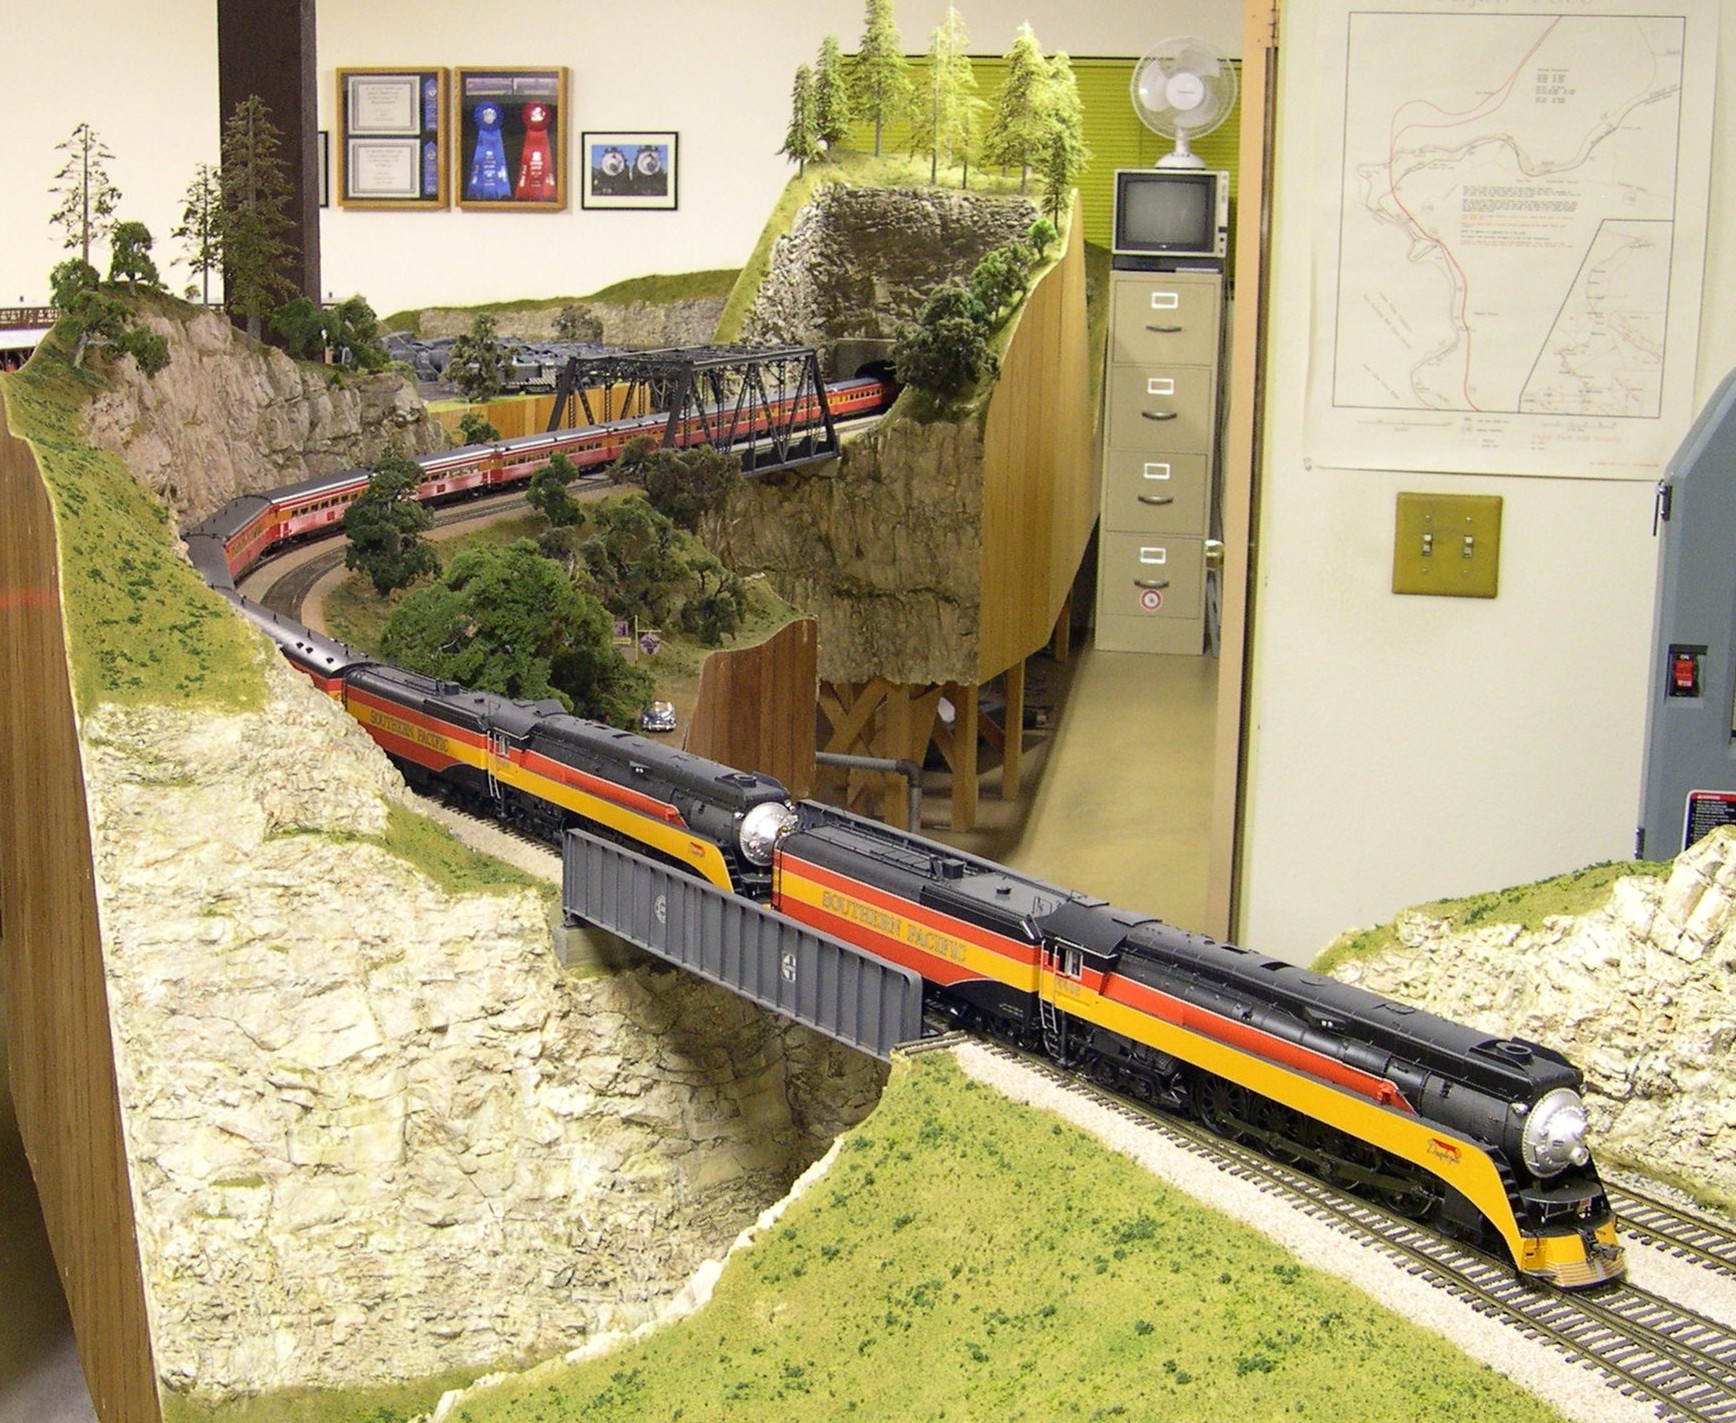 This photo shows a lot of the area south of the truss bridge. The Daylight engines crossing it are by Overland. The 14 car Daylight snaking through the curves puts on a real show.
photo 4 ⤵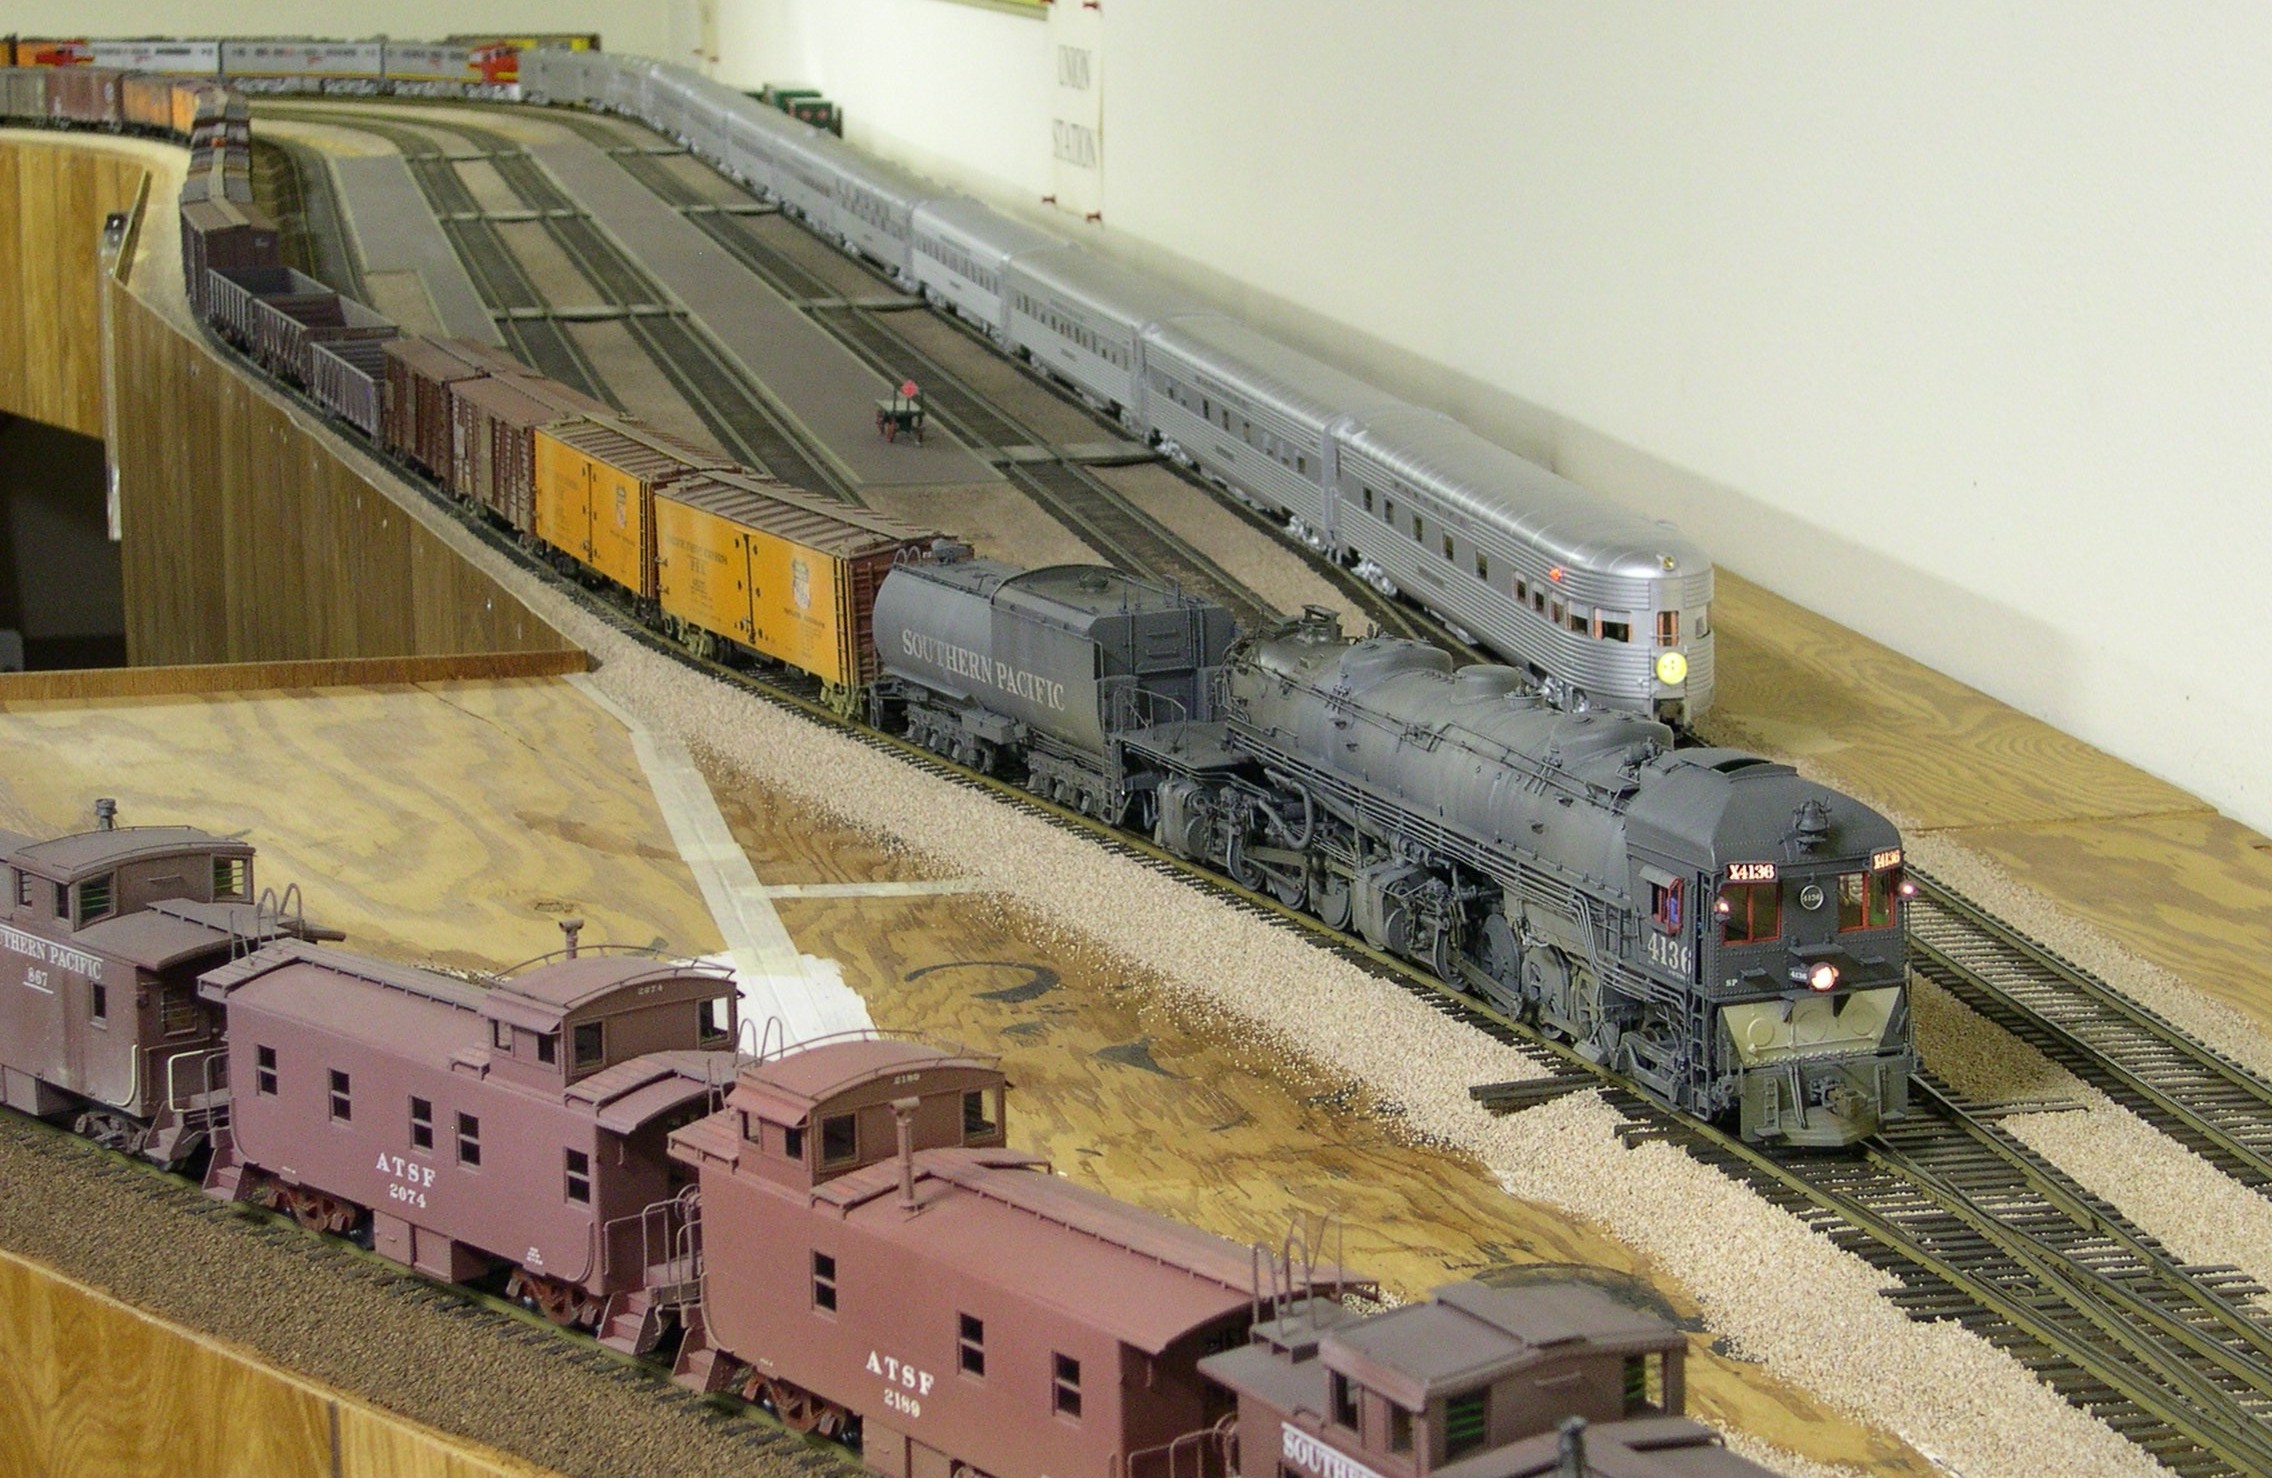 In the Union Station area, the passenger platforms are complete. Remaining is the station façade along the wall and the concourse, which will project out over the first 5 tracks. Train sheds will cover the platforms to protect passengers from the elements. AC-6 number 4136 is leading a long freight on the freight bypass track. It is an extensively re-detailed PSC model. The eleven car Super Chief in the background is led by an ABA set of Warbonnet painted Alco PA’s. They are by Overland.
photo 5 ⤵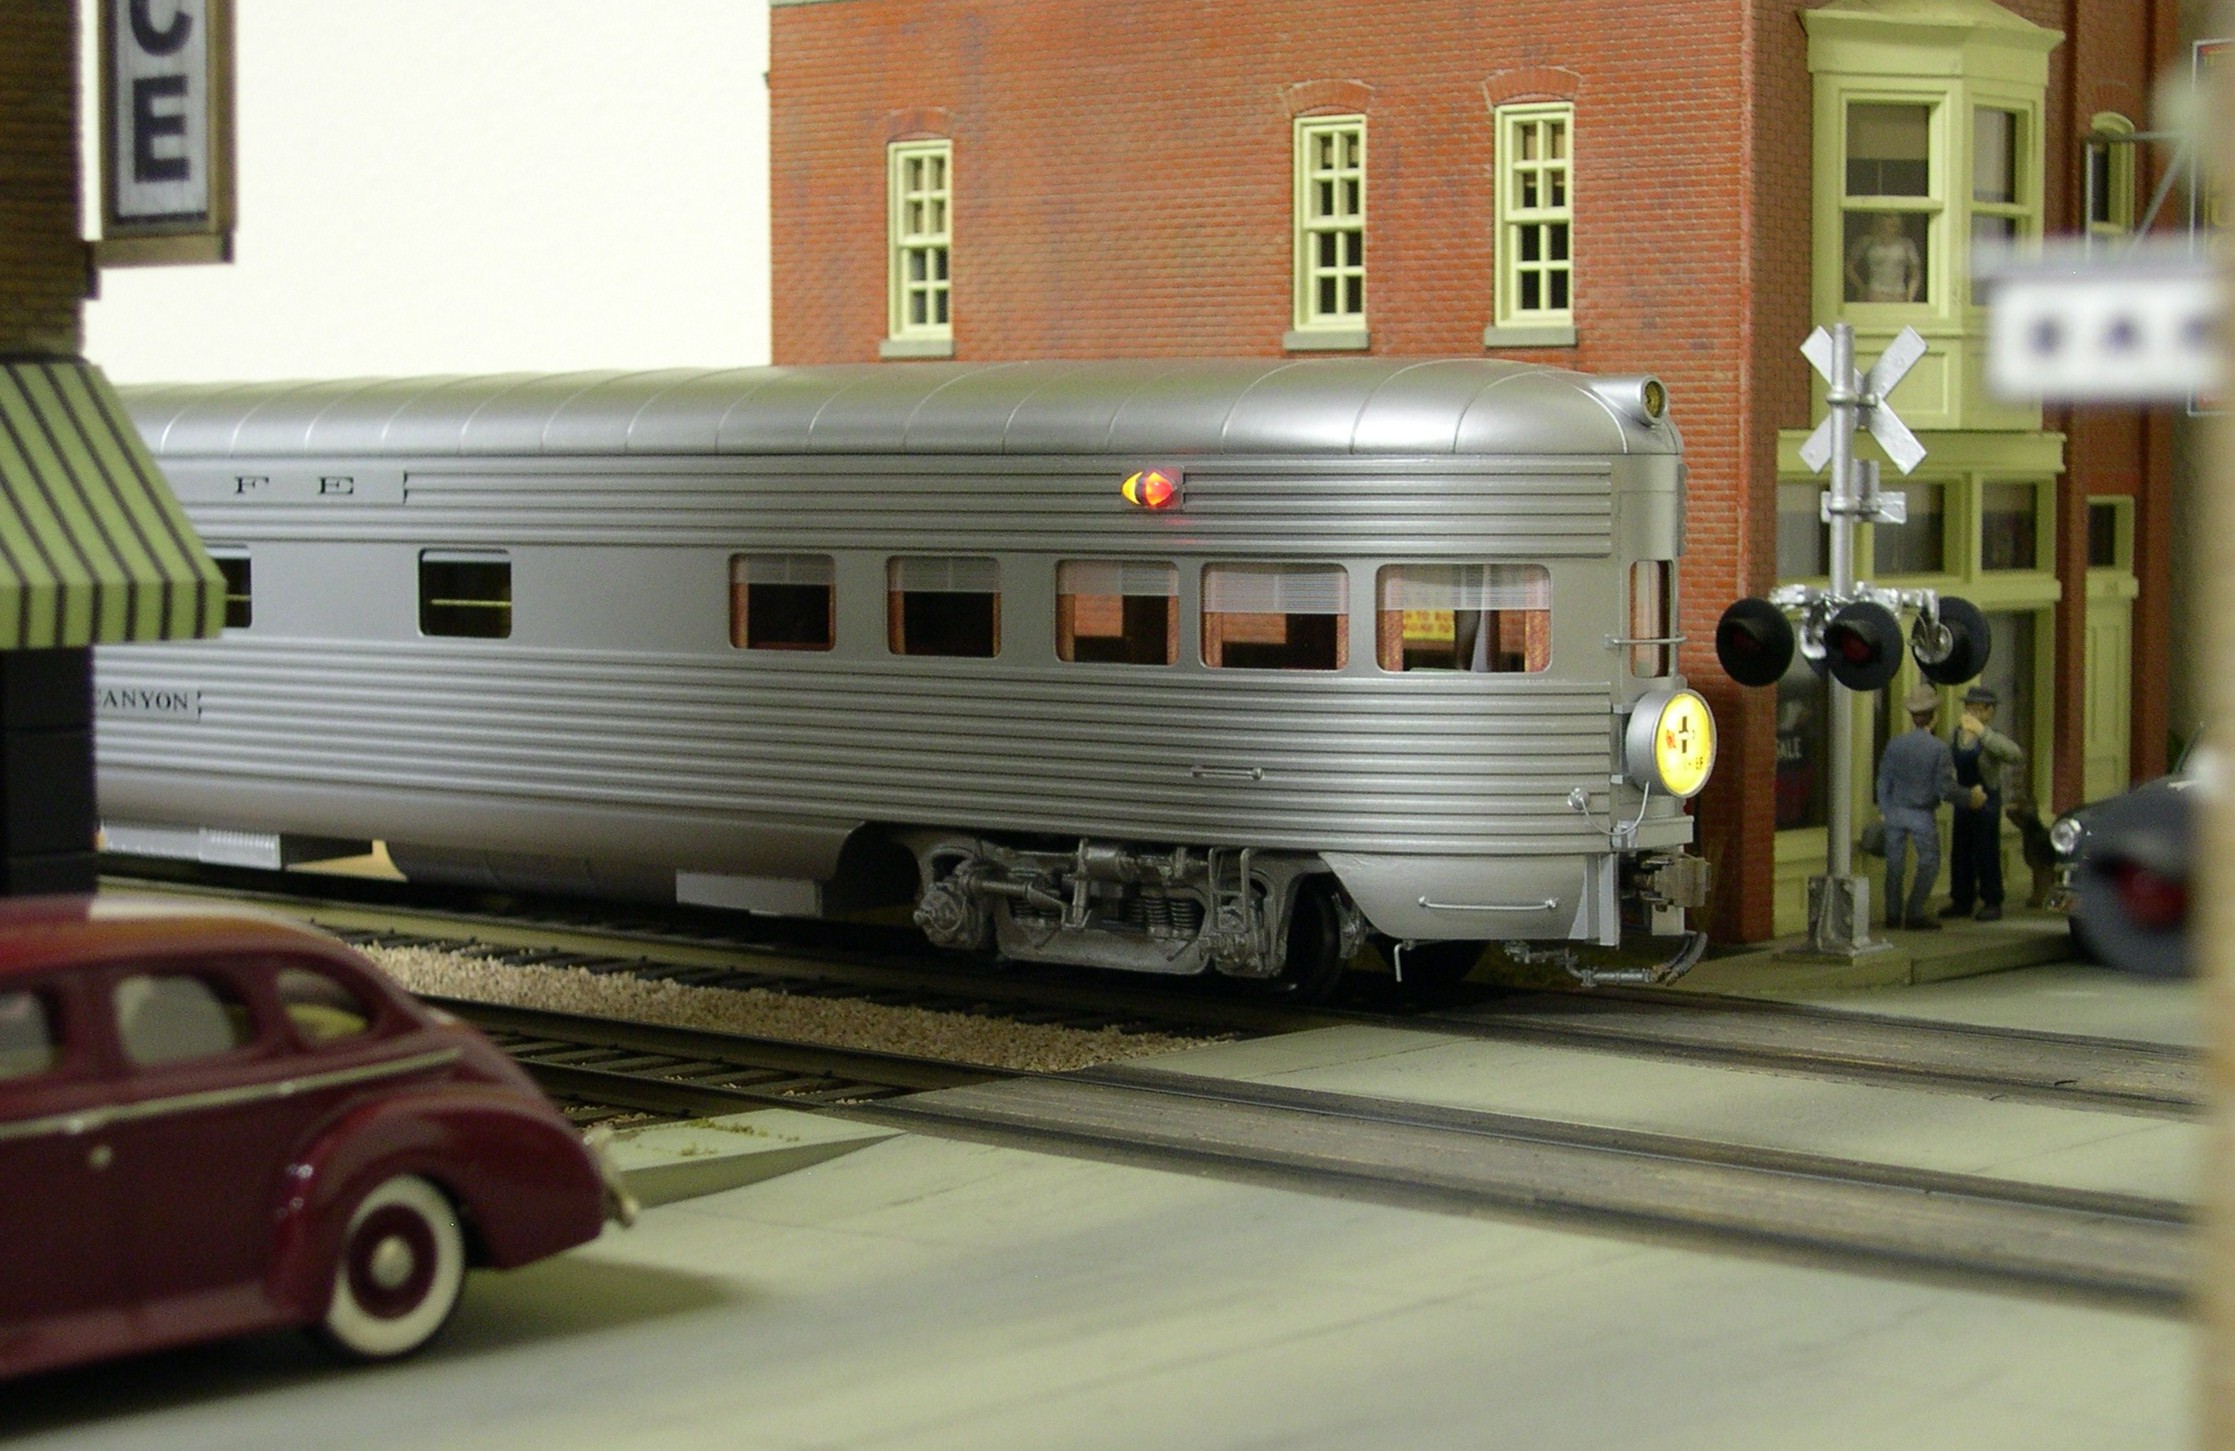 The beautiful, sleek observation car Vista Canyon glides across Maple Street bringing up the rear of the Super Chief. It is an American Standard Car Co styrene kit with loads of extra detailing and a full interior. The trucks are Keil Line. It has its own DCC decoder to independently control the marker lights, drumhead, and backup light.
photo 6 ⤵ Action at the south end of Union Station. A heavyweight Southern Pacific passenger train is entering Union Station, while a long freight uses the freight bypass track. An AC-5 is entrained as a helper 10 cars ahead of the caboose per SP practice. The first three classes of SP bay window cabooses were delivered with those vermillion or crimson ends starting in 1947. The double slip switch saves a lot of space and is very reliable.
photo 7 ⤵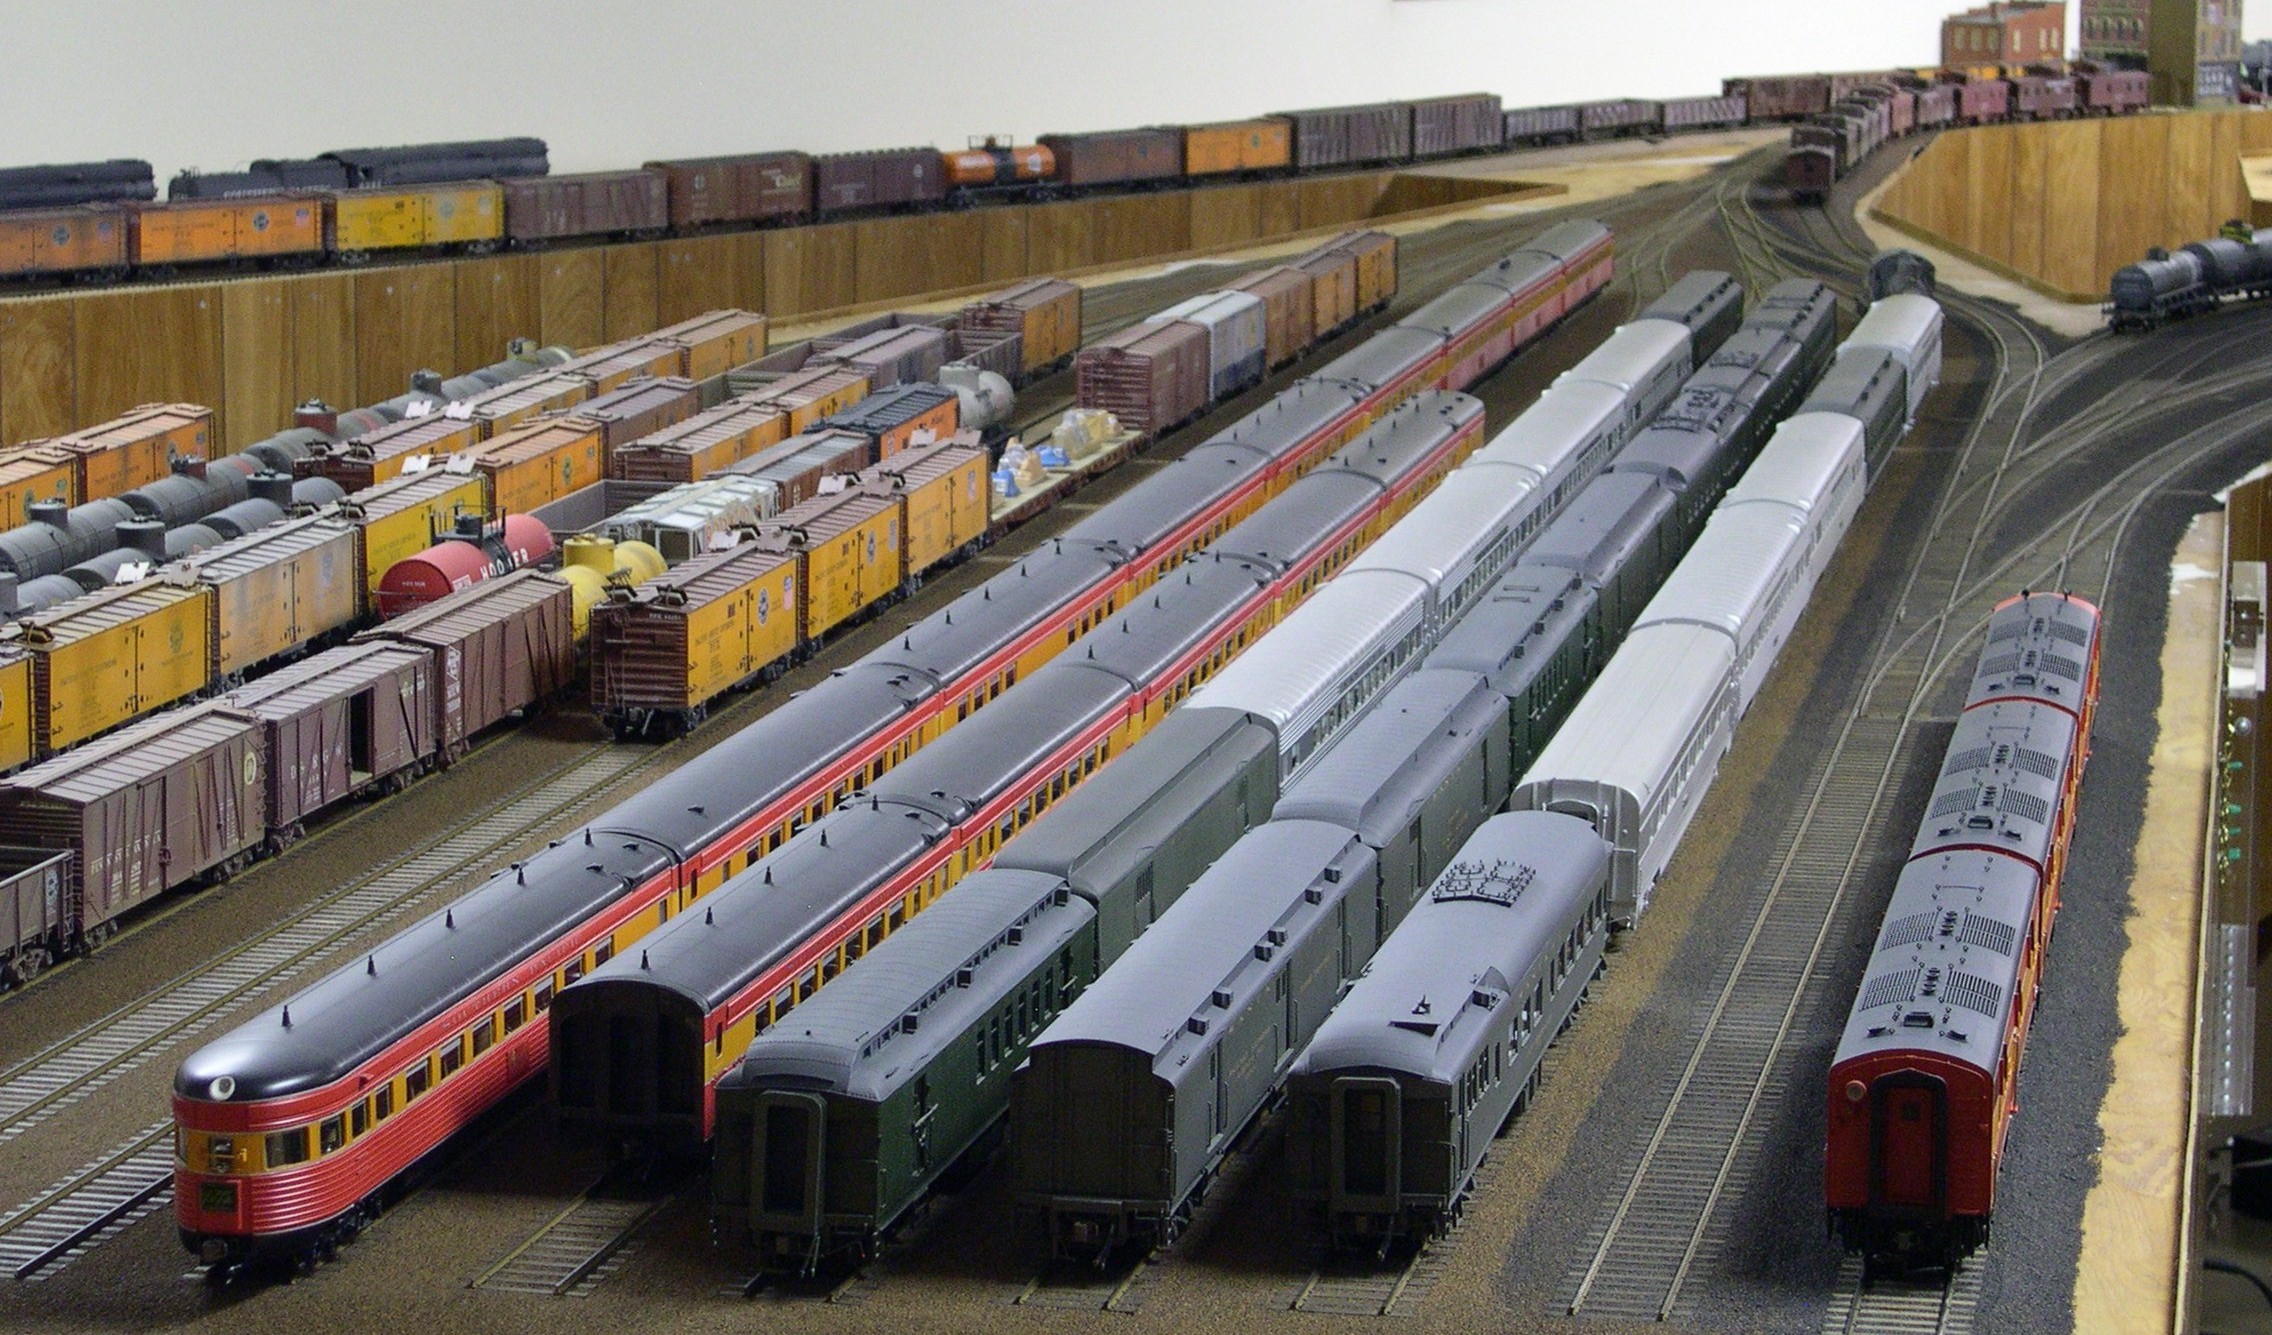 Overall view of the freight and passenger yards. Union Station is in the background to the left, while the engine facilities are just out of the photo to the right. There are 13 yard tracks. The second track from the right, with dark ballast, is the engine lead to the roundhouse.
photo 8 ⤵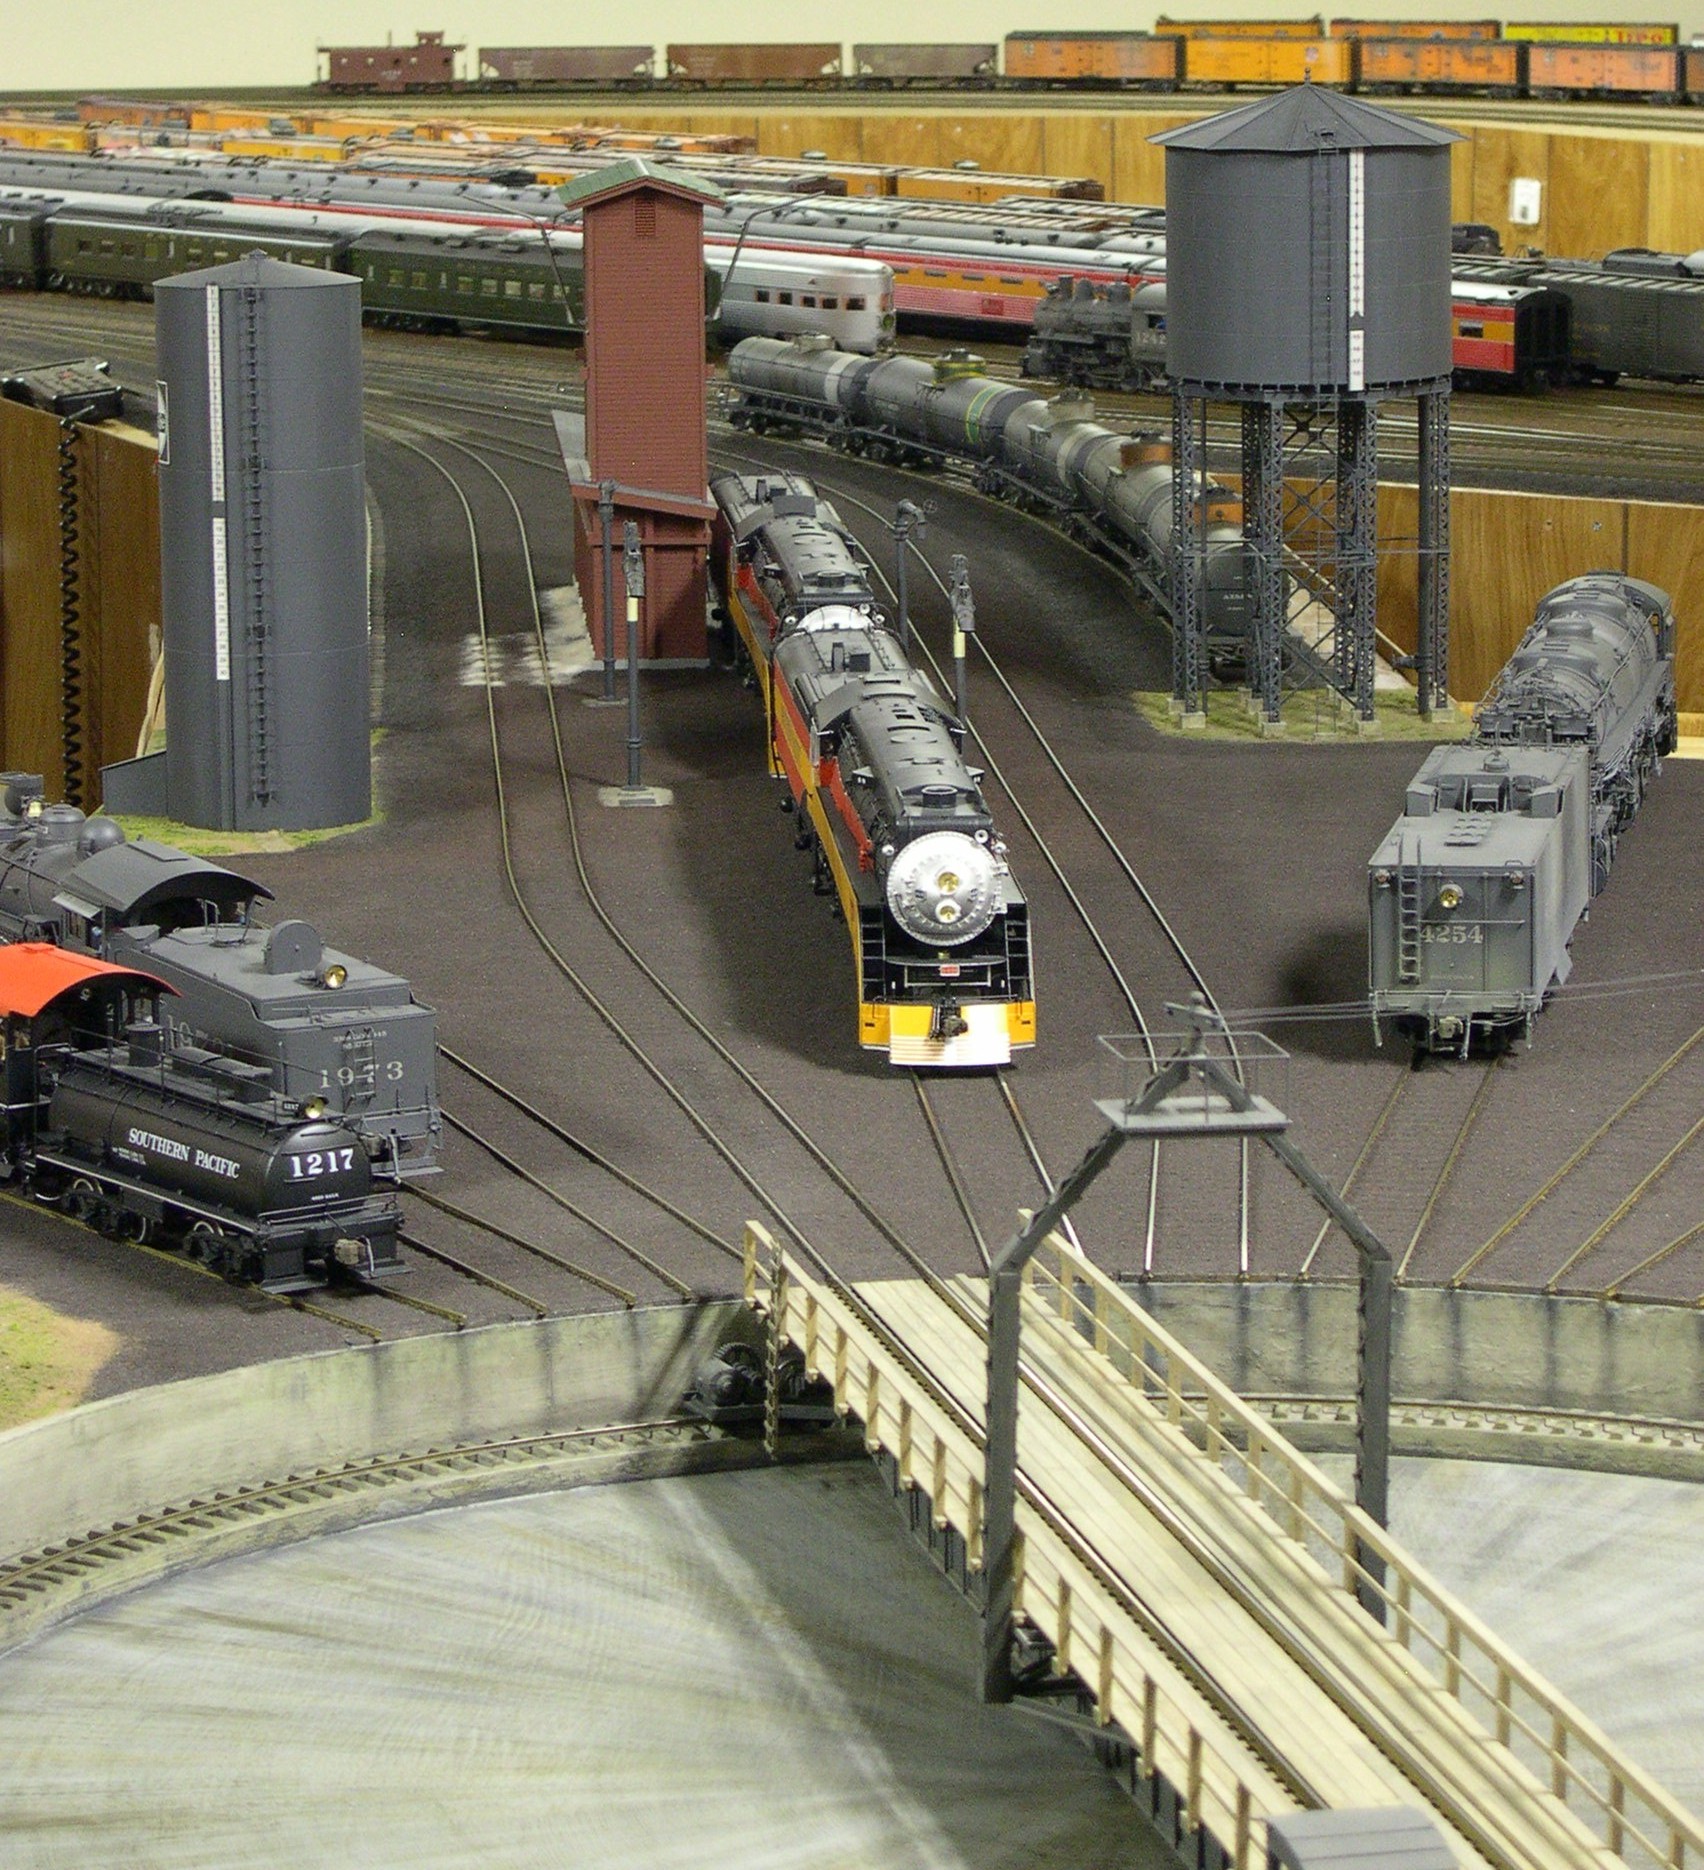 This view of the engine facilities from the north shows the 130’ turntable, which can handle the largest engines of either road. It is by Diamond Scale with extra detailing. On the far left is a Westside SP S-10 0-6-0 painted in SP’s passenger switcher colors including a blue-green boiler and red cab roof. Next is a Sunset ATSF 1951 class 2-8-0. In the middle are two Overland SP GS-4 Daylight engines just in from a run. To the right is a PSC SP AC-11 cabforward.
photo 9 ⤵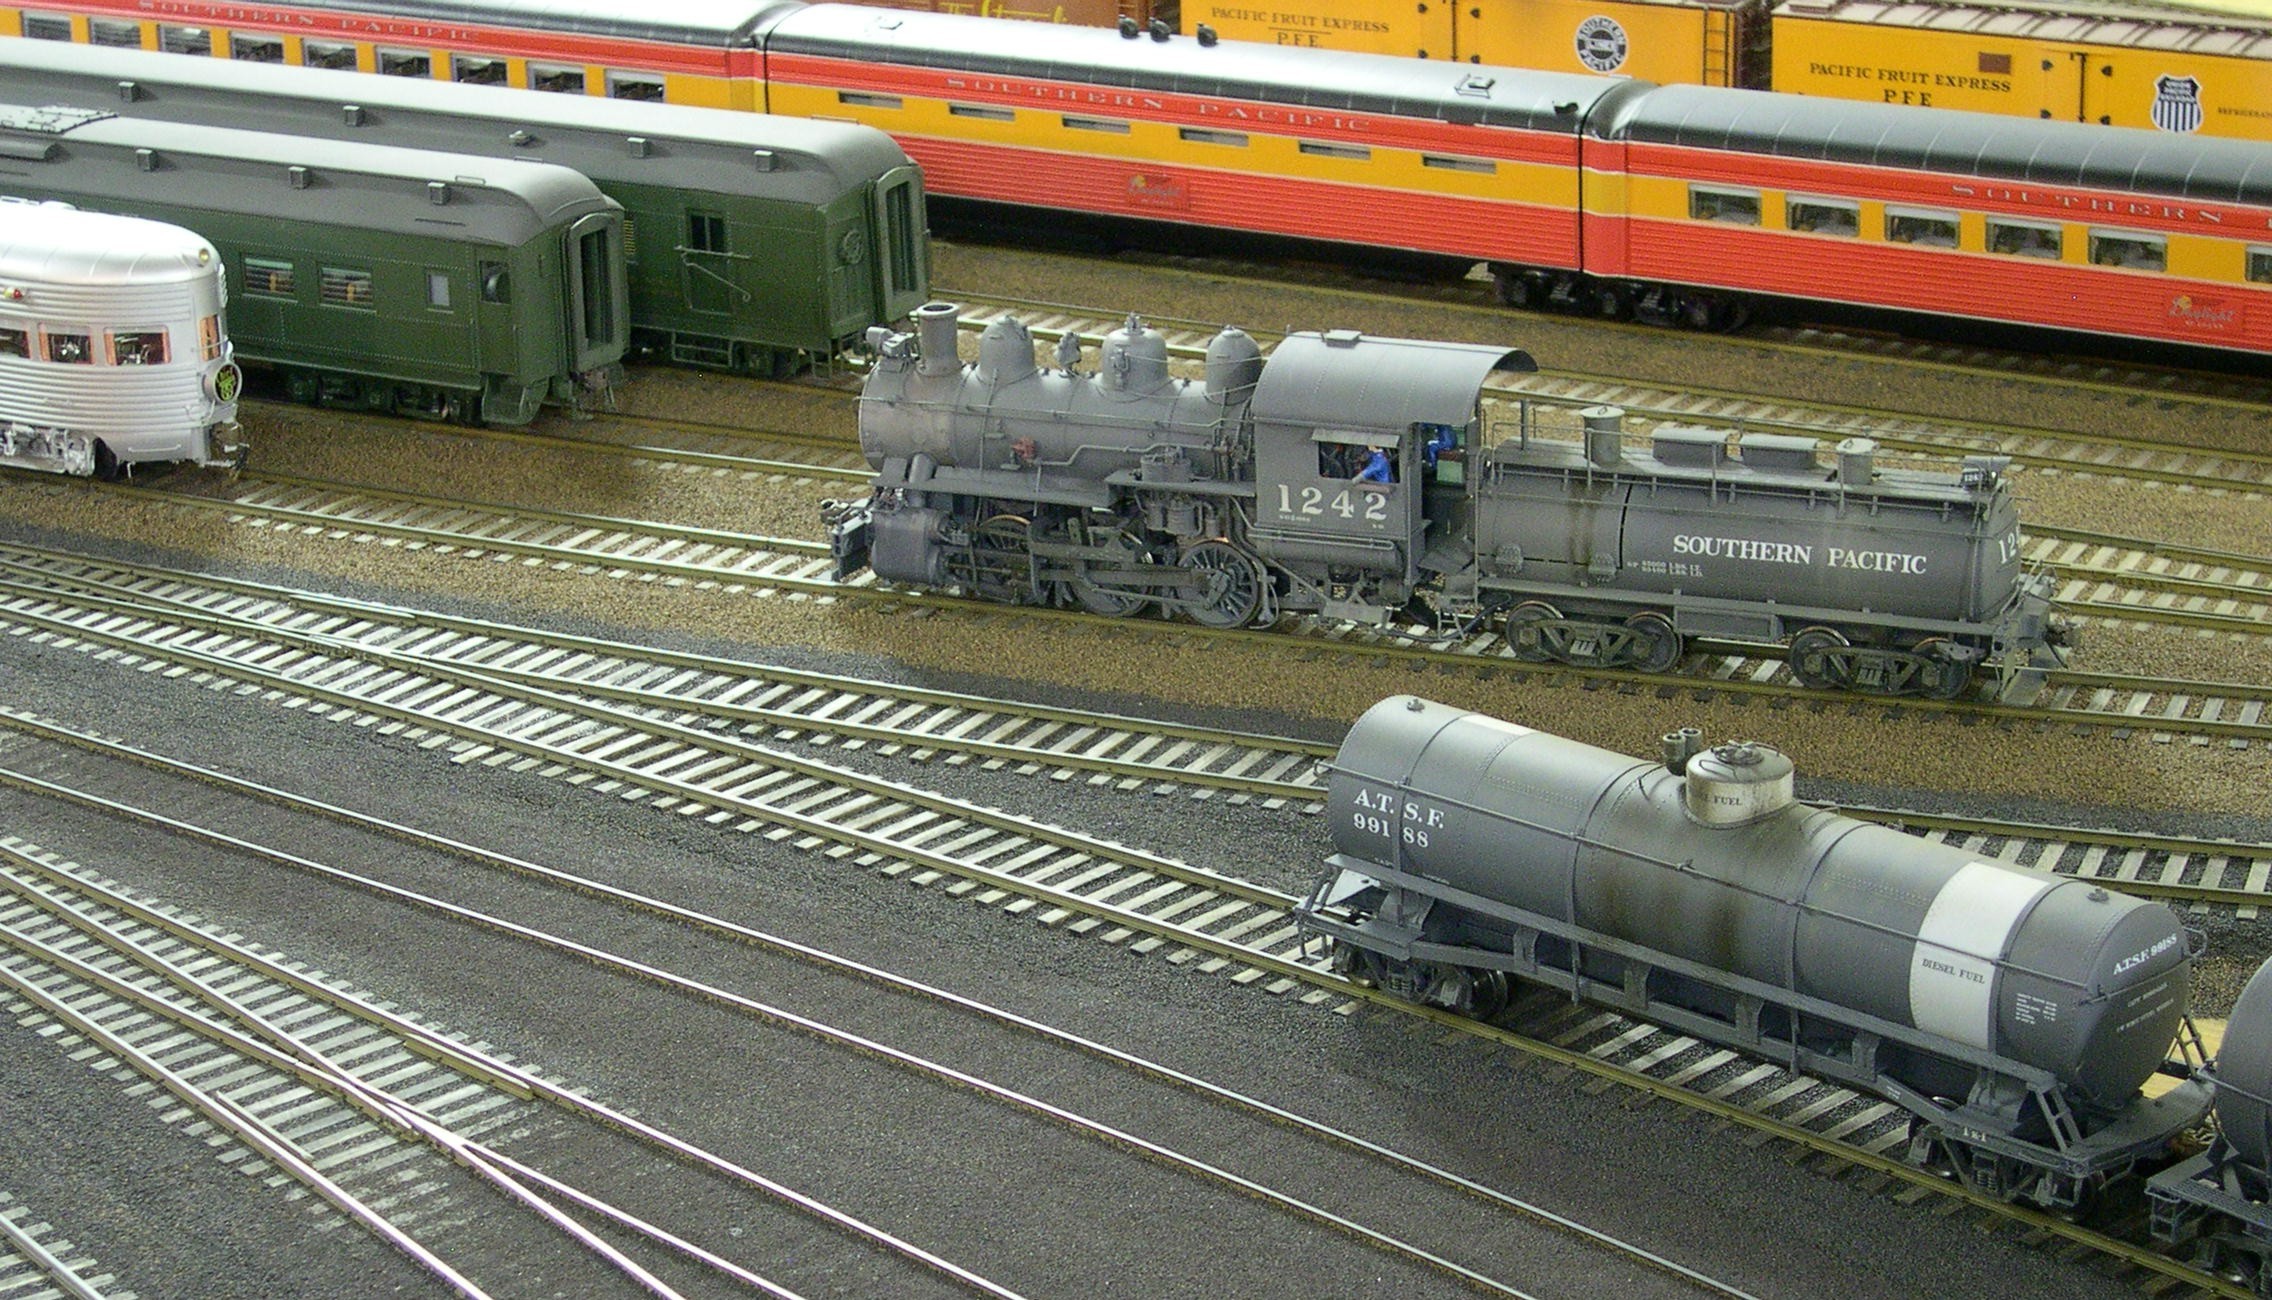 Ordinarily, the fancy painted passenger switcher would be doing the switching in the passenger yards, but today a regular S-10 is on duty. It is also a Westside model. The Daylight’s articulated triple unit diner is in the background.
photo 10 ⤵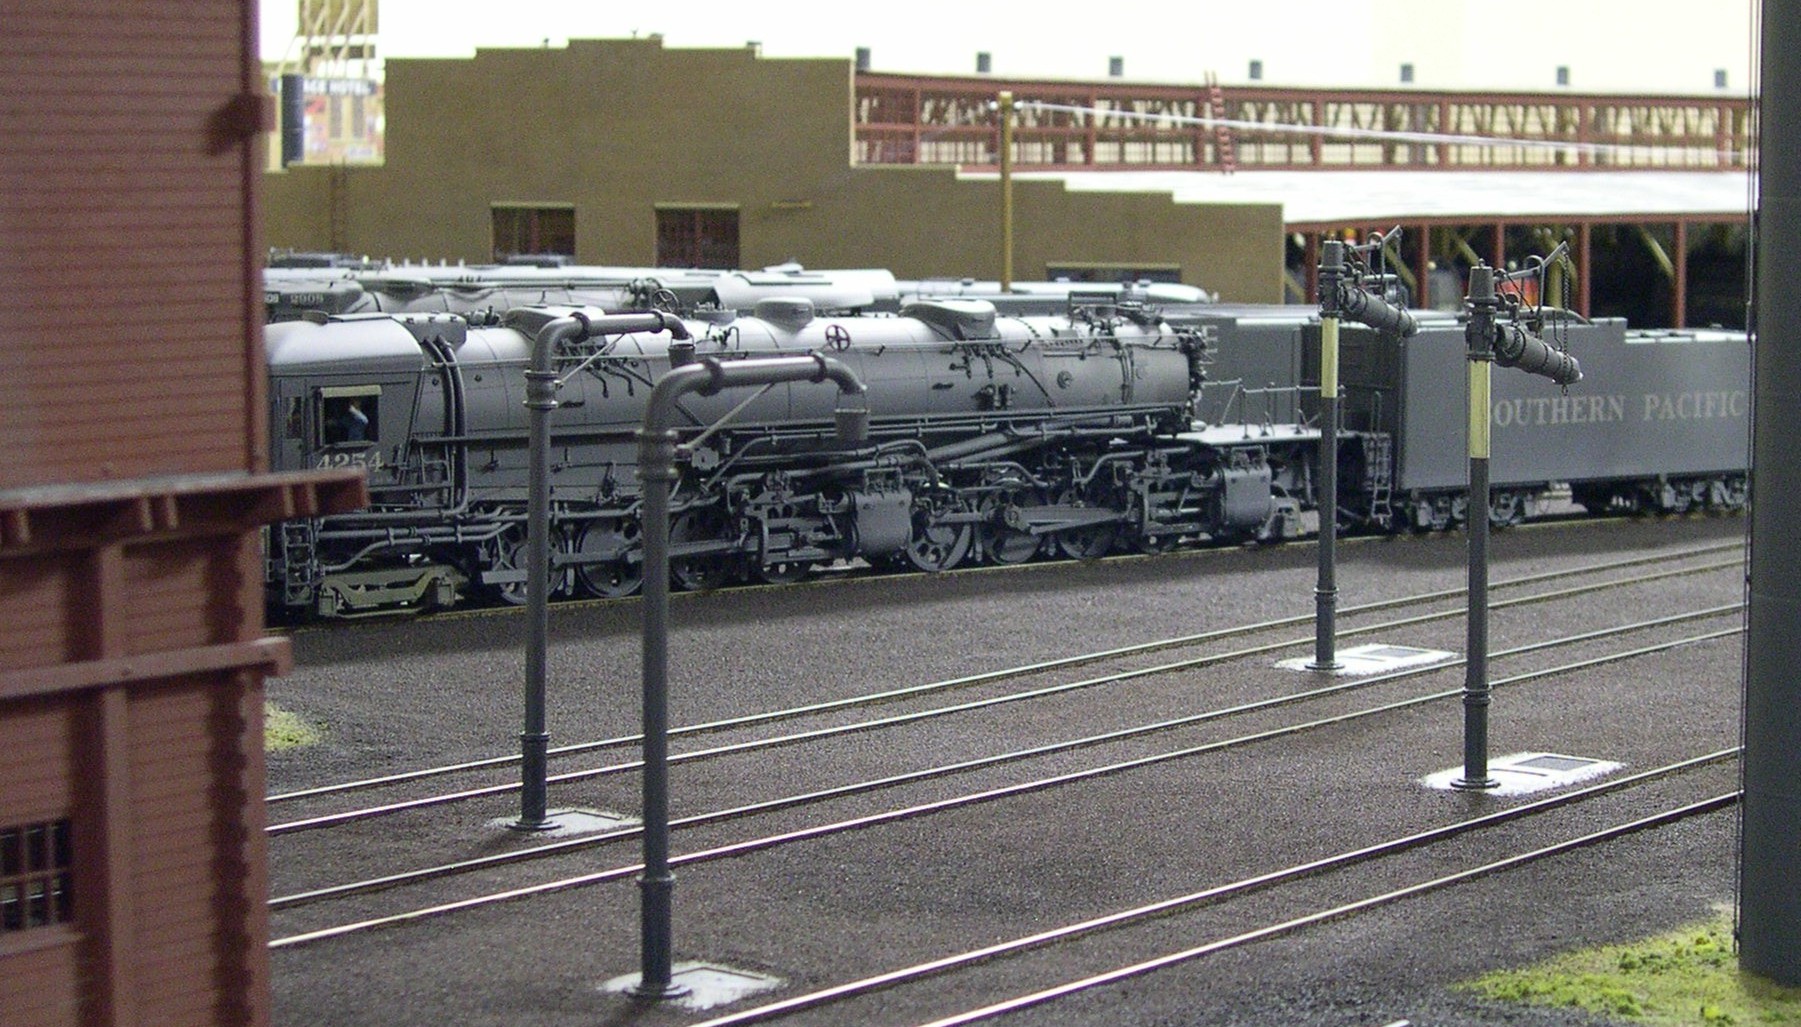 Looking across the engine leads and past the sandhouse, we spot a huge SP AC-11 taking a nap on an outside whisker track. It is by PSC. The oil and water columns are also by PSC.
photo 11 ⤵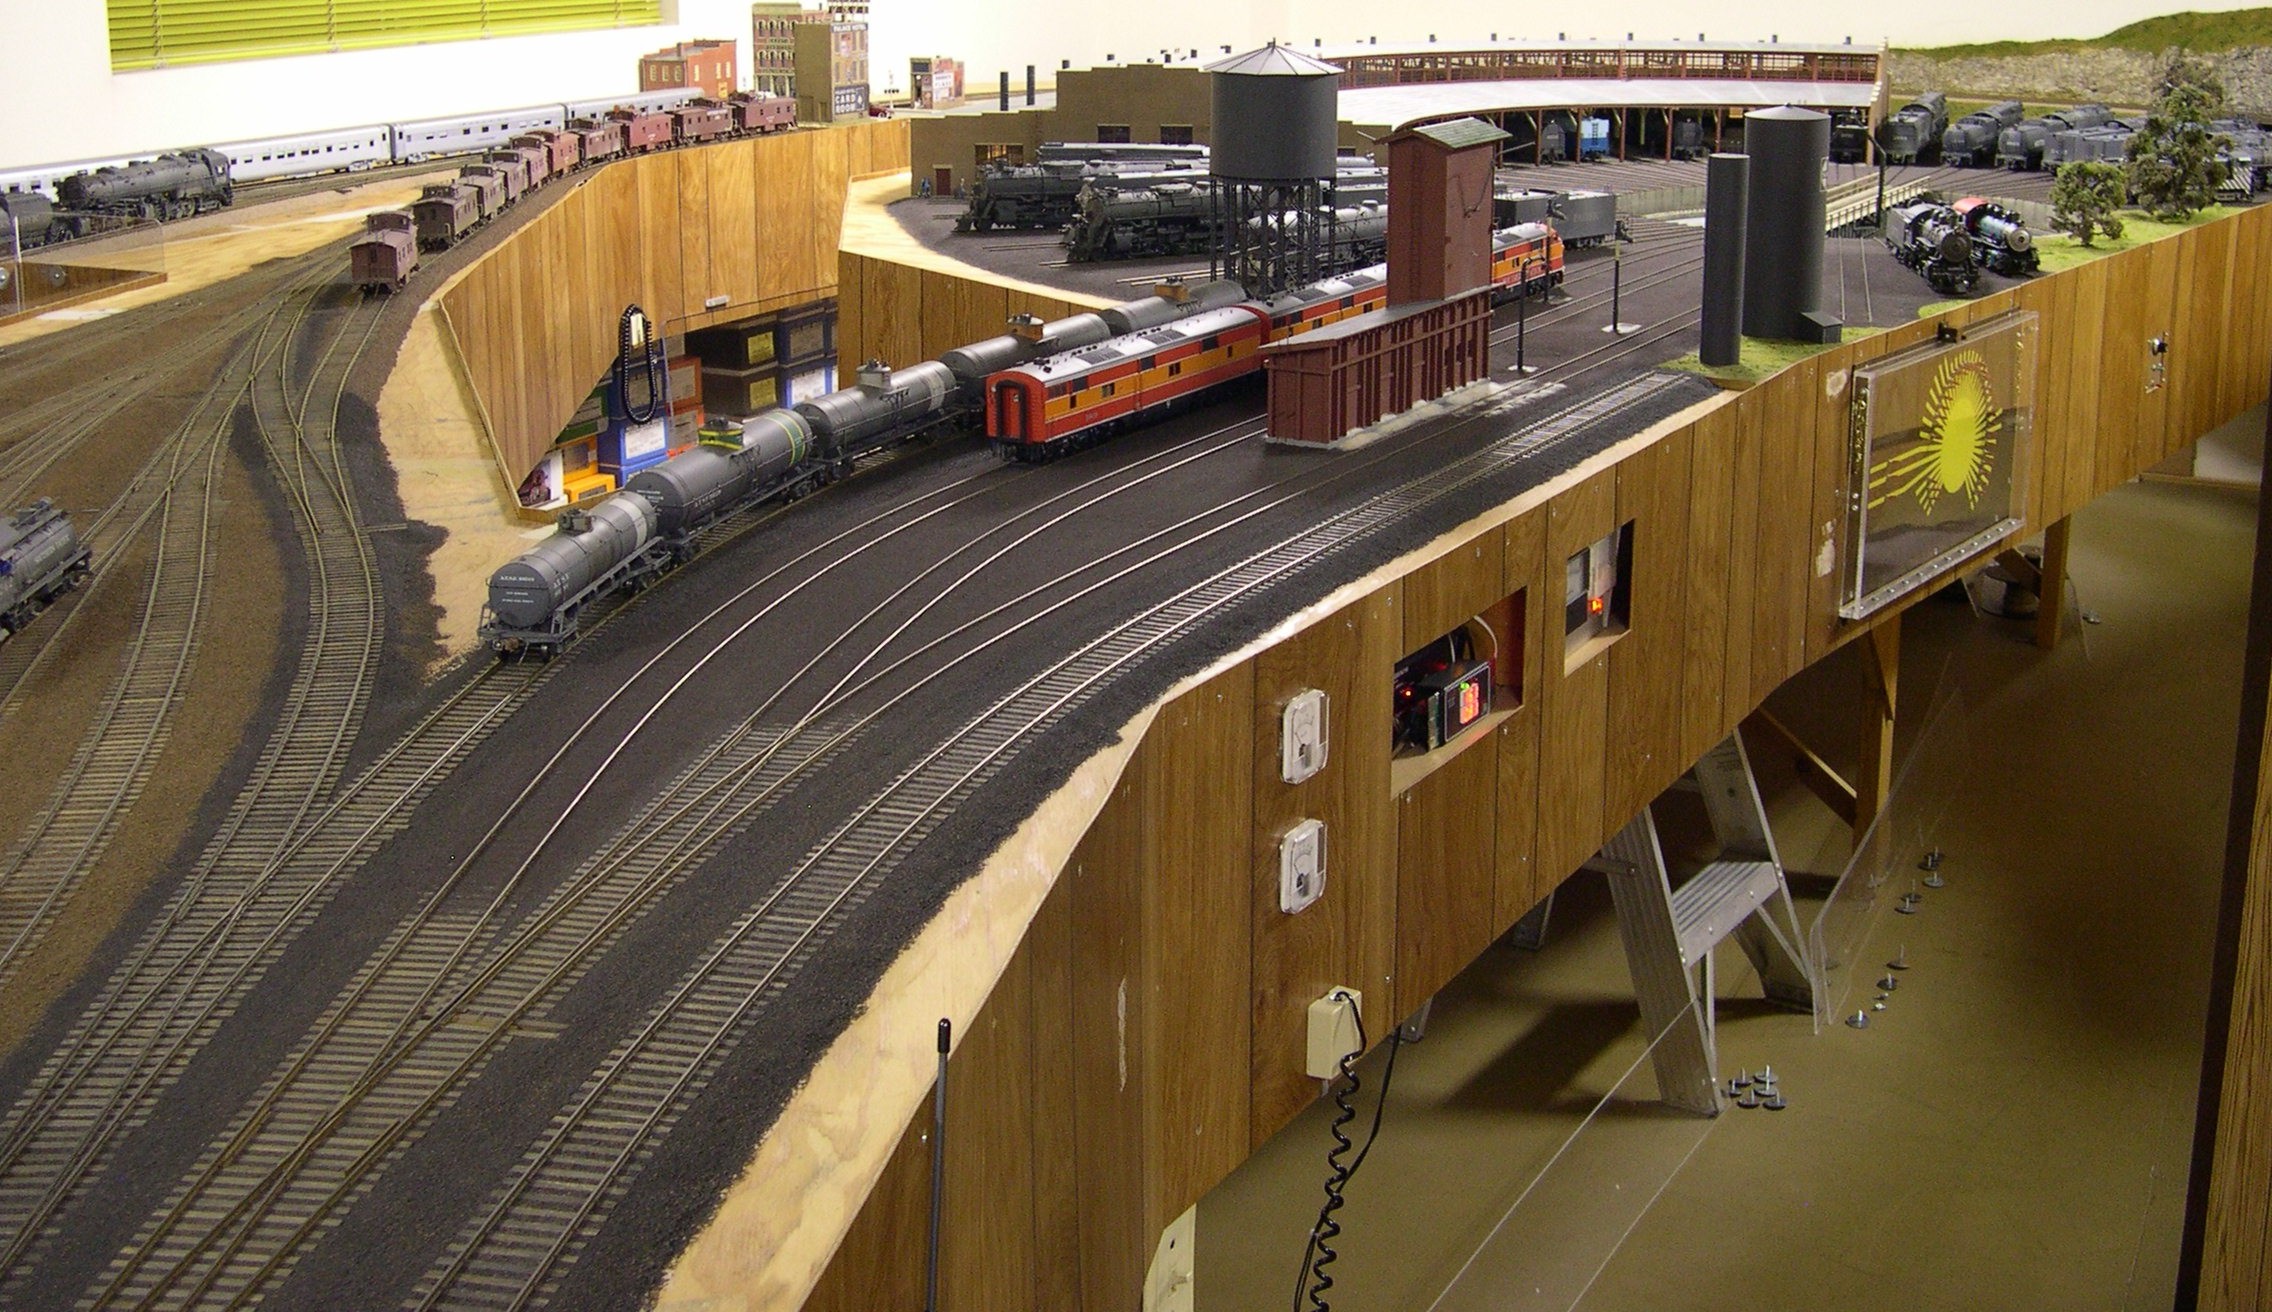 Here we have an overall view of the engine facilities from the south. The yard throat is to the left. The Daylight E7 ABB set is by Key. The sand house and roundhouse are both entirely scratch built. The vertical oil and water tanks are by PRB, and the Harriman water tank is by PSC.
photo 12 ⤵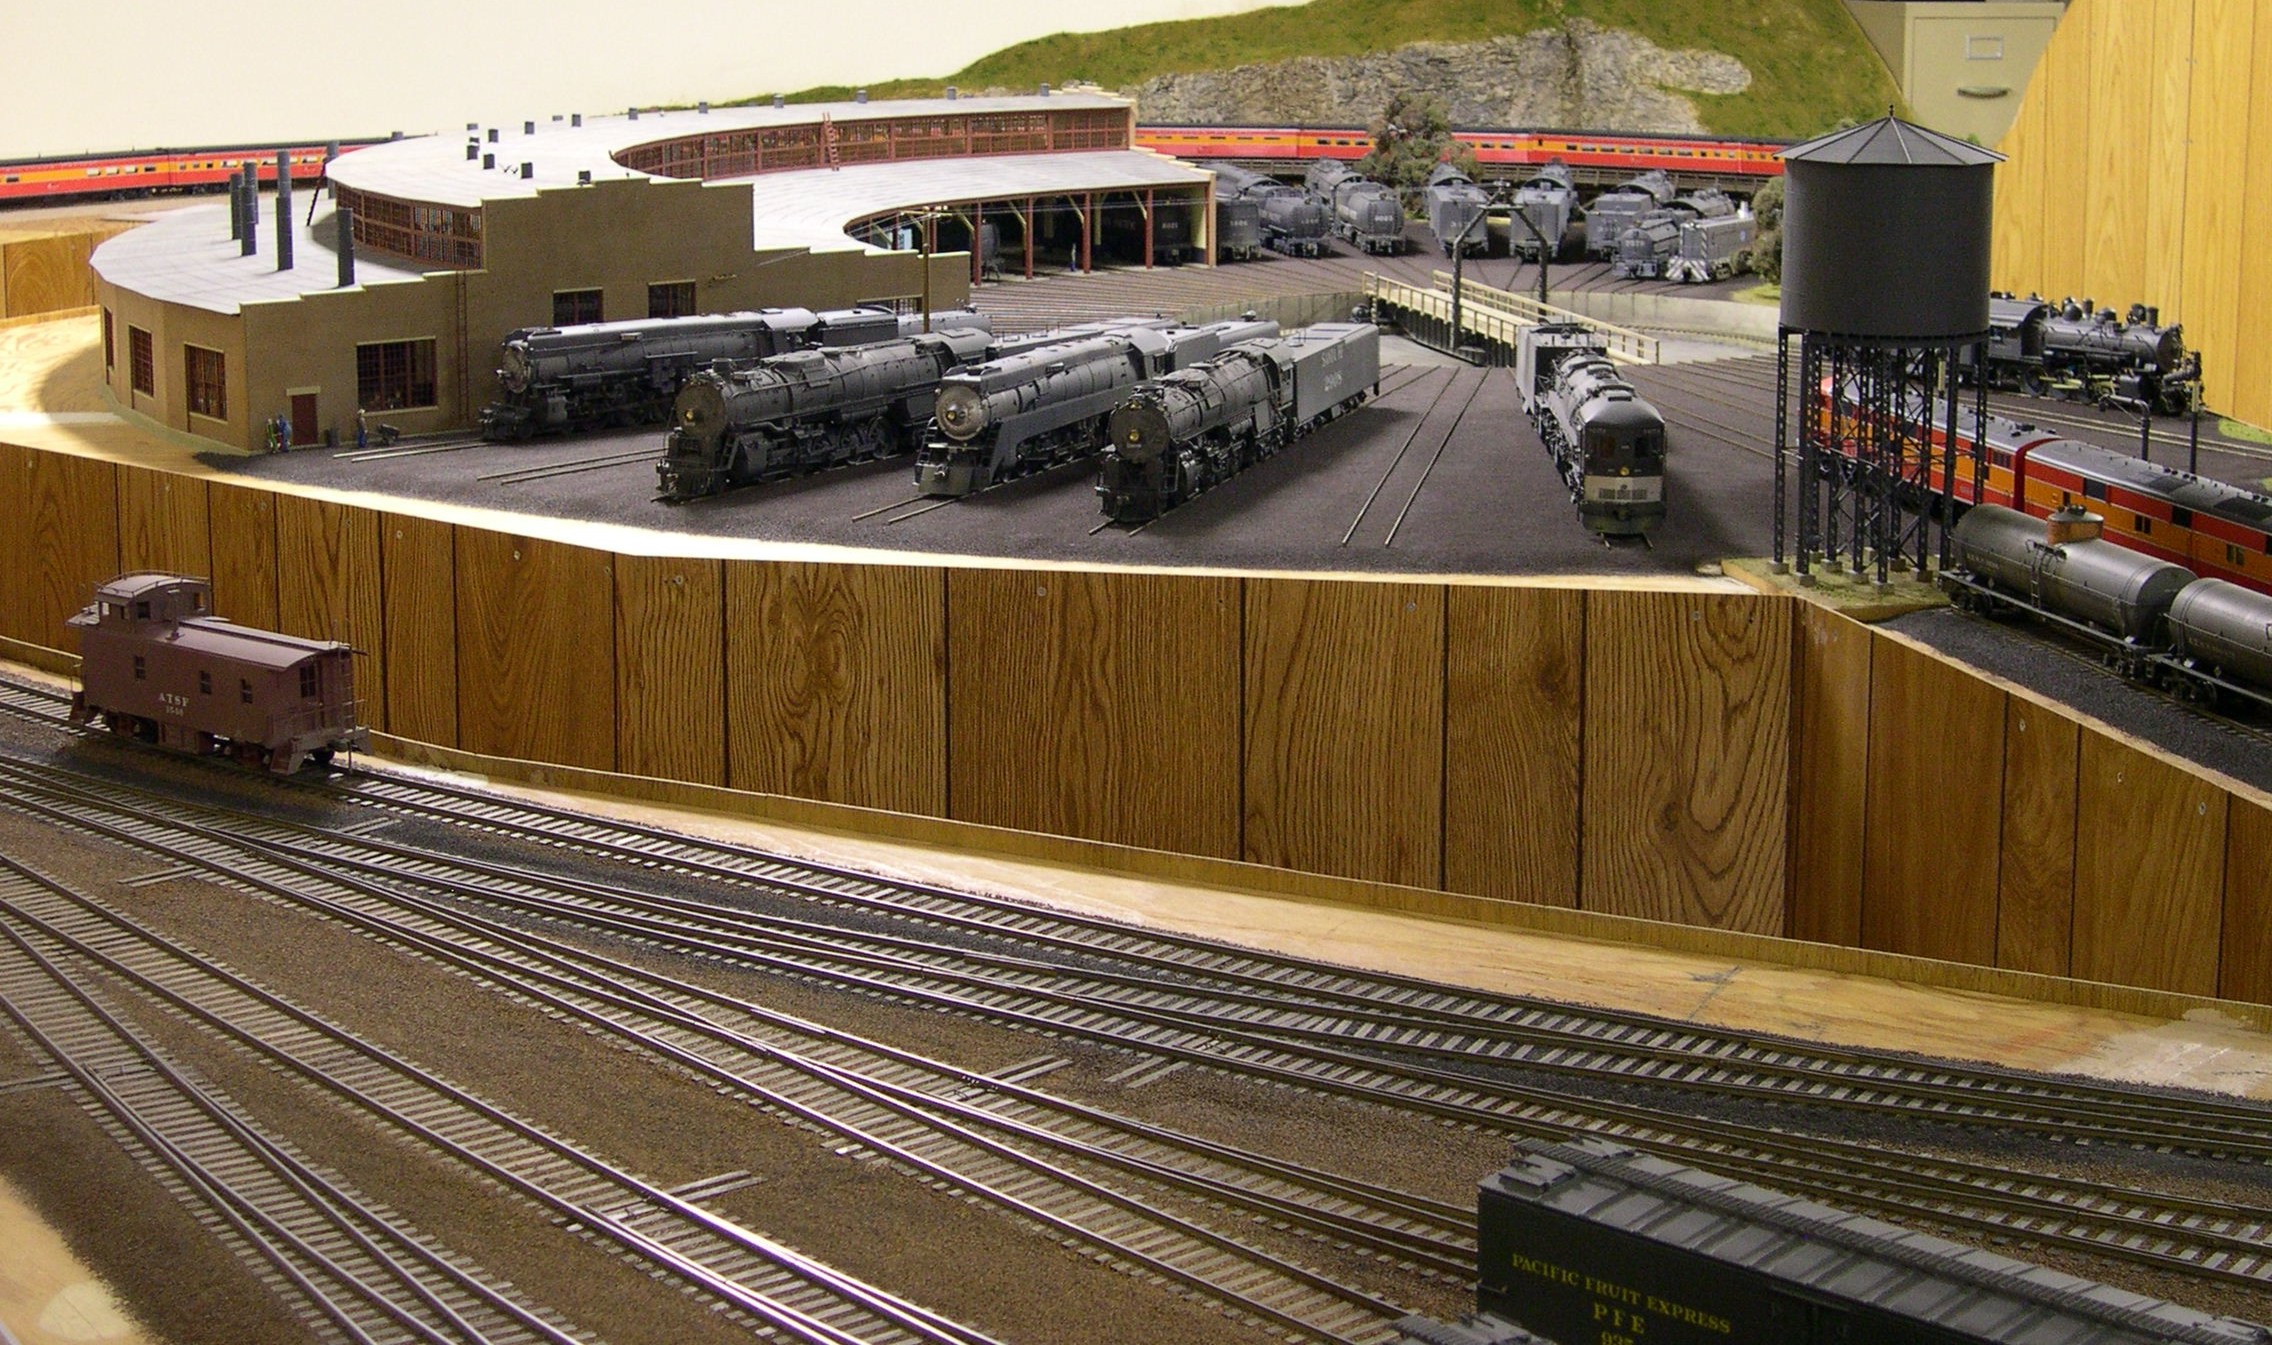 Overall view of the roundhouse area viewed from the southwest across the yard leads. Next to the roundhouse is a PSC SP Mt-3 class 4-8-2. Then we have a USH ATSF 5011 class 2-10-4, an Overland SP GS-3 class 4-8-4, and a USH ATSF 2900 class 4-8-4. The Daylight painted E7’s on the engine lead are taking on sand, water, and diesel fuel in preparation for a run on 99, the Coast Daylight. The diesel fuel comes from those tank cars next to the water tank.
photo 13 ⤵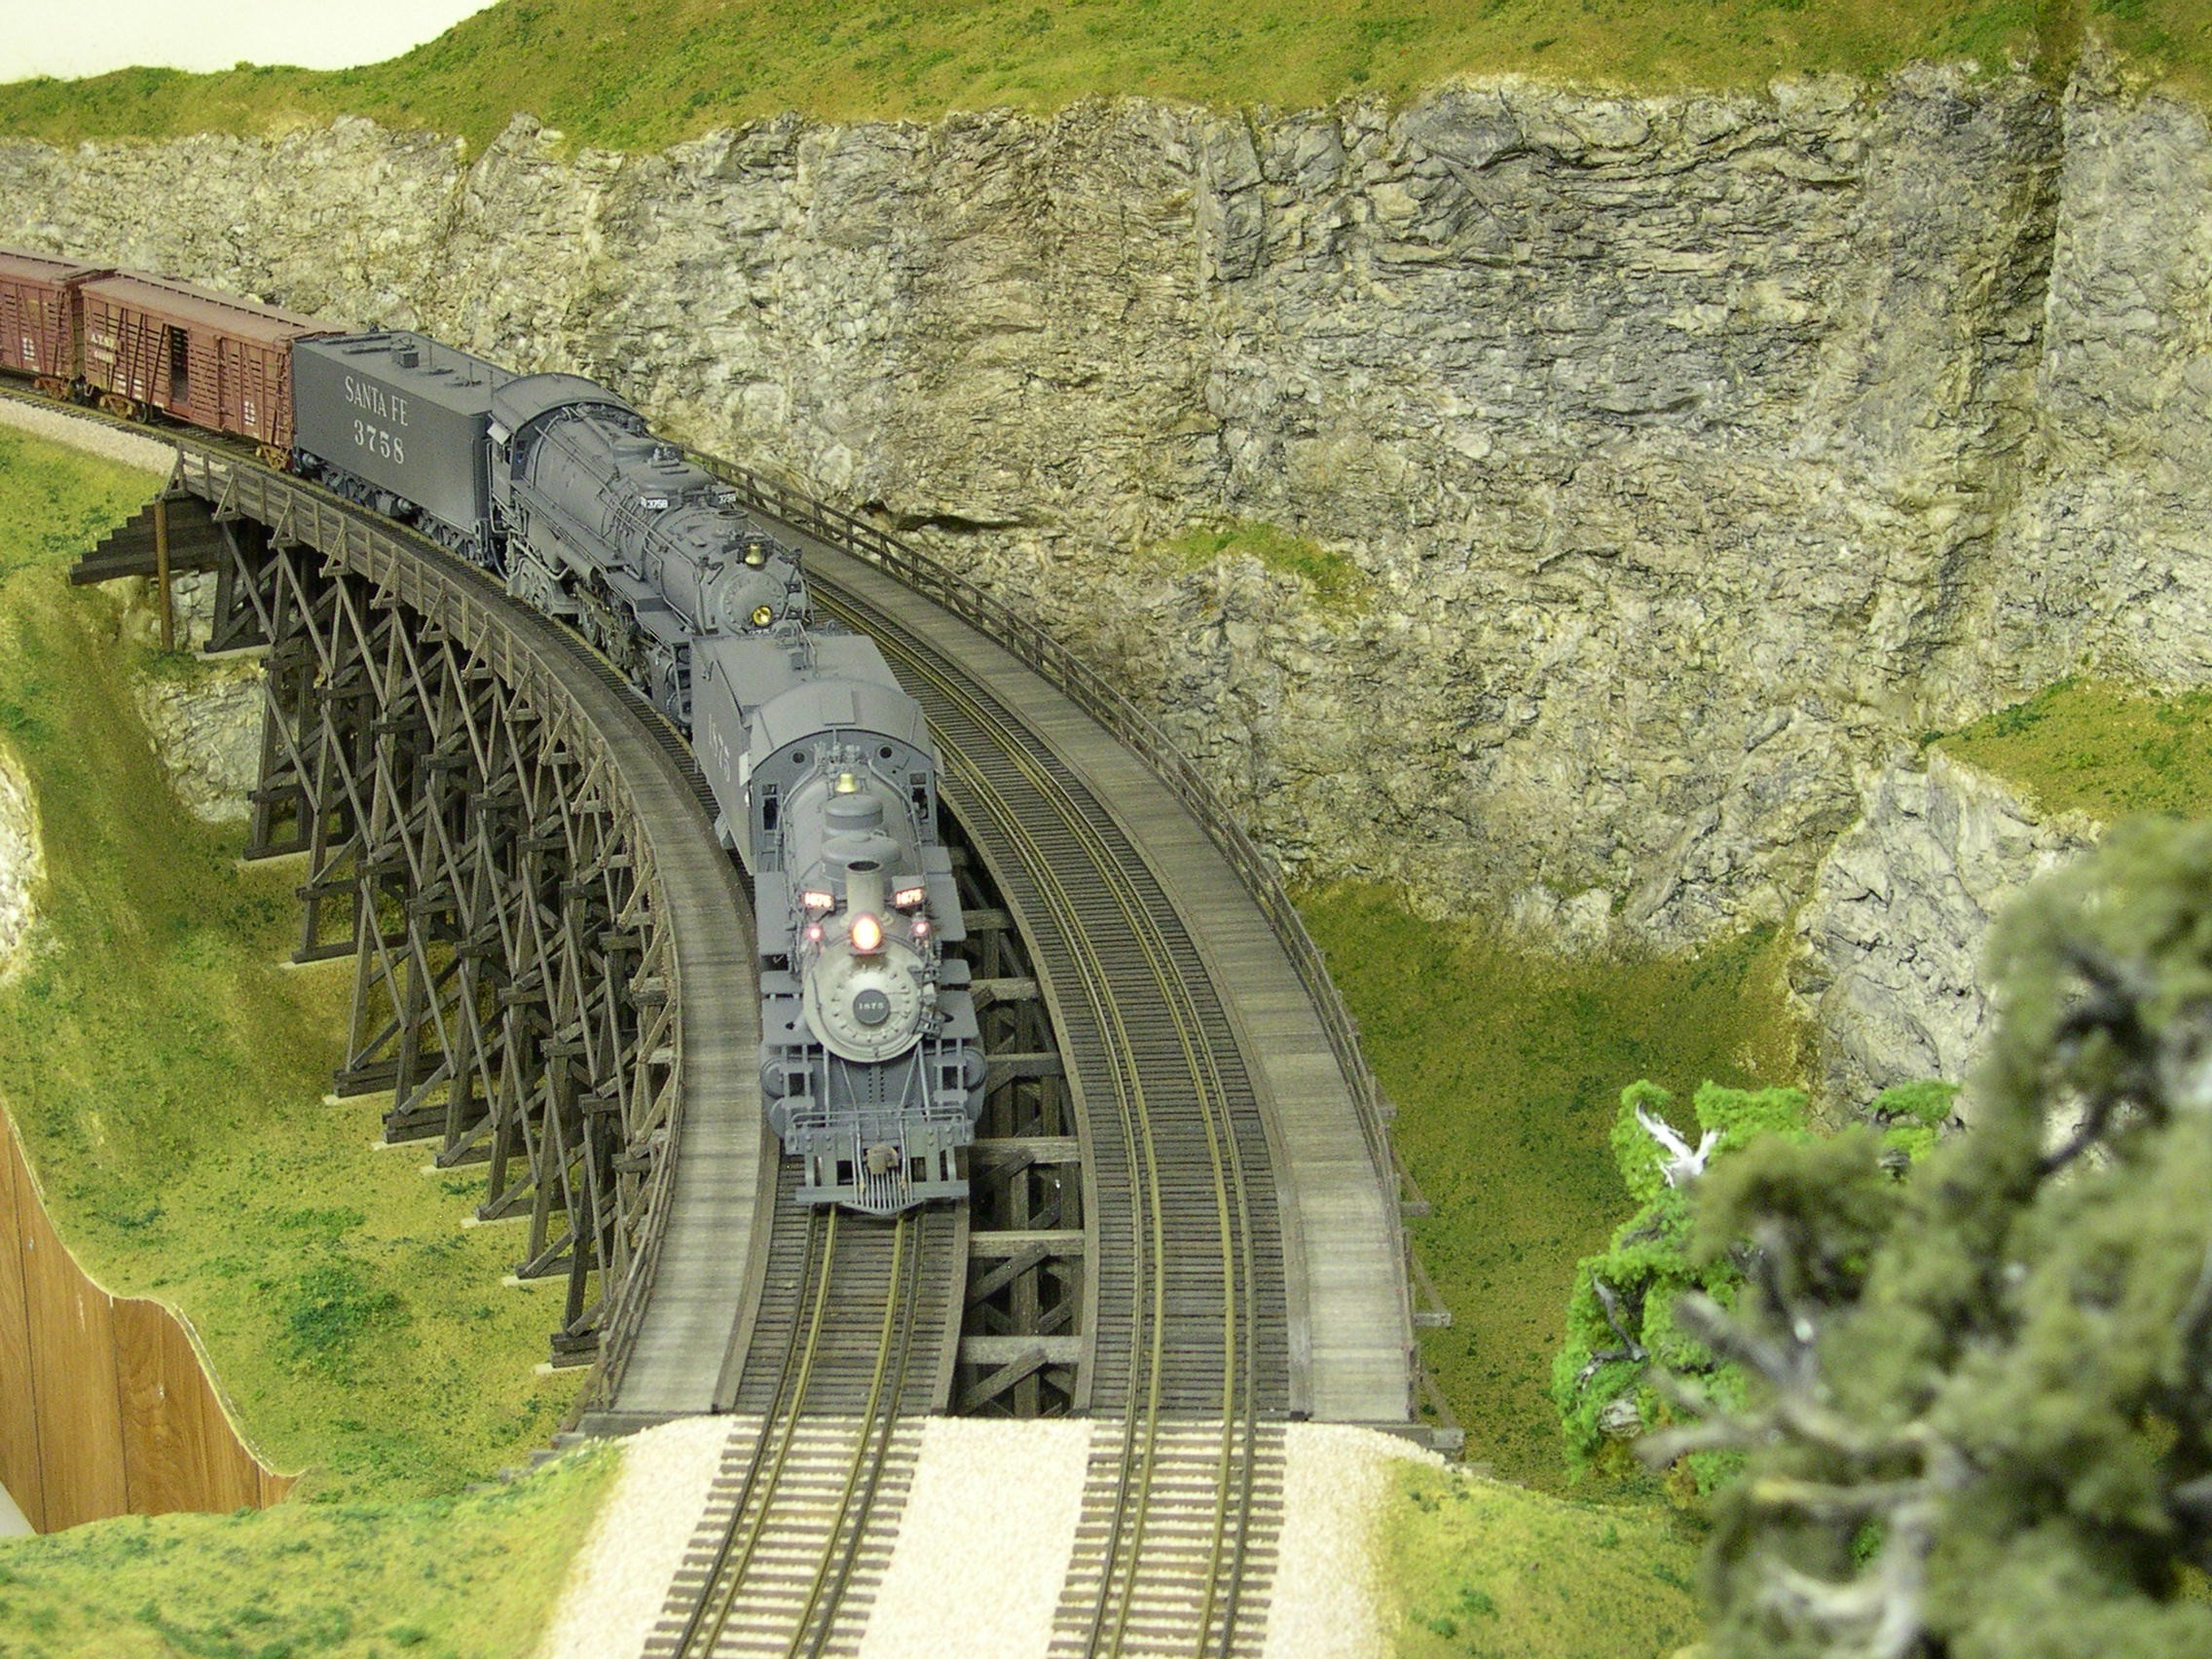 Hidden behind the mountain with the tunnel is a spectacular double track curved timber trestle built to correct heavy loading standards to carry double headed articulateds. It is 228 scale feet long and 56 scale feet high. Here we see a Santa Fe 2-6-2 Prairie type leading a big 3751 class Northern on a freight train. The Prairie is a Pecos River Brass 1800 class, and the 4-8-4 is by Sunset.
photo 14 ⤵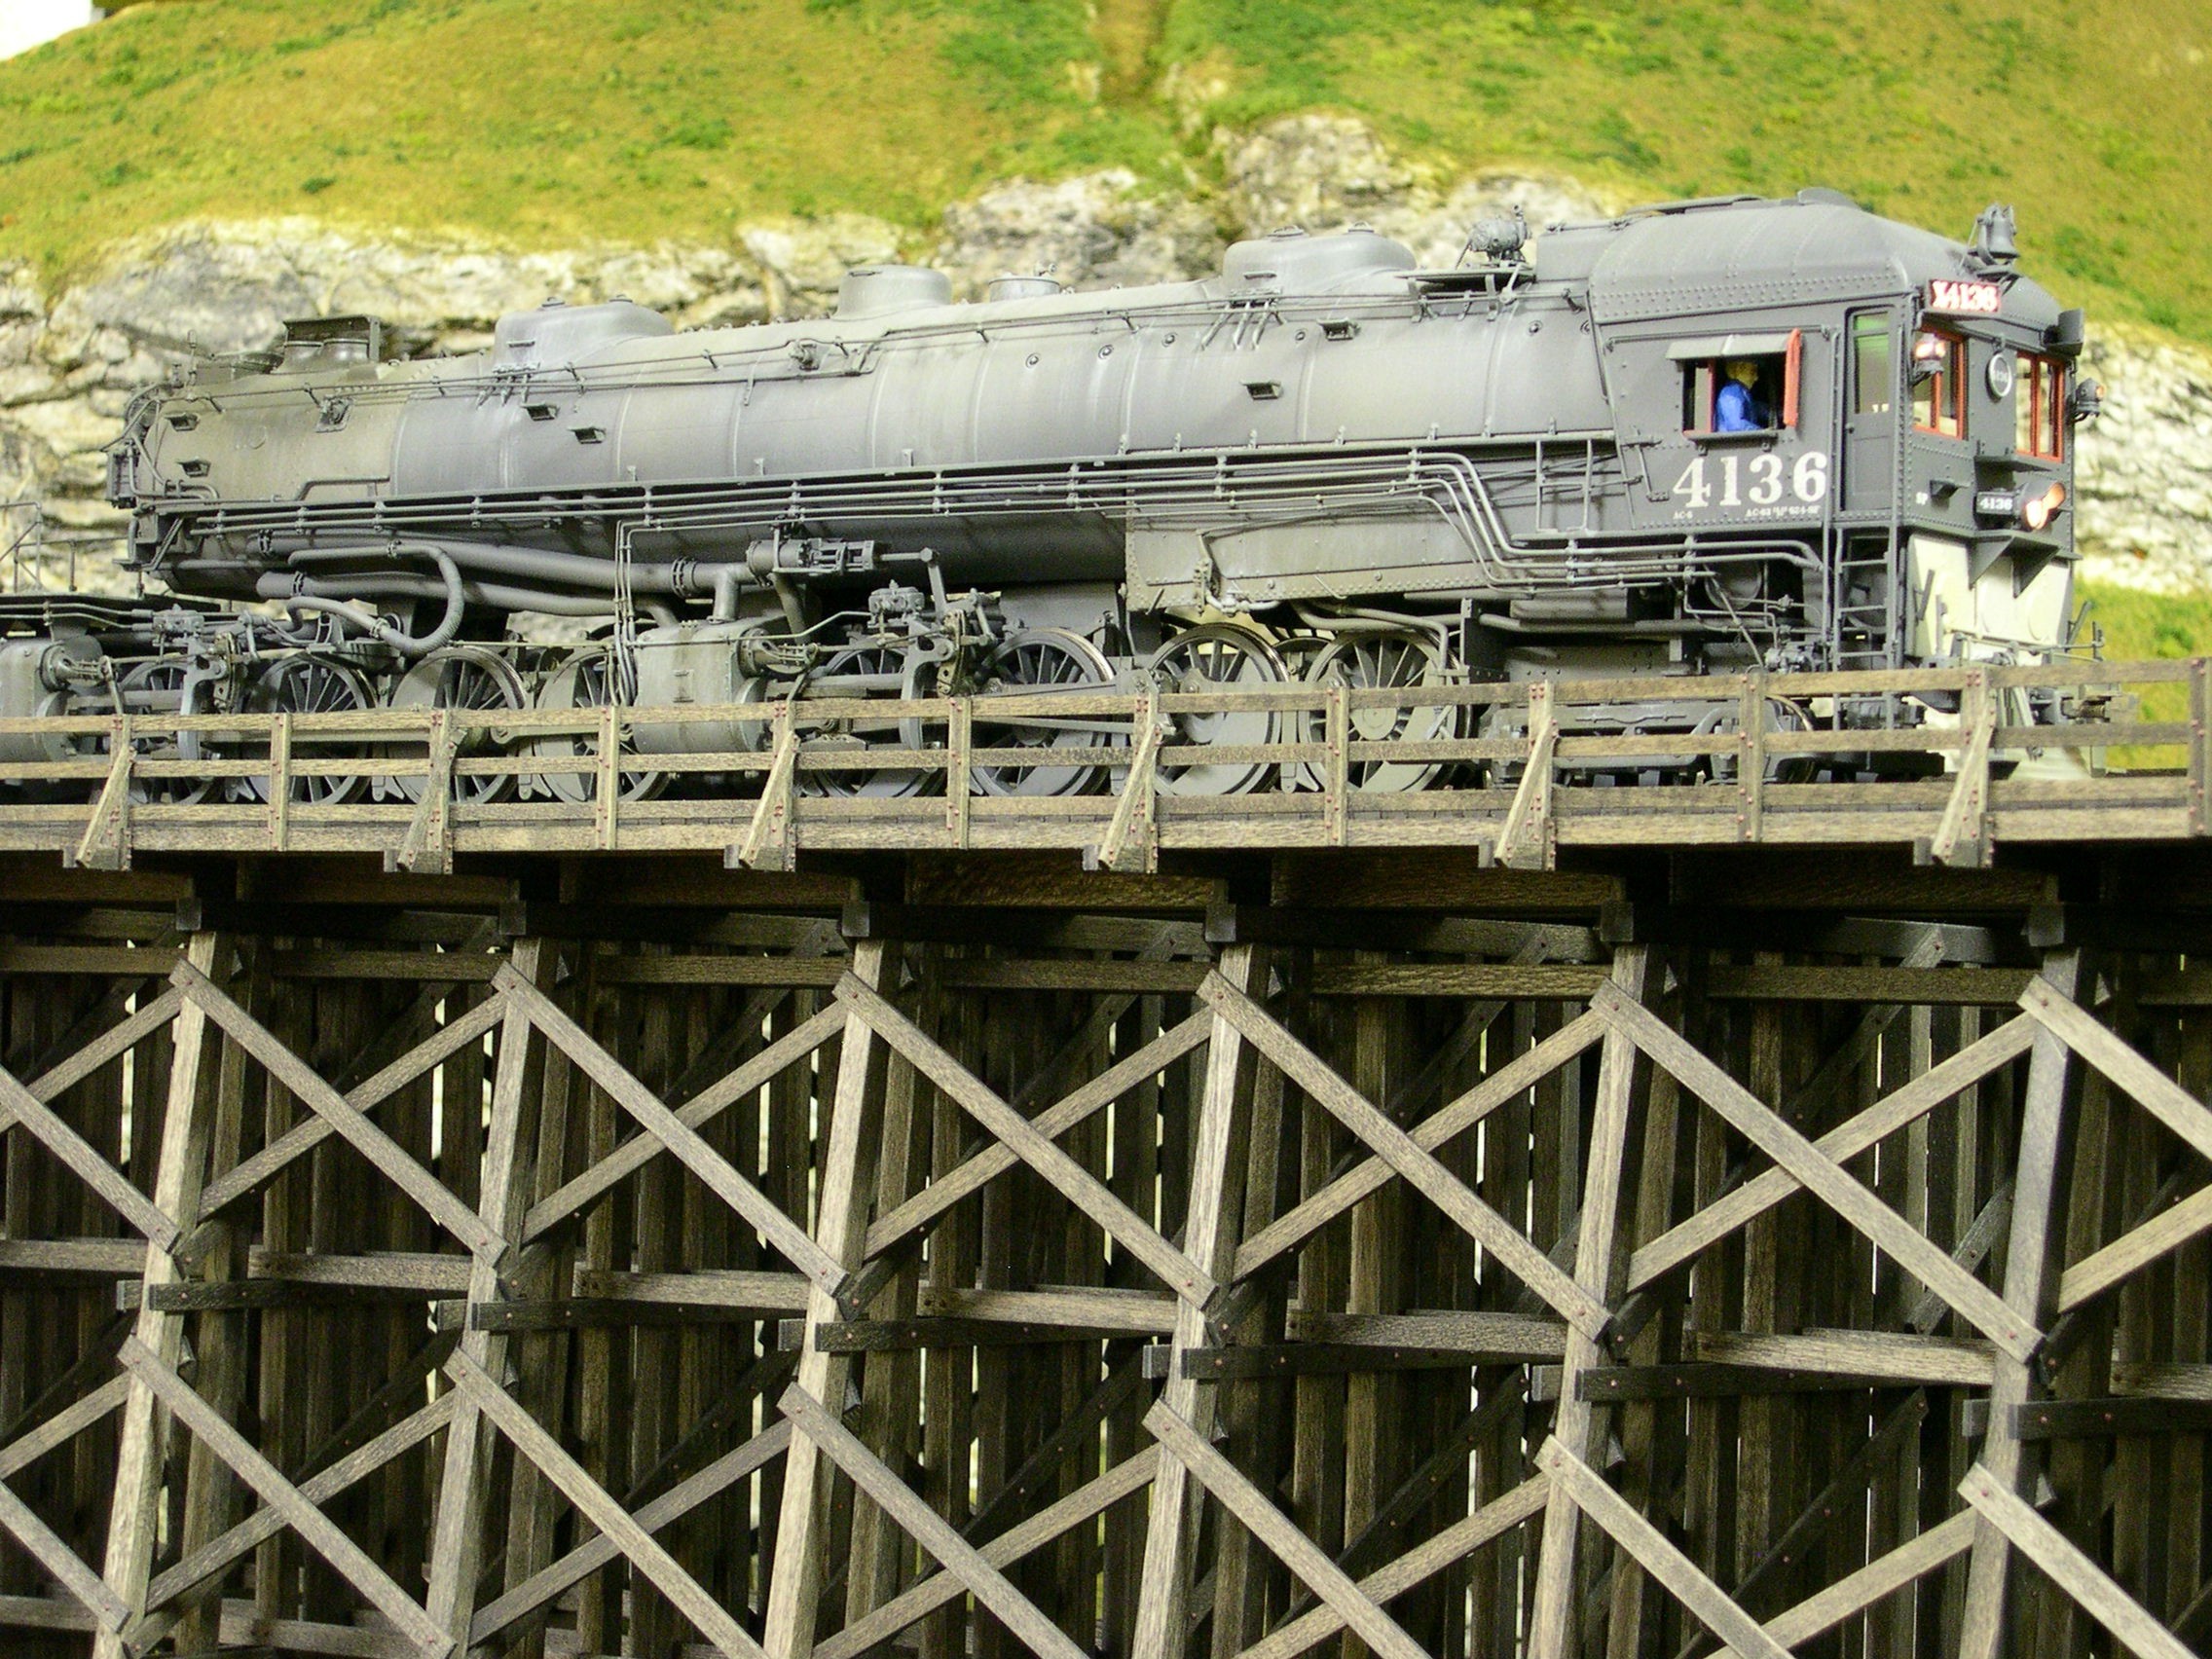 A closer view of the trestle is provided by this shot of a Southern Pacific AC-6 cab forward. It is by PSC. There are just short of 6,000 Grandt Line nut-bolt-washer castings in the trestle.
photo 15 ⤵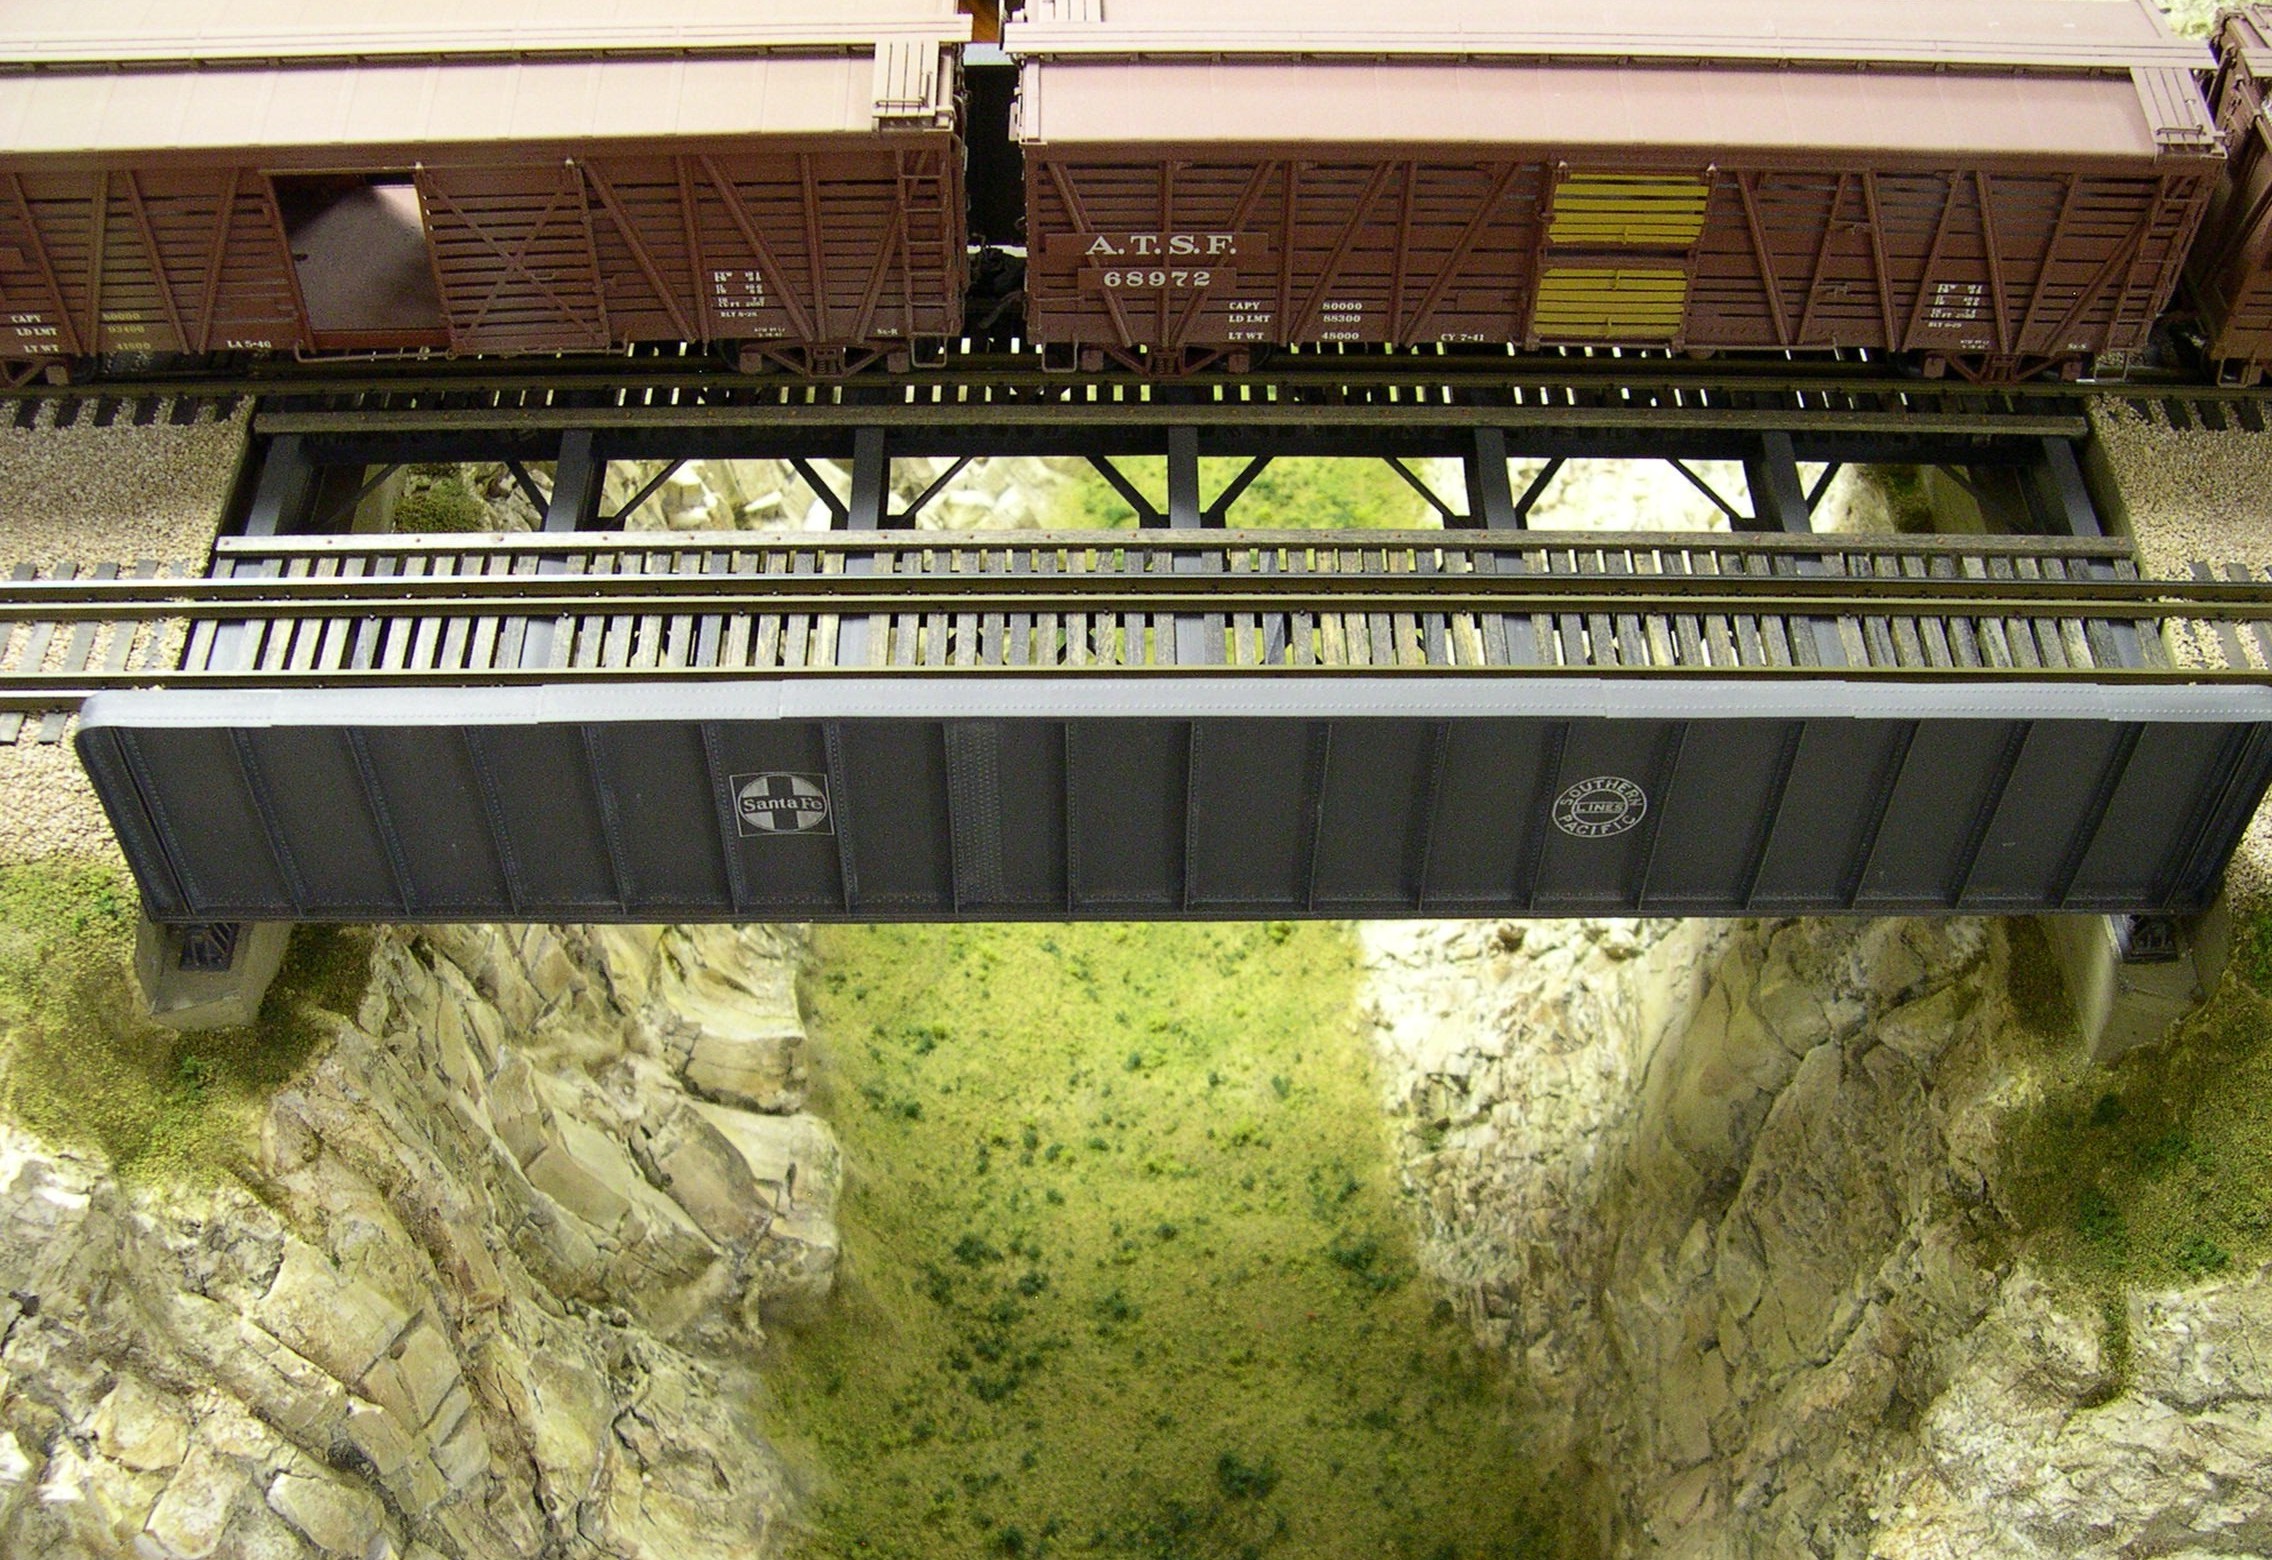 This open deck, through plate girder bridge is built entirely of scale size styrene. Girder webs are 0.010” thick, while all stiffeners are 0.015” thick. None of the styrene is thicker than 0.015”. The only metal in the bridge is the rails. However, built exactly like the real thing, it also acts just like the real thing and can hold my two heaviest engines with ease.
photo 16 ⤵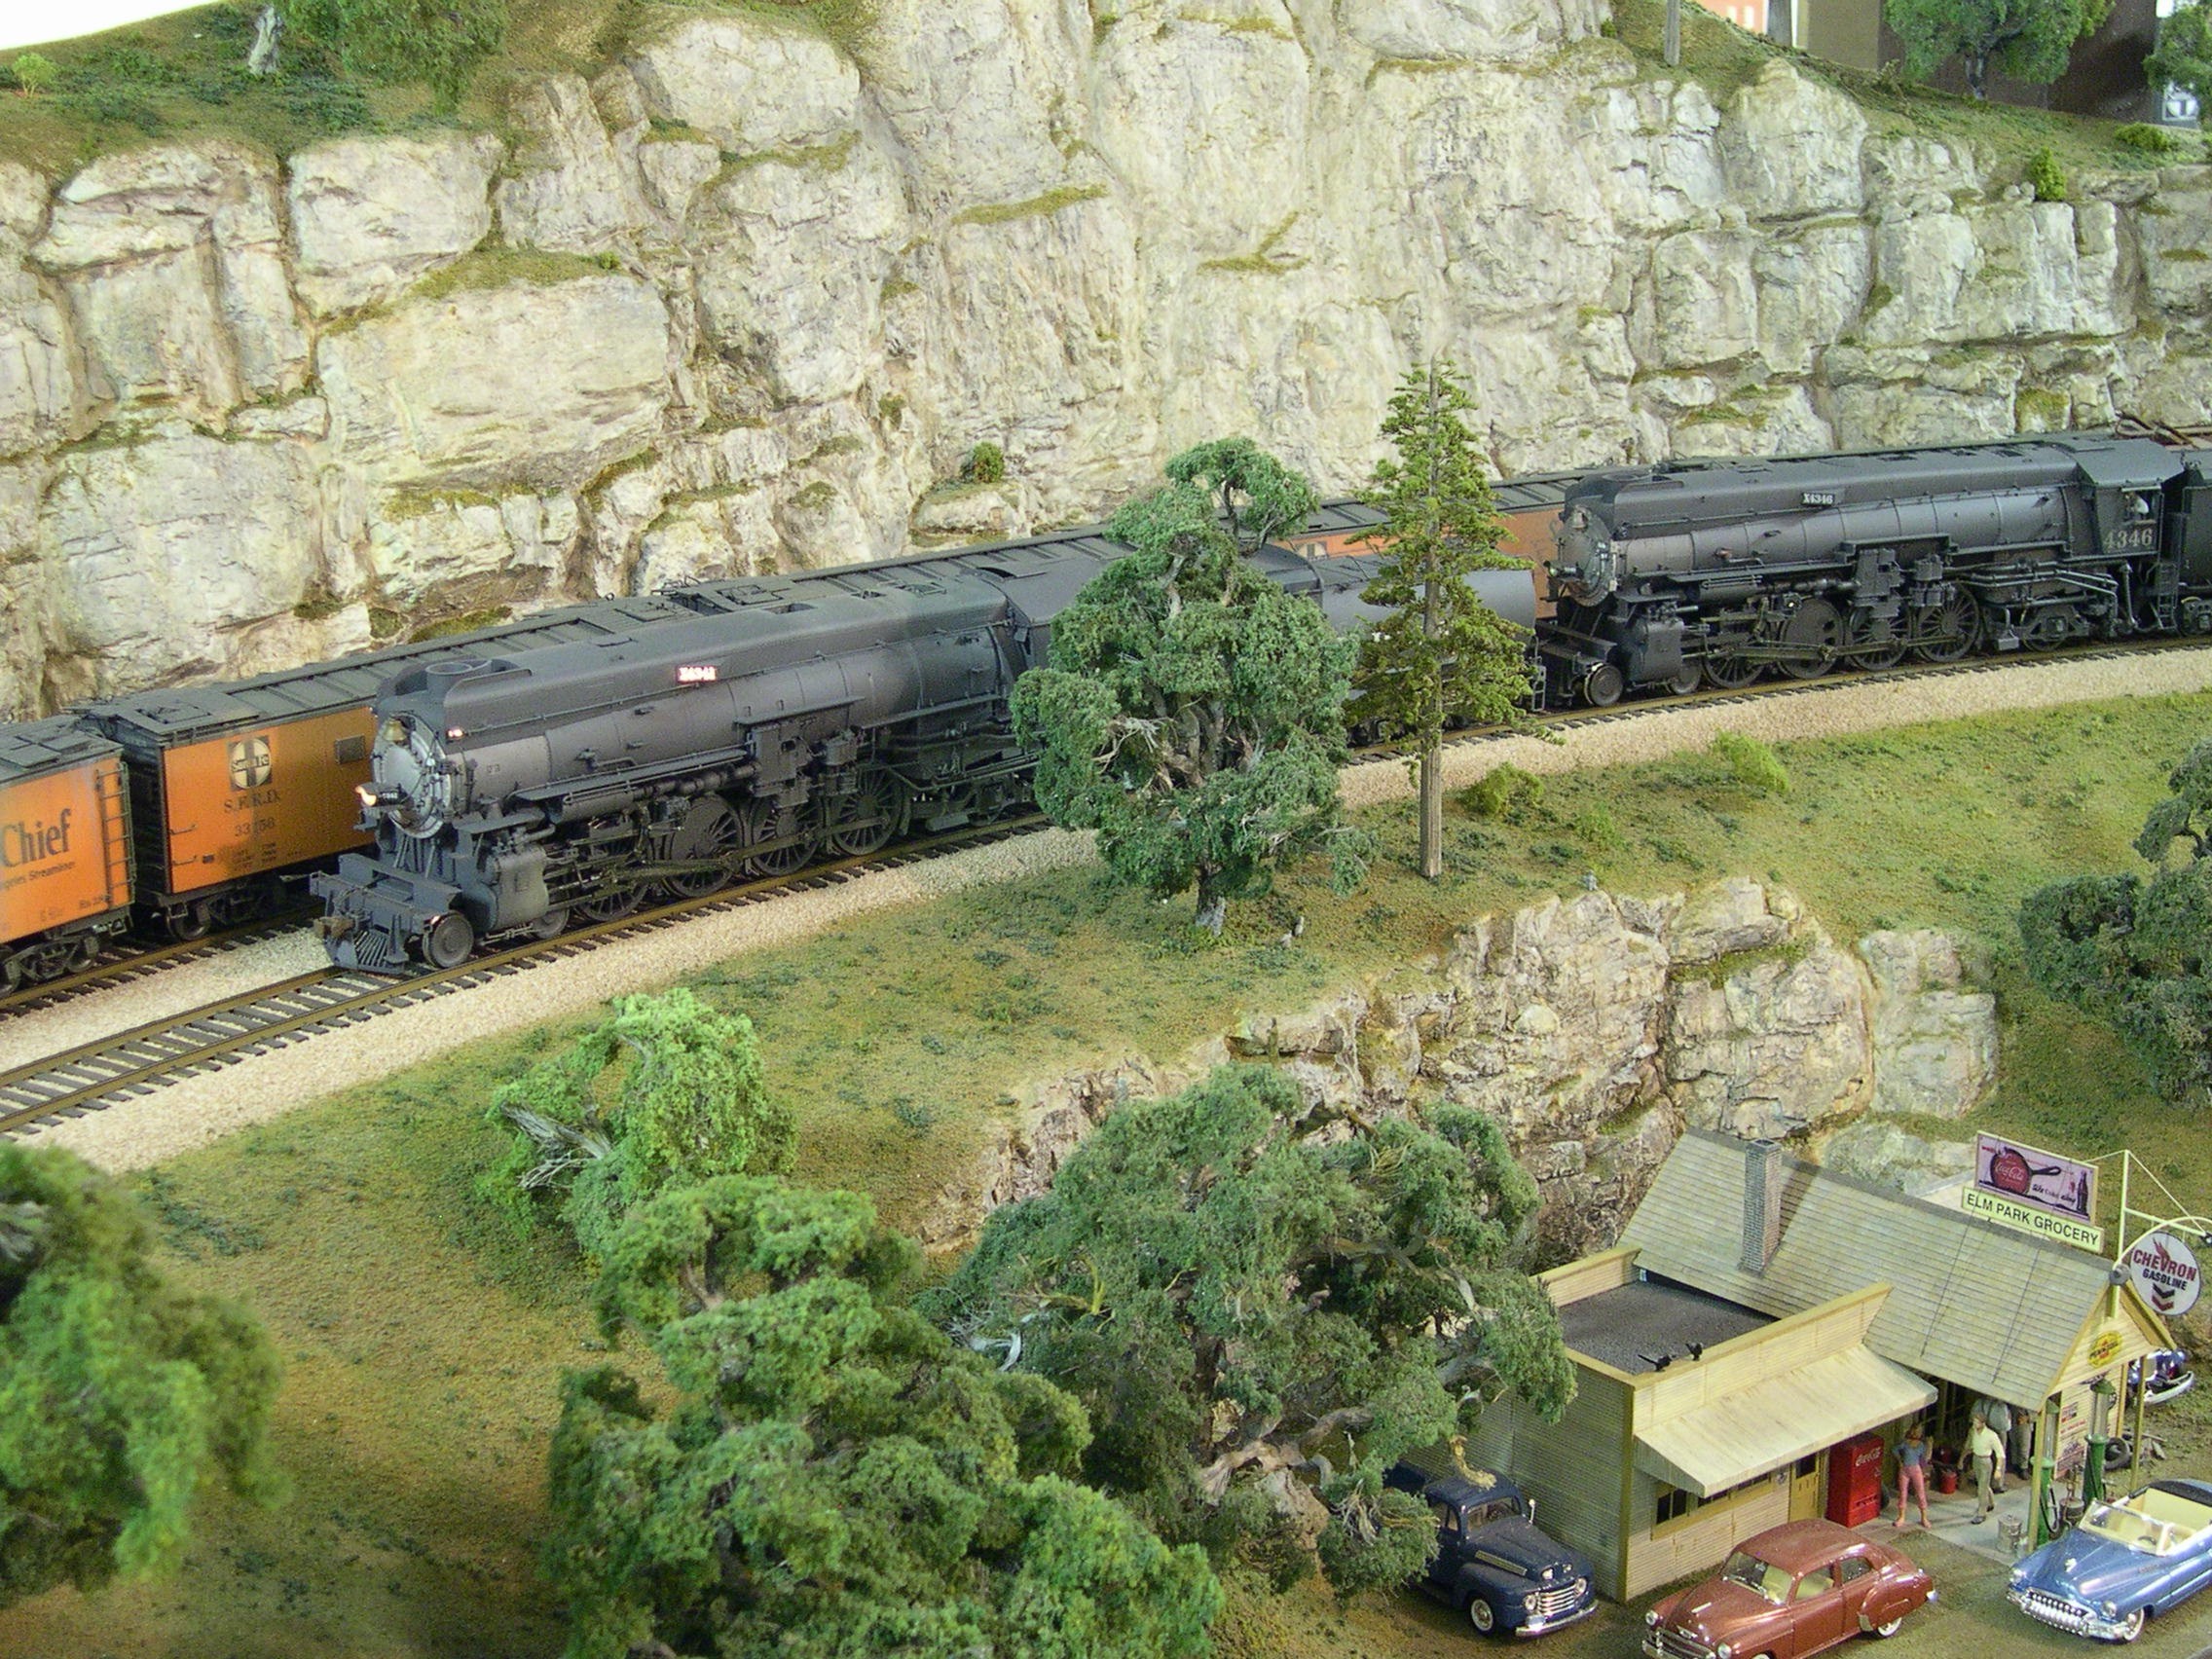 Southern Pacific Mt-3 number 4341 is leading Mt-4 number 4346 on a heavyweight passenger train as they thunder past an SFRD reefer block on the curve above the Elm Park Grocery. Both engines are by PSC, and the reefers are by PRB.
photo 17 ⤵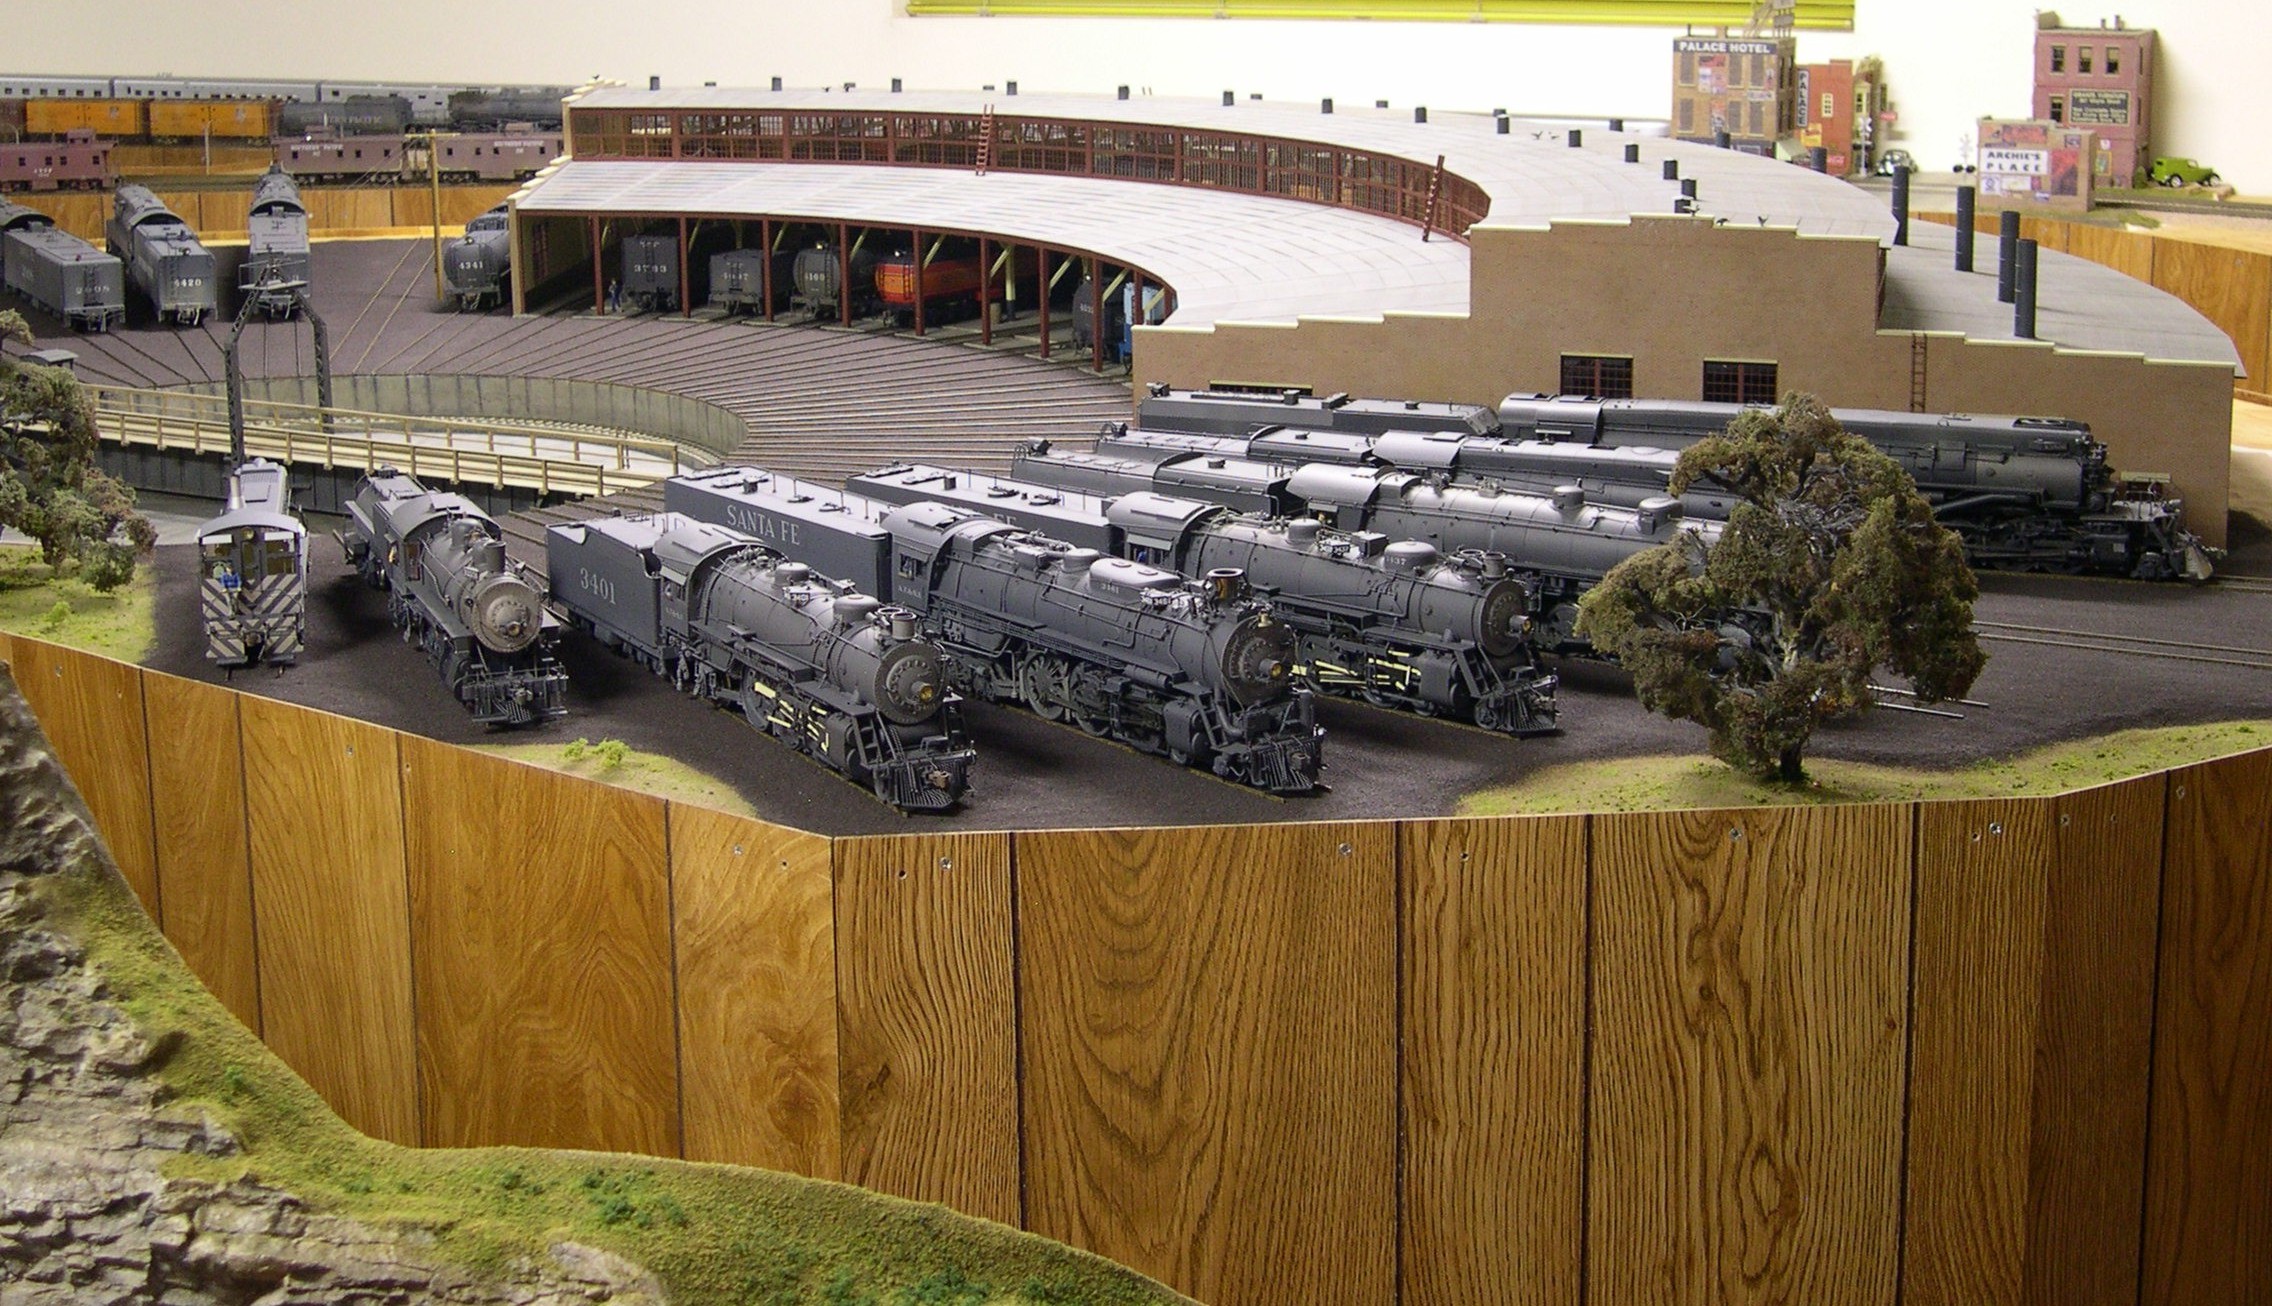 The engines on the outside whisker tracks are (left to right): Car Works Baldwin DS-4-4-1000 diesel switcher, PFM SP C-9 Consolidation, USH ATSF 3400 class Pacific, Sofue ATSF 3460 class Hudson, USH ATSF 3400 class Pacific, Max Gray SP 4-10-2, PSC SP Mt-4 Mountain, and PSC SP AC-9 2-8-8-4. There are currently 34 engines fully detailed.