AT&SF Class 5001 Paint 2
There are 16 photos attached to this email showing additional steps in my painting process and exploring the area in which I do my airbrushing. Photo 15 shows how I mount smaller parts to boards for painting.
paint 15 ⤵
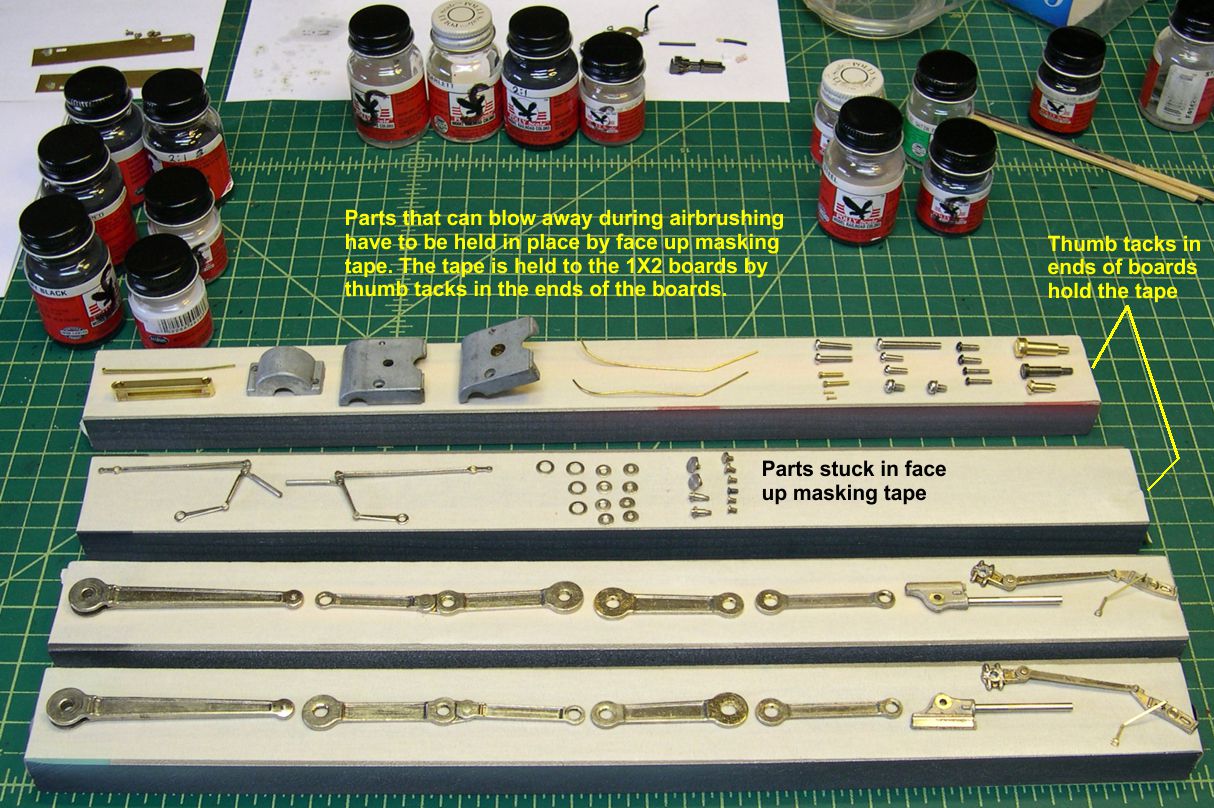
I have a set of 1X2 and 1X4 boards I use for painting. When paint build up gets too high, I just replace the board. I thumb tack one end of the tape, sticky side up, to the end of the board, pull the tape across the board to the other end, and thumb tack that end to the end of the board. Then most any part can be stuck onto the board and held in place for airbrushing. Parts like the front handrails and drawbar on the top board need to be turned over after being painted on one side. Turns out you can do so with very little trouble. Just stick them to an unpainted part of the tape that was shadowed by the part on the first coat. They generally stick OK that way. The siderods and valve gear parts don’t need to be painted on both sides, as you can’t see the back sides after reassembly anyway. I used to hand paint the heads of all those screws and the washers, which is a bit time consuming. Turns out, I can hit mostly just the heads with the airbrush, and the little bit of paint that gets on the threads is too thin to create problems. This way is a lot faster and easier. Same thing with the gearbox. A tiny amount of overspray inside it is of no consequence. Just keep it to a minimum.
In photos 16 and 17, I show how I do some reassembly before painting.
paint 16 ⤵

paint 17 ⤵
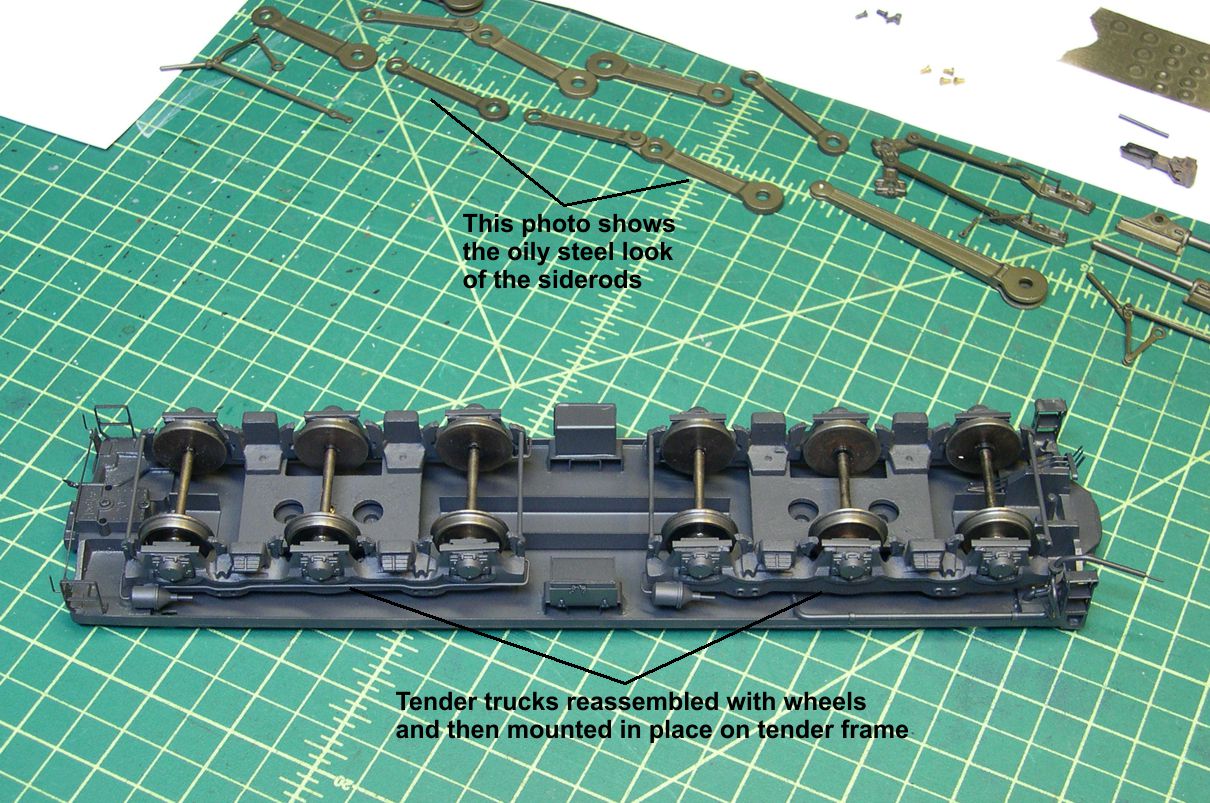
The journals are all re-installed in the trucks, which helps keep the sliding surfaces free of paint, and the journal retainers are re-installed on the frame. It’s a lot easier painting the tender bolsters and coupler box, as well as other parts, as part of a larger assembly. Of course, you want to remember to put a small piece of masking tape over each axle hole, so you don’t have to clean paint out of them afterwards.
Starting with photo 18, you get a quick tour of my painting area.
paint 18 ⤵
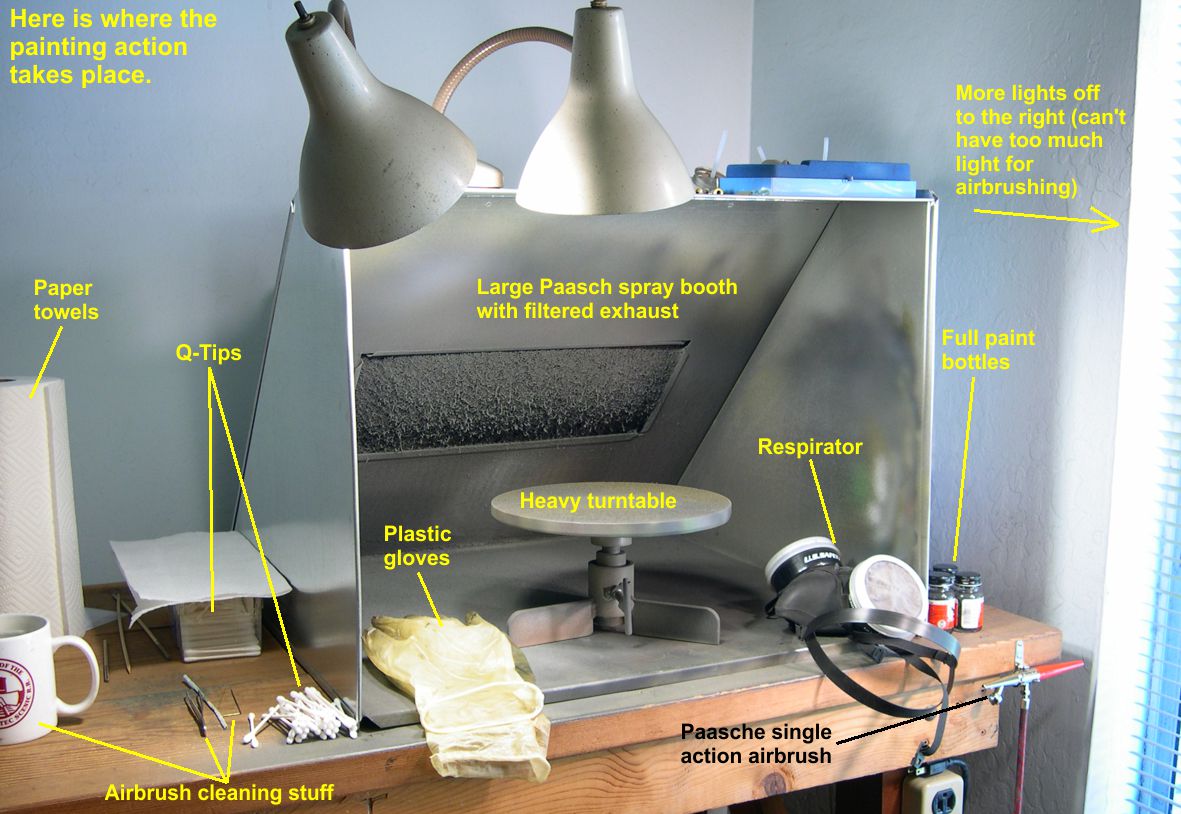
It is in one of my bedrooms equipped with a large workbench and a desk. I have pointed out most of the equipment, and I hope the labels are more or less self explanatory. The mug of soapy water is an essential ingredient, as are the Q-Tips. I use thousands of Q-Tips a year for all sorts of modeling purposes. In this case, they are for cleaning the airbrush tip if paint flow starts to slow down, and they are used in the final cleanup of the airbrush. The gooseneck lamps just over the spray booth have 100W equivalent CFL bulbs for a lot of close up lighting. There are also 3 60W bulbs in a lamp aimed just over my right shoulder as indicated by the note in photo 18. You need a LOT of light when painting a black steam engine. Trying to see into all those little nooks and crannies to make sure you have left no bare brass is a real challenge. Don’t spare the bulbs!
I always use plastic gloves to keep the paint off my hands. It’s a lot easier than trying to wash it off later, and they help prevent any fingerprints on the models as I handle them during painting. I also use a respirator as shown. Even though I am not using solvent based paints, breathing finely divided pigment is not good for your lungs. Get a good one that can be adjusted for the best fit and it will not be a big pain to get used to. I don’t remember where I got the nice heavy turntable. I think someone may have just given it to me, as they had no use for it. It’s a great tool for airbrushing, but don’t ask me where to get one – like I said I don’t know where I got this one.
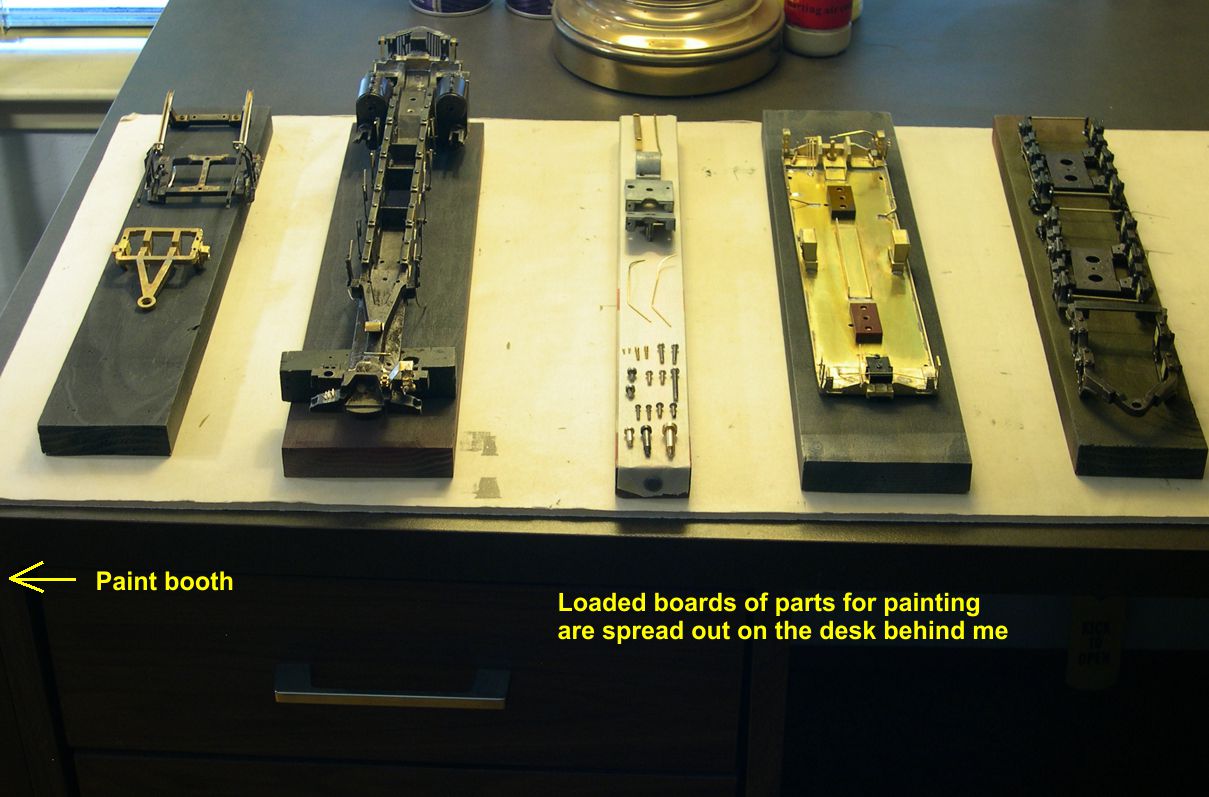
In photo 19, you can see the general arrangement of the painting area with the desk behind me as I use the paint booth.
paint 19 ⤵

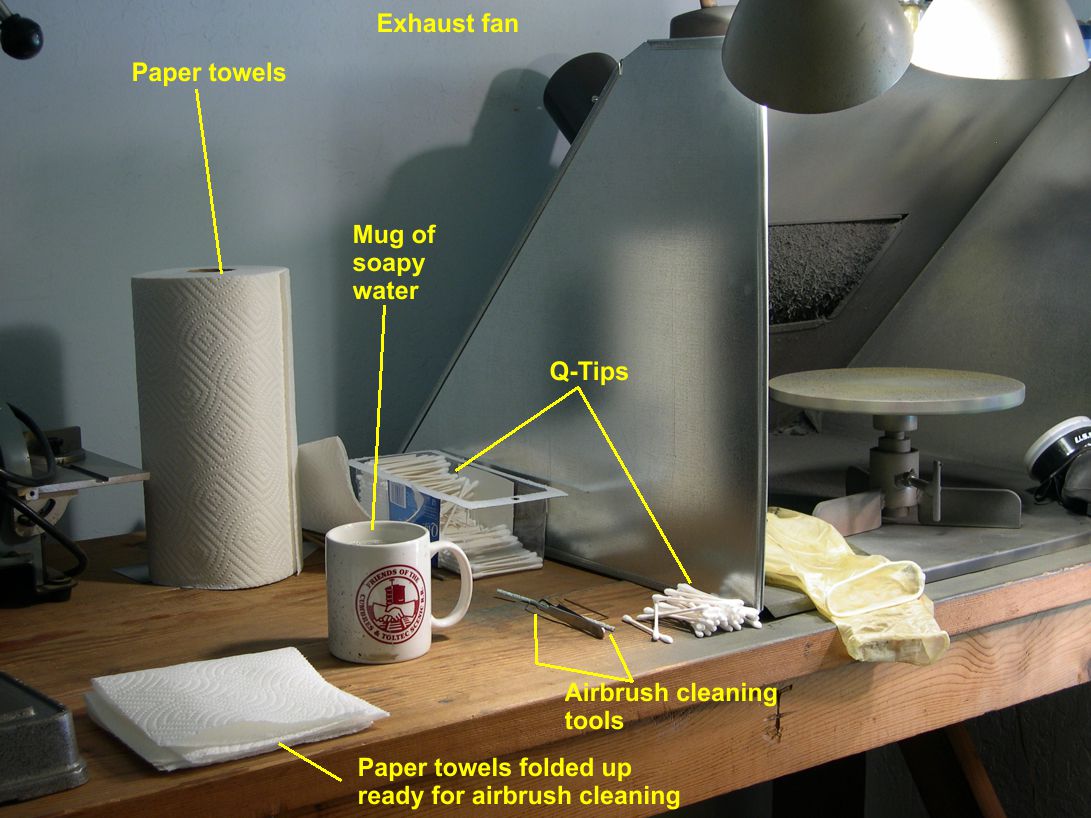
All the loaded boards get staged on the desk. The compressor and tank are from Micro Mark. I got them a few years ago after being a little disappointed in other setups. The compressor is very fast, but pretty loud. Not a problem though, as I don’t have anyone living with me to complain, and I stopped jumping every time it started up after just a few uses. It can fill the tank in less than a minute and only cuts on for a few seconds every 3-5 minutes during heavy use. All in all, I like it. Photos 20 and 21 just show more of the area.
paint 20 ⤵
paint 21 ⤵
Photos 22-26 show some intermediate steps in the process.
paint 22 ⤵
paint 23 ⤵
paint 24 ⤵
paint 25 ⤵
paint 26 ⤵

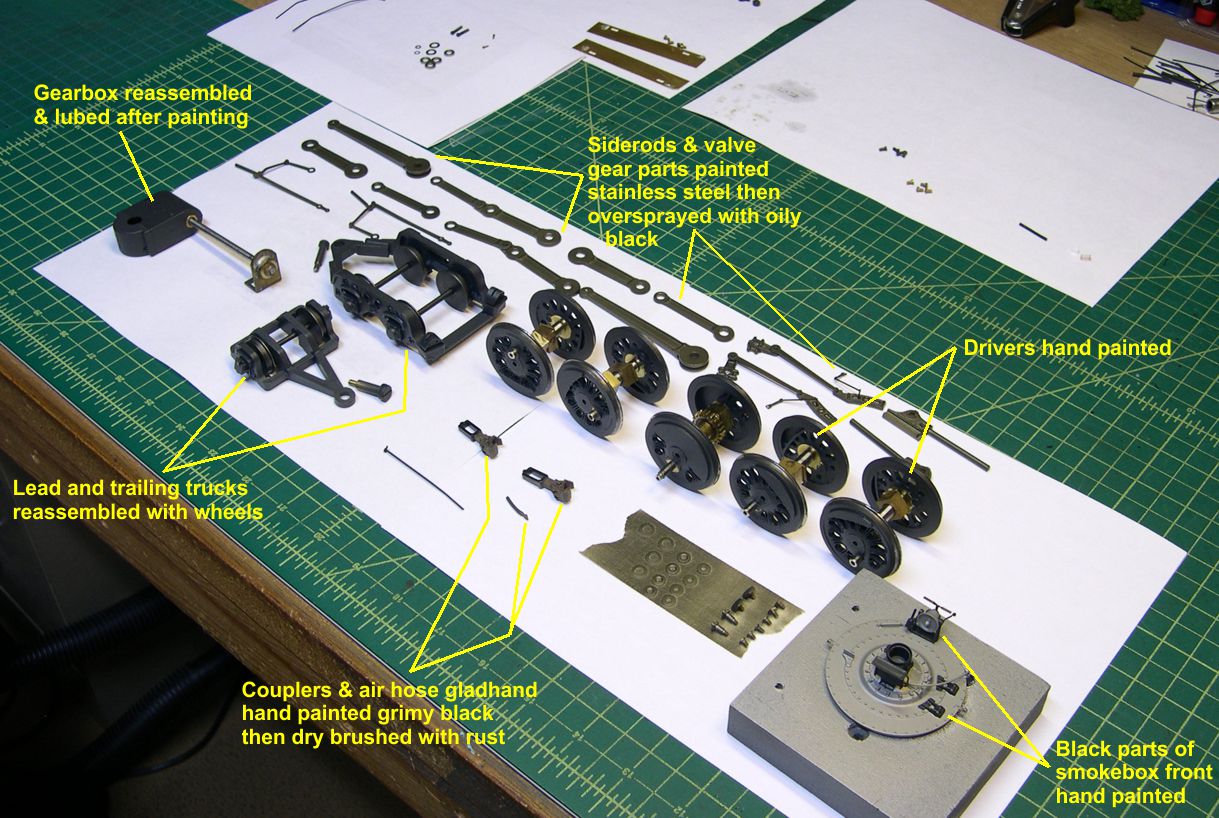
The trucks have all been reassembled after painting. The drivers have been hand painted. I have been hand painting drivers for years. It seems to take less time than masking them, and I can do the backs more easily than having to mask the bearings and axles before airbrushing. Don’t worry about paint getting on the treads. After I reassemble the mechanism, I just set the motor to spinning the wheels and hold lacquer thinner soaked Q-Tips against the treads to clear the paint. You get nice sharp edges on the paint that way, at least as good as masking.
Now a word about the black paint I use. I never use straight Engine Black paint unless a customer insists on it. It is simply too black. Hold a sample of it up against a good color photo of a real engine back in the day and you’ll see what I mean. There are several reasons why jet black paint is not realistic for models. First of all, when you view a real loco from any distance at all, the dust and water vapor in the atmosphere lighten the black color. Also, the paints they had back in the steam age were totally unlike the wonderful Imron paint used on excursion engines today. It was not as jet black and glossy, especially after a short exposure to weather and sunlight, not to mention high temperatures on loco boilers which lead rapidly to oxidation. Slightly less black shades make it a lot easier to see all that nice detail you put on your model as well. Jet black on jet black makes viewing small details very hard. What I use is a mixture of Engine Black and Grimy Black to get an appropriate shade of very dark gray. For an engine fresh out of the shops or an extremely well cared for engine, such as a Daylight GS, I use 1:1 Grimy Black : Engine Black. For an engine that has been in service for a while and gotten slightly weathered, I use a 2:1 ratio of Grimy Black to Engine Black. For engines I plan to weather pretty heavily, I go to 3:1. This particular model is getting 2:1. Notice in photo 26 how easily you can see the tiny oil lines between the air pumps, as well as other small detailing. Those would be very hard to see if I had used just Engine Black.
As far as I can tell from photos, the ATSF stopped painting the valve gear parts and outer ribs of the siderods on these engines white by the late 1940s. They just left the rods all steel which then weathered and got all oily very rapidly. To simulate that, I painted the rods Stainless Steel, then over sprayed that with Oily Black to give that oily, dirty appearance. Photo 23 shows that color pretty well, although it is hard to really see all the subtlety in a photo.
Other hand painted items are the black parts of the smokebox front and the couplers. I get a dirty, rusty appearance on the couplers by painting them roughly in Grimy Black then dry brushing lightly with Rust. Both these items are shown in photo 22. I should note that the stark contrast of the black and tarpon gray you see in the photos will be greatly muted by the weathering that comes along later.
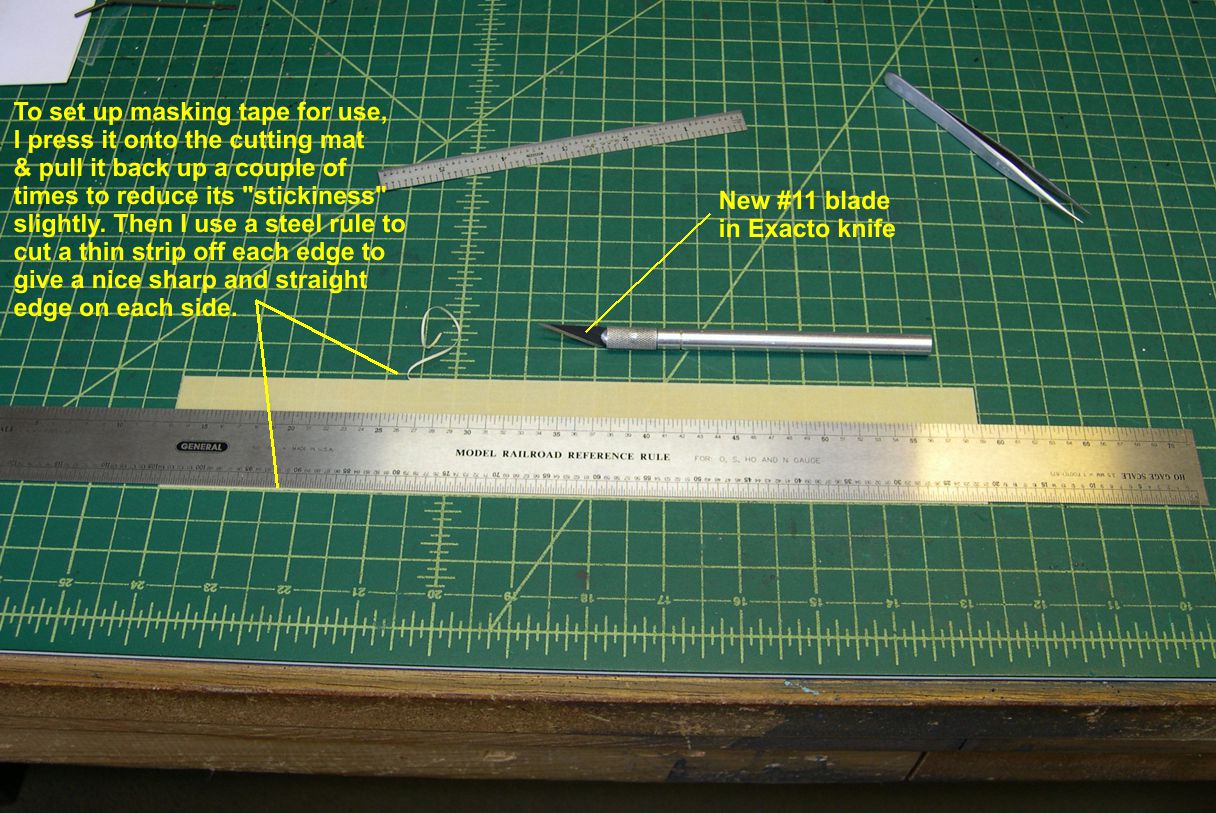
At this point, I have to start masking the cab and boiler assemblies before I can paint them black. In fact, I have one more color to spray on the cab before going to black – the cab window awnings. Photos 27 and 28 show the way I prepare masking tape before I start masking.
paint 27 ⤵
paint 28 ⤵
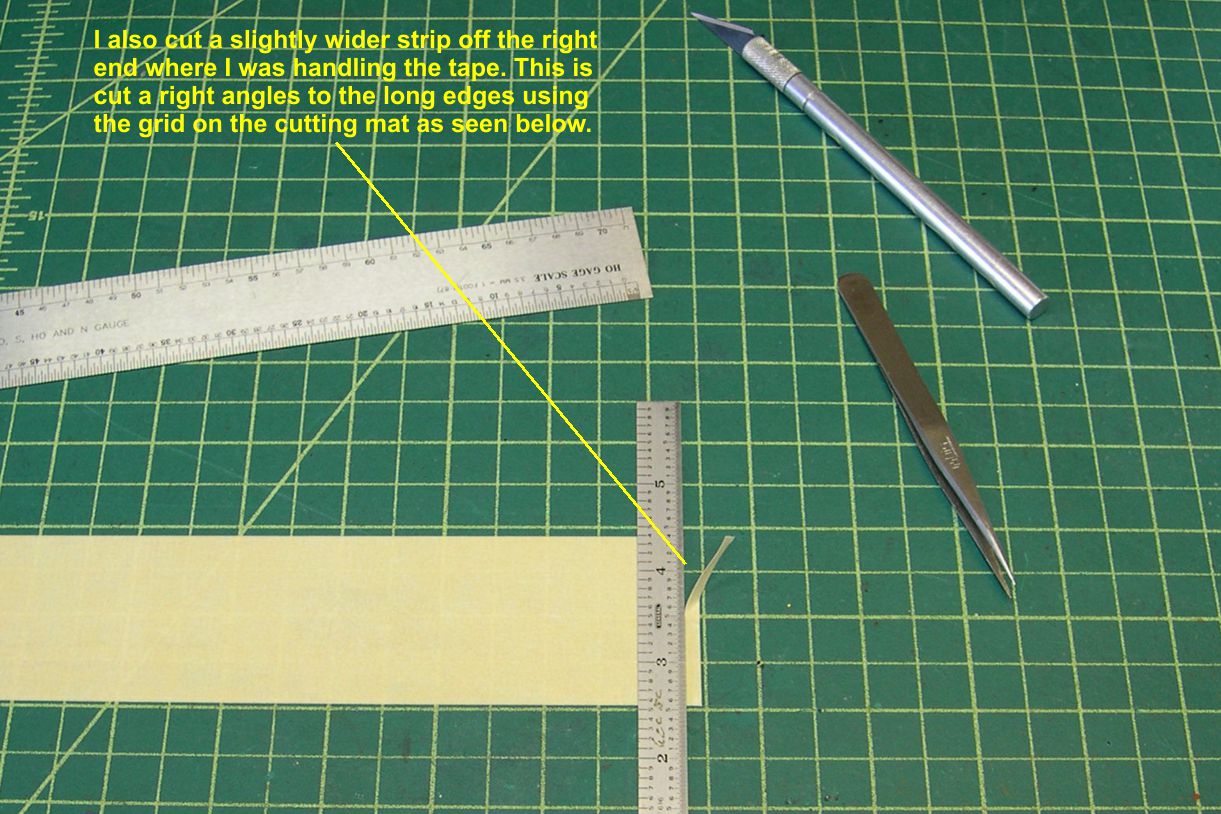
You want clean, sharp edges on the tape. I’ve tried using plate glass for cutting the masking tape as recommended by some people, but I find essentially no difference in just using my cutting mat and a blade lasts a lot longer, so I just keep it simple. In photo 29, you can see the masking of the cab interior.
paint 29 ⤵
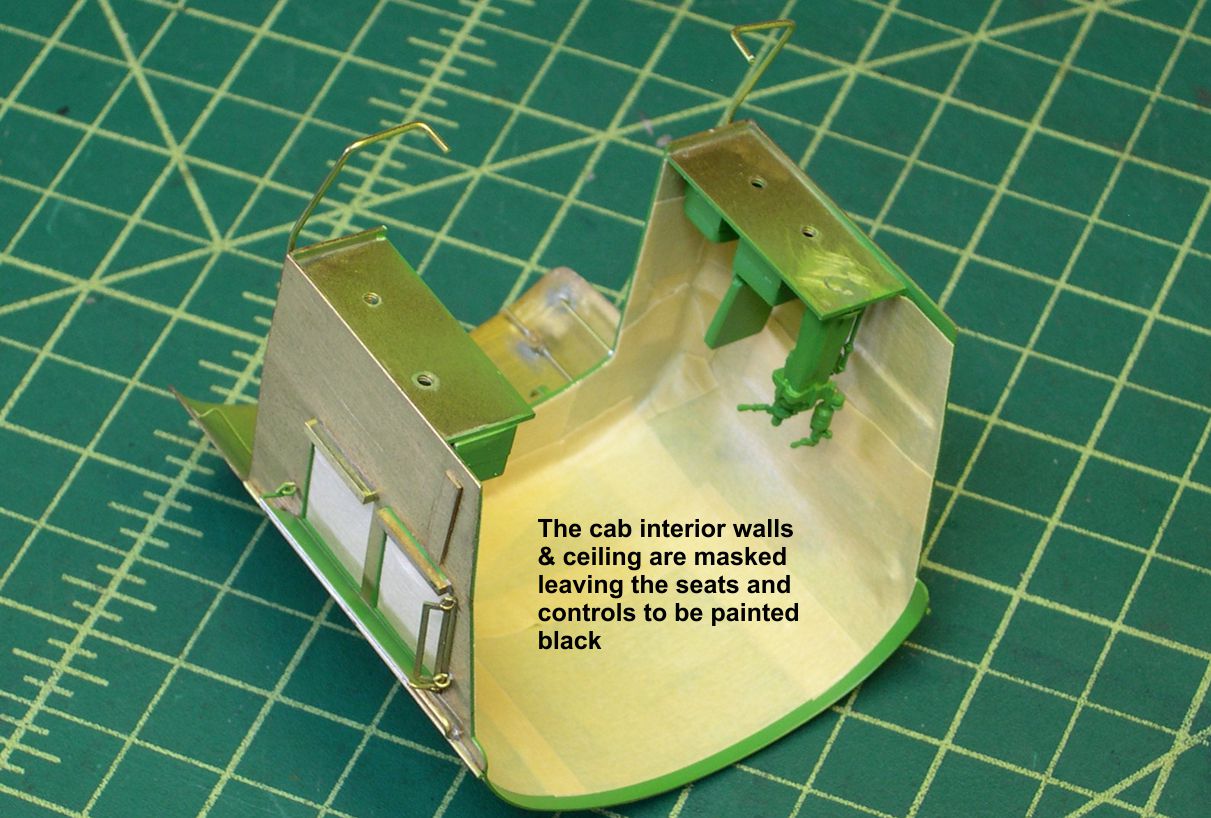
The seats and controls are unmasked, so they will eventually get painted black.
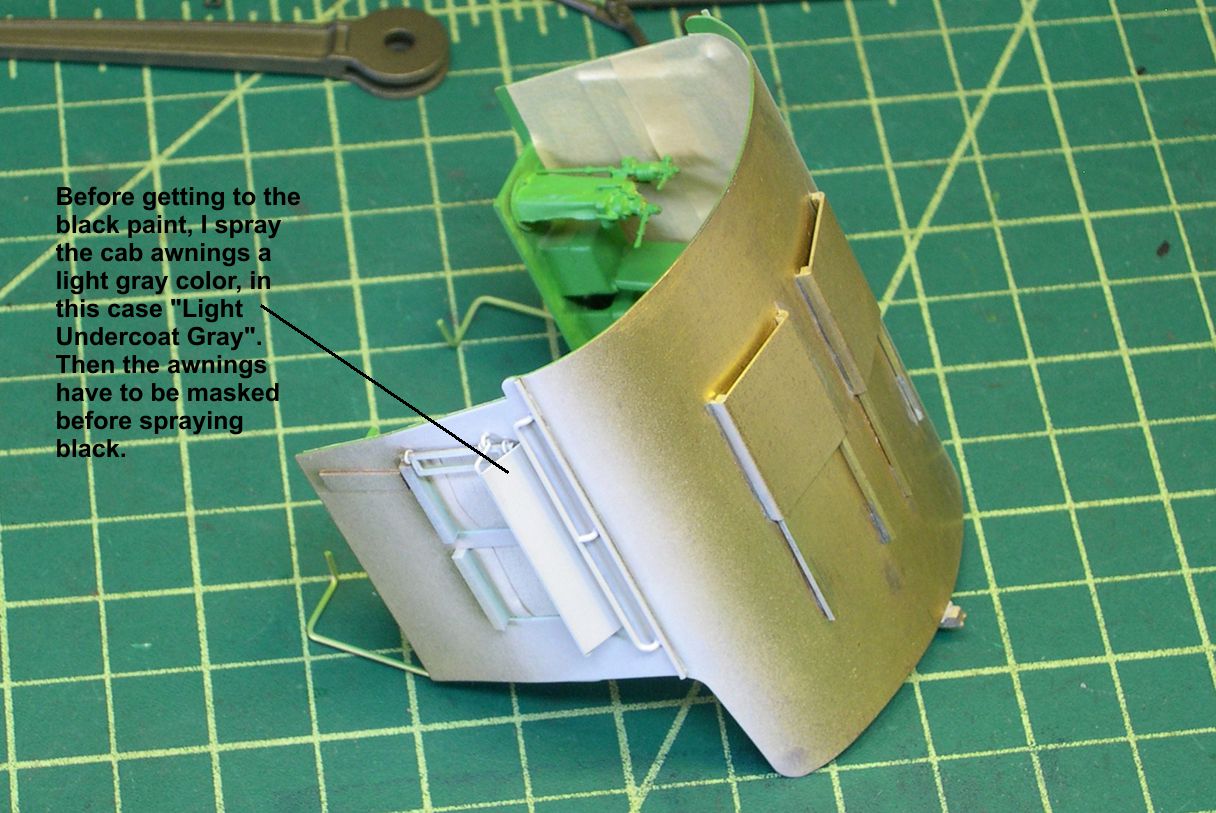
The awnings on ATSF engines started off as a very light gray color – new canvas. I find it’s best to start the same way. After weathering, the color is much darker, of course, but starting with light gray seems to replicate what happens on the prototype a little better. The color I used here is Light Undercoat Gray, a very flat, light gray. I will keep the awnings masked until after decaling and overall satin finishing to preserve that nice flat look of canvas. See photo 30 for the light gray application.
paint 30 ⤵
Gary