AT&SF Class 5001 Tender 1
As you will see in the accompanying 5 photos, the tender mods for these 5001 class 2-10-4s are not a “piece of cake” either. The tenders came off the USH ATSF 3400 class 4-6-2 model. I have two of those that I replaced the tenders on for various reasons as I was super-detailing them. The replaced tenders, of course, were meant for this project. One of the biggest discrepancies versus the prototype on these 20,000 gallon tenders is the rivet pattern on the top of the tender. I mention this so no one can accuse me of missing it. However, in as much as I plan to finish this project within my lifetime, I choose not to spend a gigantic amount of time replacing the top and making the correct rivet patterns in it. Besides, in photos, it is hard to see the exact pattern due to all the rust, debris, and other “gradoo” accumulated up there over the years. This is one discrepancy I can live with.
Most of the details on the tenders have to be replaced though, so I used my trusty heat gun to remove almost all the details from the tender top. I then had to clean up all the excess solder and sand the areas smooth where there had been soldered details. See photo 1 for how the tender looked at this stage.
tender 1 ⤵
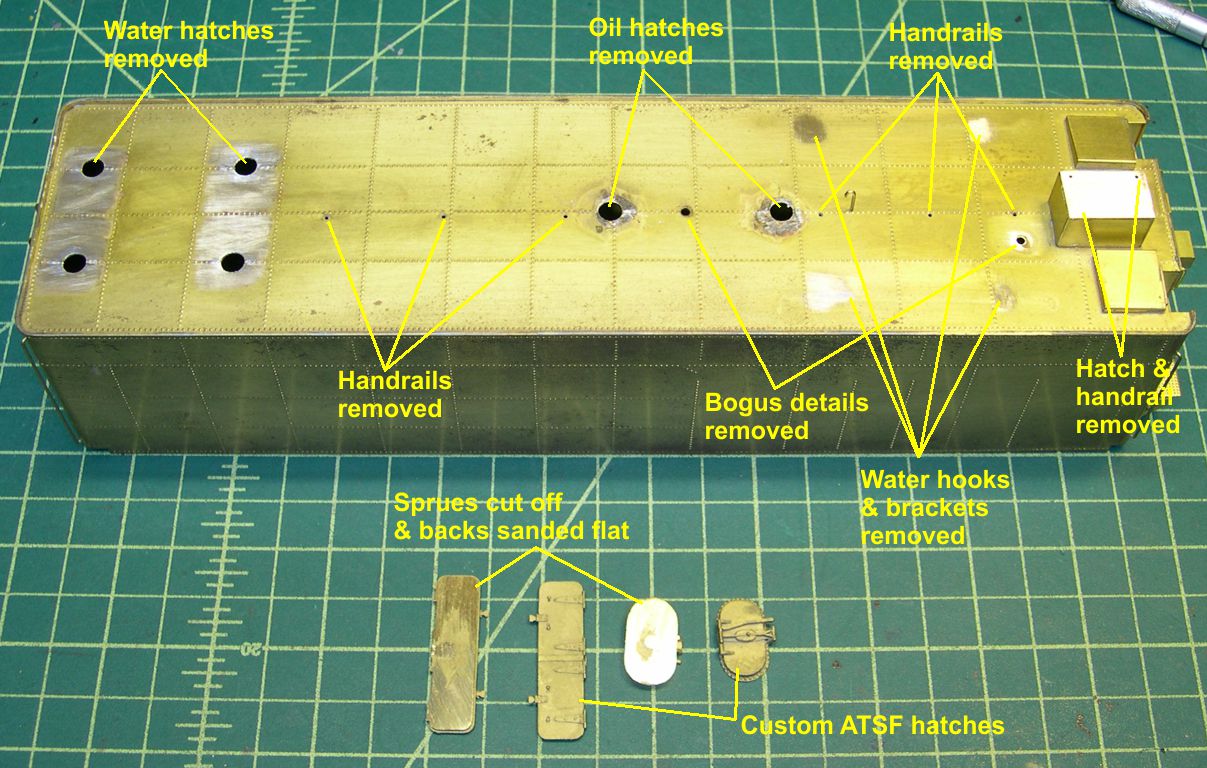
Also in photo 1 is shown the custom oil and water hatch castings. I had to remove the sprues on the backs of the castings and then use my sanding disc to sand the backs flat before soldering them to the tender top. As shown in photo 2, it is necessary to remove some rivets where they will interfere with the hatch castings lying flat on the surface.
tender 2 ⤵
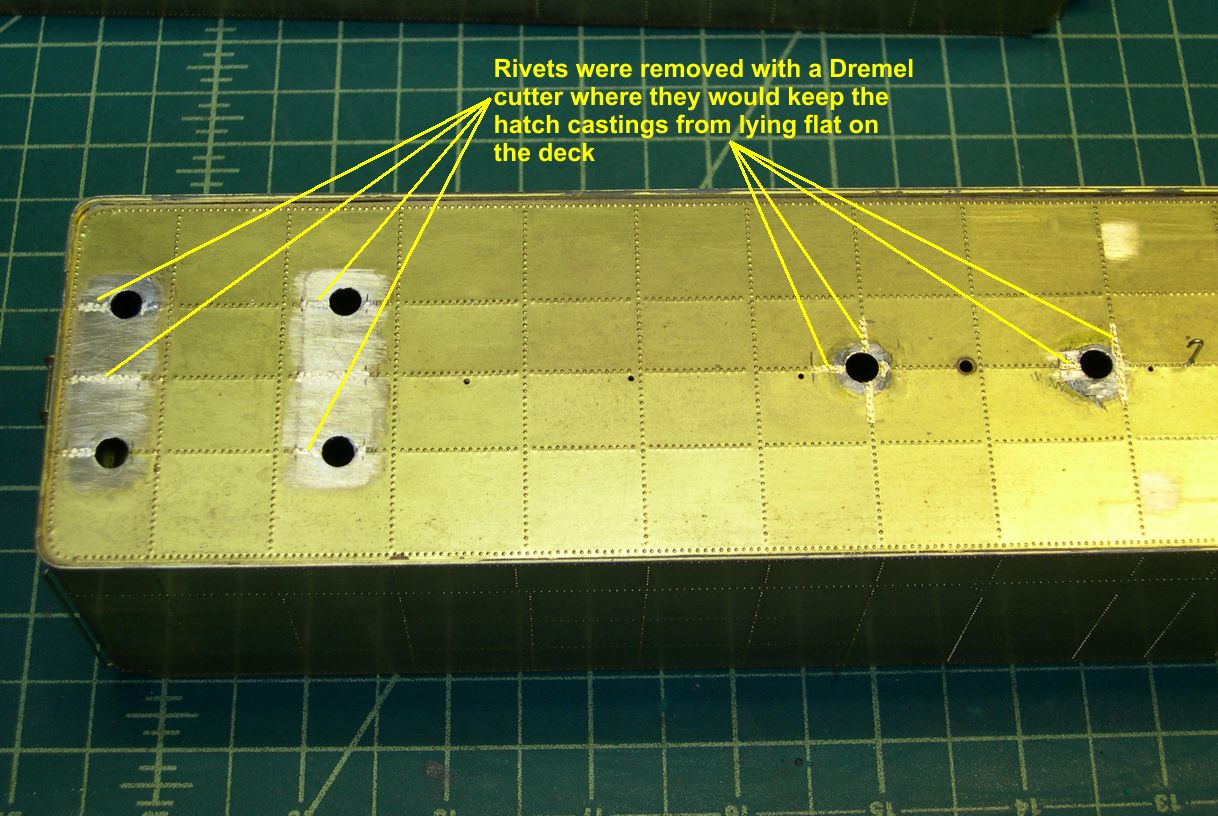
I measured which rivets had to go by placing the hatches in their correct locations and marking their outlines with a pencil. Then I used a small burr in my Dremel to remove the offending rivets. You can see the scars in photo 2.
Photo 3 shows the oil and water hatches soldered in place.
tender 3 ⤵
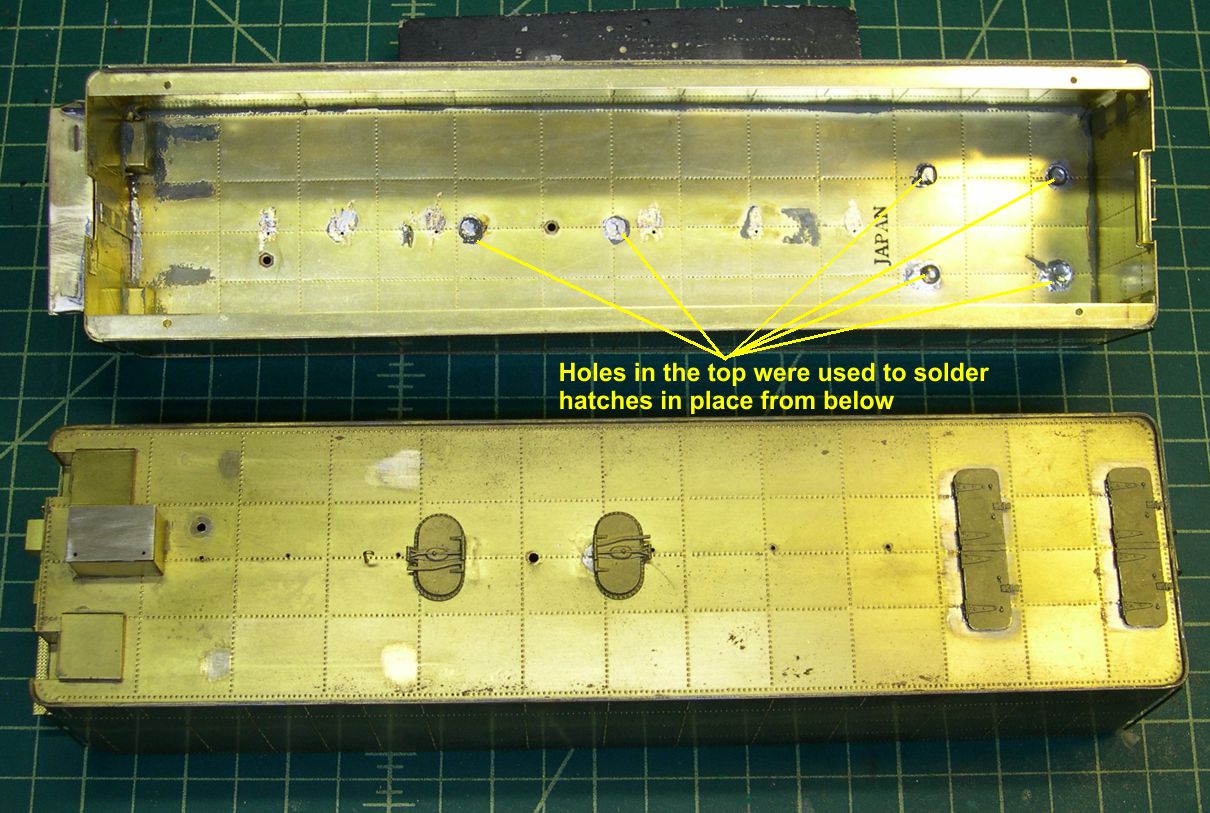
The original Japanese builder had placed holes under the hatch locations so the hatches could be soldered from underneath. I used his conveniently placed holes to do the same.
One of the bogus details that was mounted near the front toolbox had a mounting hole for it. I had to turn a plug on my lathe and plug that hole as shown in photo 4.
tender 4 ⤵
Also shown in photos 4 and 5 are the new handrails.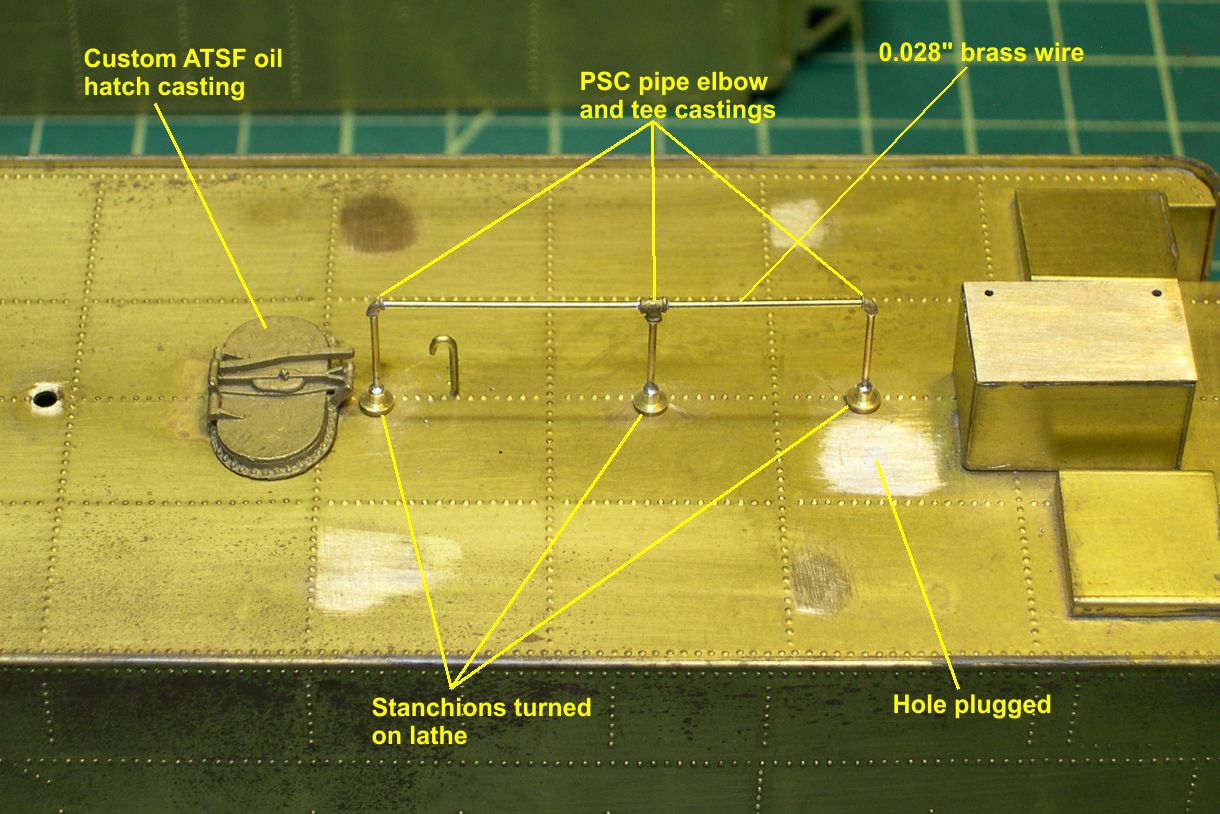
tender 5 ⤵

I had to turn the handrail stanchions on my lathe. I used PSC pipe elbow and tee castings plus 0.028″ brass wire to build up the new handrails. Note the curious shape of the back end of the rear handrail. All the tenders were originally built with handrails straight across the way USH had them. However, firemen and hostlers must have complained bitterly about those handrails blocking the swing of the water spouts to the front water hatch, so all the 20K tenders had their handrails modified the way you see on the model. That would allow water spouts to swing over them without banging into them. That’s the only reason I can think of to do that mod on all the tenders.
There are plenty more tender mods to go before I get to paint these engines, so back to the workbench.