AT&SF Class 5001 Paint 3
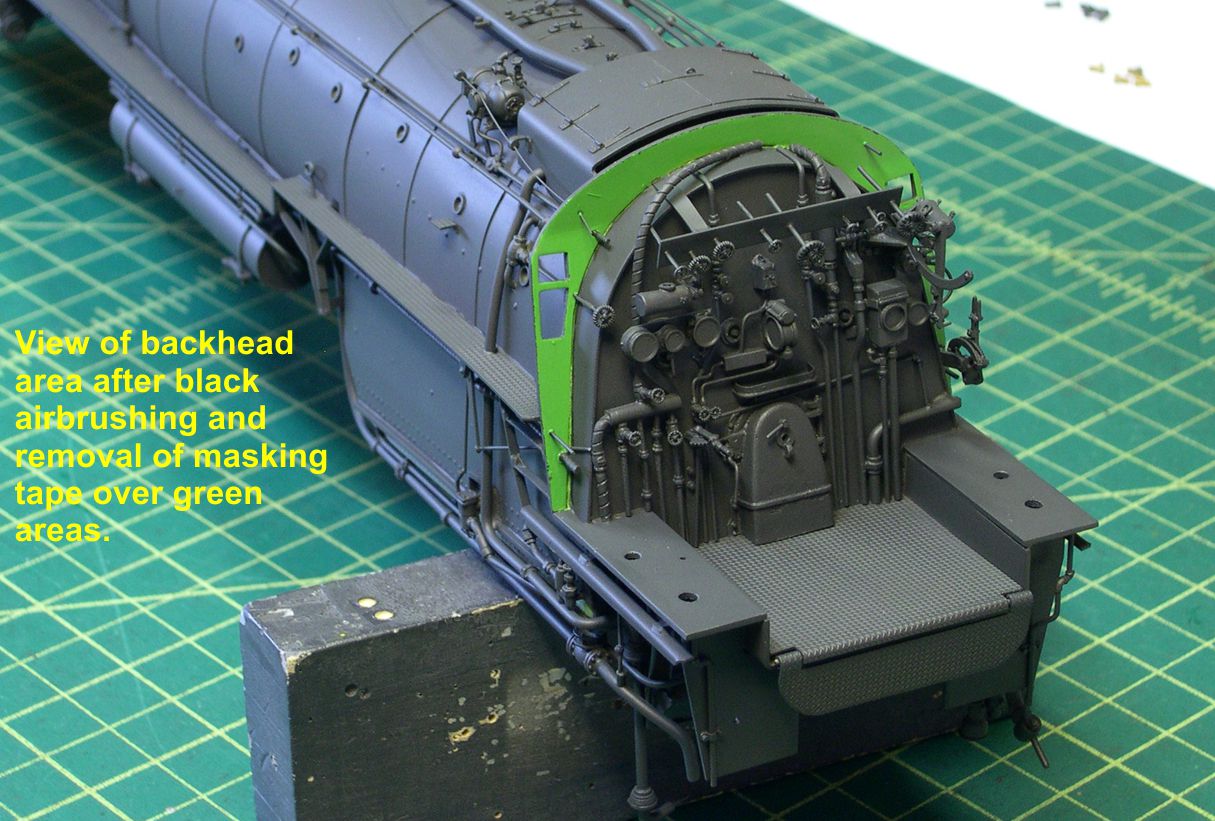
In this issue of the 5001 class saga, I finish the painting of 5006 and apply the decals. All the tarpon gray, BN green, and light gray areas were masked, and the 2:1 Grimy Black : Engine Black paint mixture was airbrushed on. In photo 31, you can see how the front portion of the boiler looks after the masking tape was removed.
paint 31 ⤵

You can’t really see it in the photo, but the sides of the large sand dome were airbrushed glossy after the application of black. All the areas that get decals were airbrushed with gloss clear coat after the black. That improves decal application considerably. Photo 32 shows the backhead after the black was applied and the masking tape removed from the green cab front.
paint 32 ⤵
In photo 33, I show the cab following application of the black and removal of the masking tape from the cab interior.
paint 33 ⤵
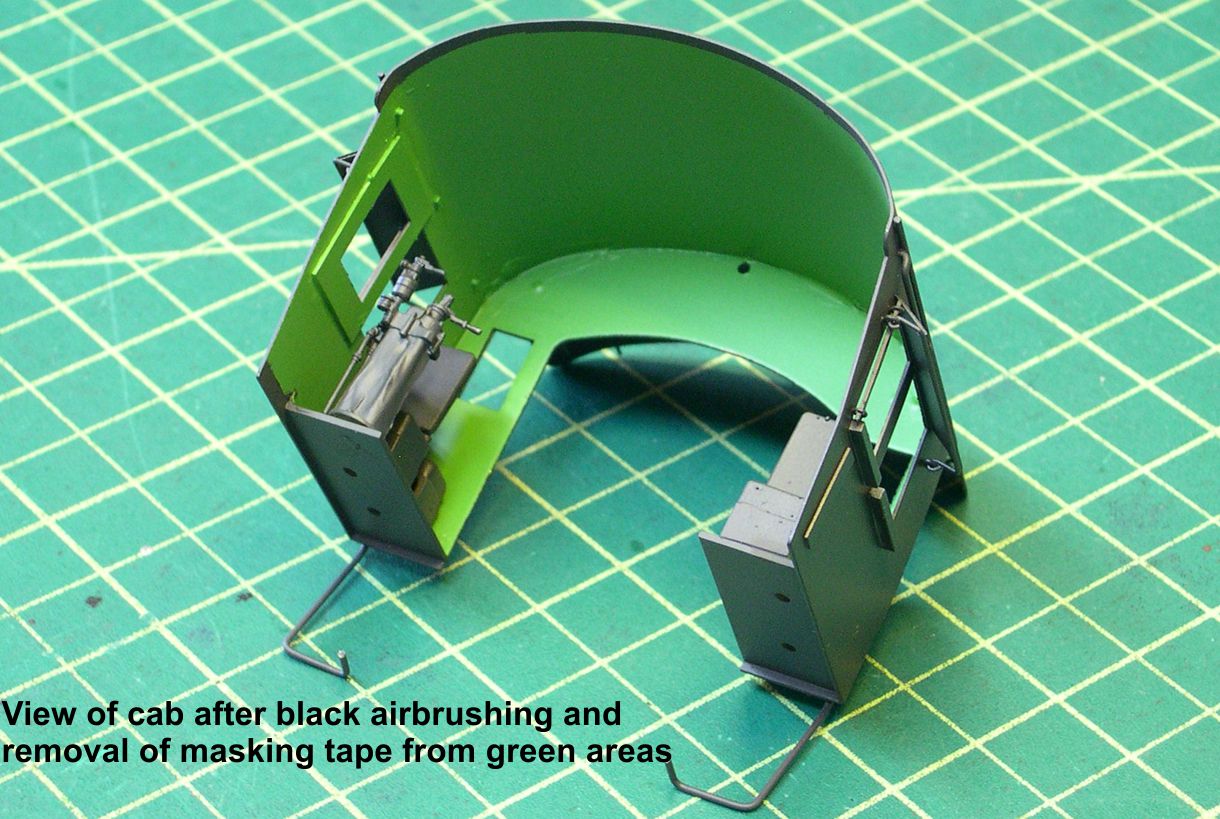
As mentioned before, I did not remove the masking tape from the cab awnings at this point, as I want them to remain really flat. Leaving the masking tape on protects them against the Satin clear coat that gets applied after lettering.
While waiting for the black paint to harden nicely, I went ahead and assembled the entire chassis, lubricating all moving surfaces with LaBelle 102 Gear Oil as I went. LaBelle 102 is a lot thicker than the lighter oils and stays where it’s put much better. It holds up under the heavy loads of O Scale much better as well. Quite a bit of careful work is necessary at this point, as applying paint to all the various surfaces can change tolerances and cause all kinds of rough running. These engines are really picky anyway due to their long wheel bases. Getting them to go around 72″ minimum radius curves is a challenge. Once I had the chassis without the motor and gearbox coasting through curves pretty nicely, I installed the motor and gearbox. I then put the whole mechanism up on blocks and ran it at medium speed for about an hour in each direction to break in all the bearing surfaces. I should mention that I pack the gearbox with LaBelle Teflon Grease. I have used it for years, and many of my locos have never required re-lubing of the gearbox, even after 10 years or more of service. I like stuff that cuts way down on maintenance. In photo 34, you can see the completed and broken in mechanism.
paint 34 ⤵
I have pointed out the two long motor wires temporarily installed to allow me to run the engine in the paint booth while I weather it. Note that nearly everything that could possibly be seen under the boiler has been painted black, the gearbox, drive train, and support brackets for instance.
Now for a discussion of how I decal models, particularly steam engines. A prime concern is to make the decal film disappear. The best way to do that is to cut it off right next to the lettering. However, this can get really tedious, and I find it to be unnecessary anyway. The main thing is to break up long straight edges of decal film so your eye cannot pick them out so well. In photos 35 and 36, you can see how I have cut notches in between letters to break up the straight lines of film around them.
paint 35 ⤵

paint 36 ⤵
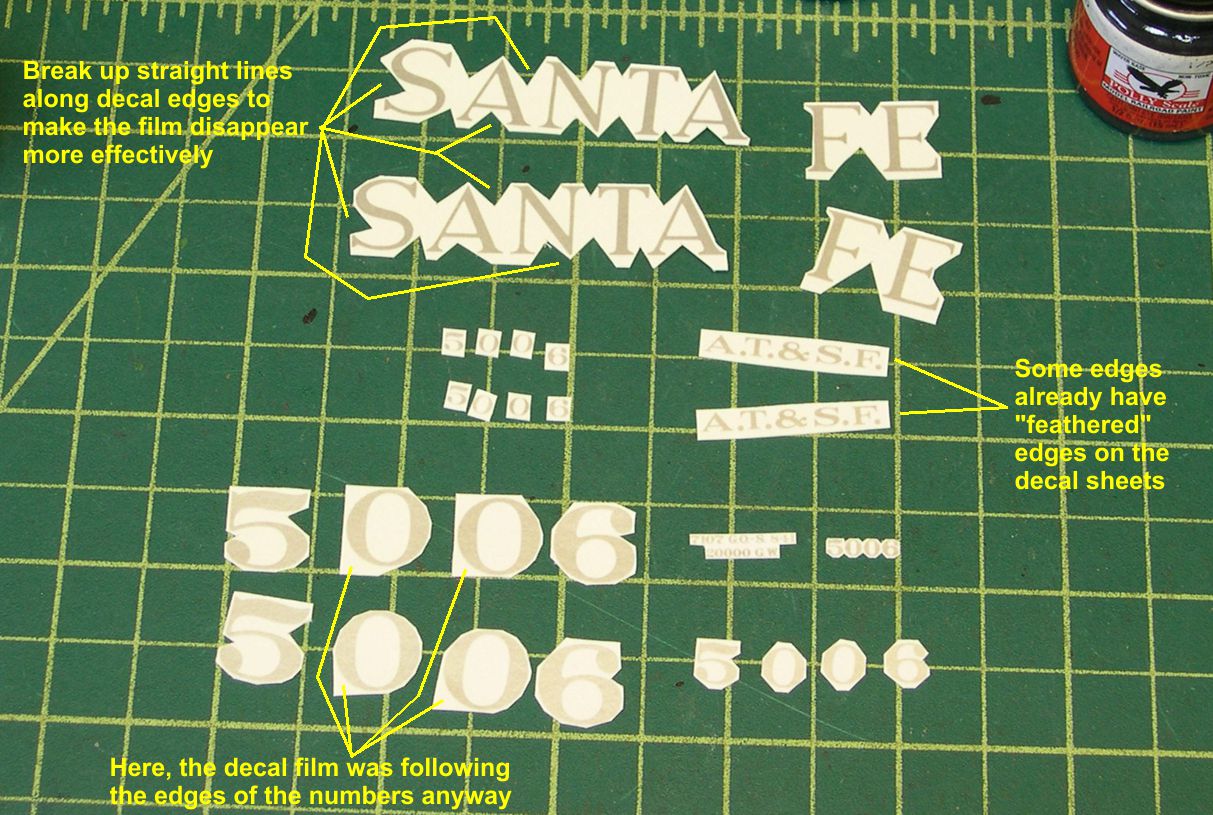
Microscale applies their decal film to the paper in shapes roughly matching the lettering. I have pointed out in the photos where I did not need to cut near the lettering due to the film already being close to the lettering. A second key thing about making decal film disappear is to use DISTILLED water to soak the decals loose from the paper. Do NOT use tap water. Tap water has all manner of dissolved minerals in it. When it dries, it leaves a frosty film of those minerals behind. Guess how that looks under your decal film. Distilled water leaves no such residues, so the decal film does not get decorated by water residues.
I soak the decals in the shallow dish of distilled water until they begin to loosen from the backing paper. I then transfer them to the model and use a pair of very sharp tweezers to position them accurately. The less tool in contact with the decals, the better. Hence the sharp tweezers. As I get the decals nearly positioned, I use a good quality paint brush to soak up the excess water. As the final position is reached, the last of the water is wiped away using the brush. A light touch along the edges of the decals is required to suck up the water into the brush without disturbing the decals. I use the paper towel to keep drying the brush as I work at sucking up the water with it. Once you think you have the decal properly positioned and the water dried up, spend some time examining it from various angles. Make sure it looks right from all directions. Sight down a line of decals, such as the large tender numbers, to see if their bottoms and tops form a really straight line. Don’t be hesitant to use the brush to add water back onto a decal so it can be repositioned if need be. Don’t be satisfied until you can find nothing wrong with the alignment of a decal or group of decals. At that point, I dip the paintbrush in the Microscale Micro Sol and quickly brush it along the decal, barely making contact – just enough to transfer the Micro Sol to the decal and surfaces just around it. Just do a single pass over each area. If you miss part of a decal, just wait until the Micro Sol starts to dry before adding any. The Micro Sol has an almost instantaneous effect on the decal, softening it dramatically. If you try to do anything else to the decal at this point, you’ll be really sorry. As the Micro Sol begins drying noticeably, you can begin adding additional coats of it to the decal until the decal really nestles down onto the surface and begins to look as if it were painted there. If any bubbles form under the decal or clear film as the Micro Sol dries, prick them slightly with a very sharp knife blade. I use a No. 11 Exacto. Then apply more Micro Sol until you get rid of any bubbles. Once the micro Sol has dried with no bubbles and no clear film haze, I make a final light application of Micro Sol and dry it off with the brush. That helps remove any Micro Sol residue. I then give the decal a few minutes to dry completely before using the brush soaked in distilled water to apply the water to the decal and surrounding area and scrub it with the brush. I then suck up the water with the brush, not letting any drops dry on the surface. This gives me a nice clean surface for applying the clear coats.
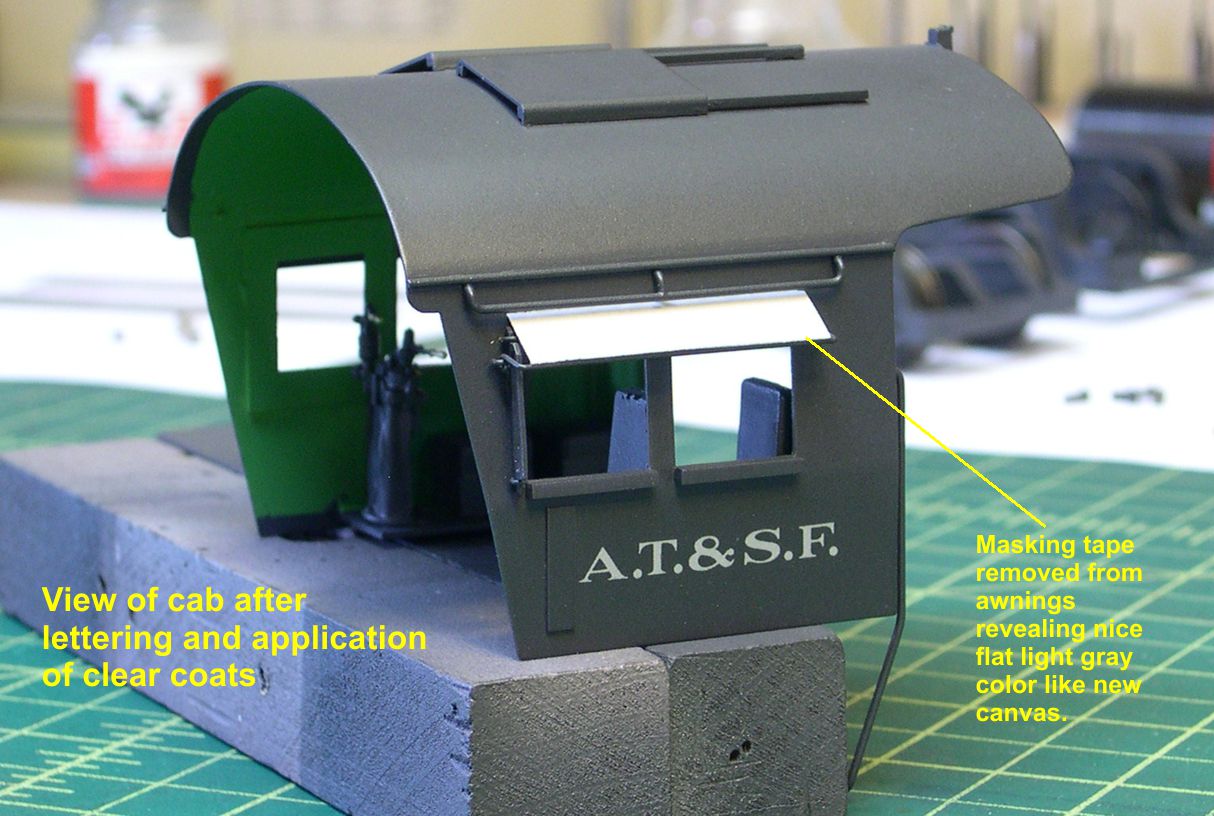
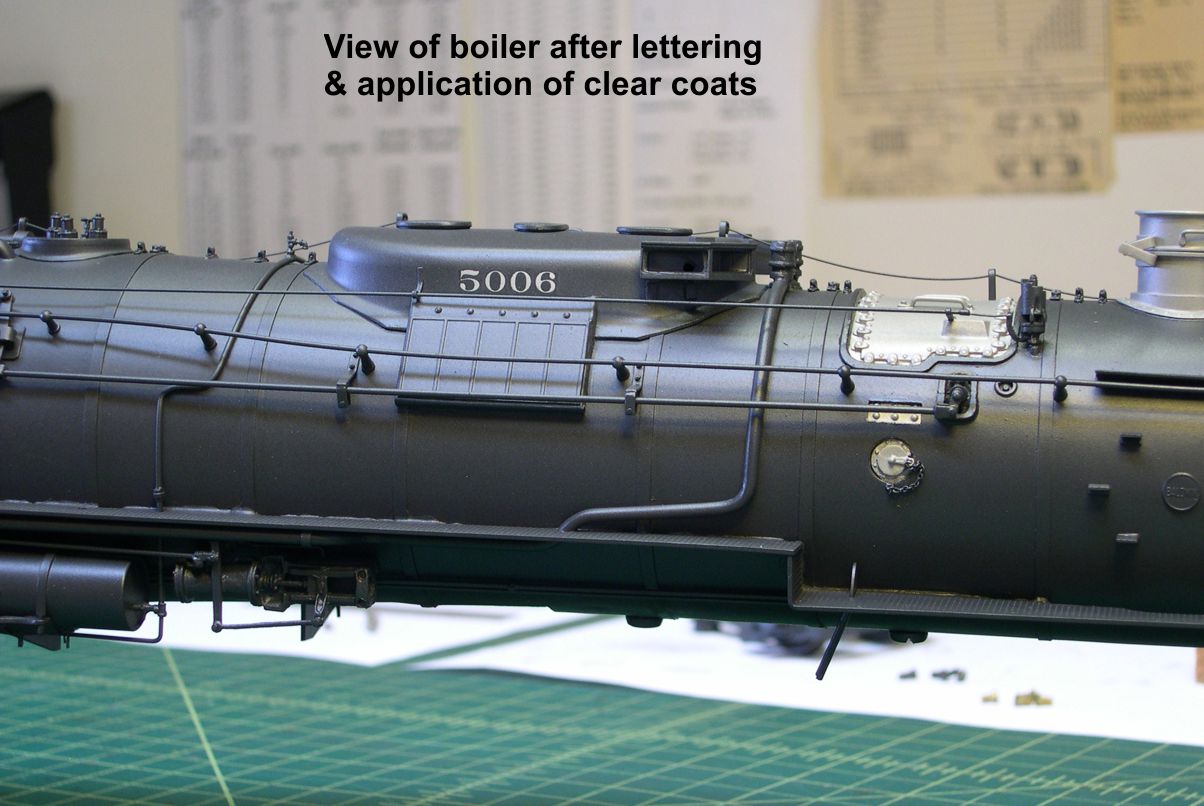
Once all the lettering has been applied and cleaned as above, I airbrush the decaled areas with clear flat to blend the decals into the surrounding areas. Finally, I airbrush clear satin over the entire part to provide a nice base for weathering (or the satin becomes a finish coat in some cases). Photos 37-43 illustrate the way the boiler, cab, tender, and smokebox front look right after the clear coats have been applied. Note in photo 37 that I have now removed the masking tape from the cab window awnings leaving nice flat canvas colored awnings.
paint 37 ⤵
In photo 38, I have noted that the bell will need to be painted brass with the inside of it and the clapper painted red.
paint 38 ⤵
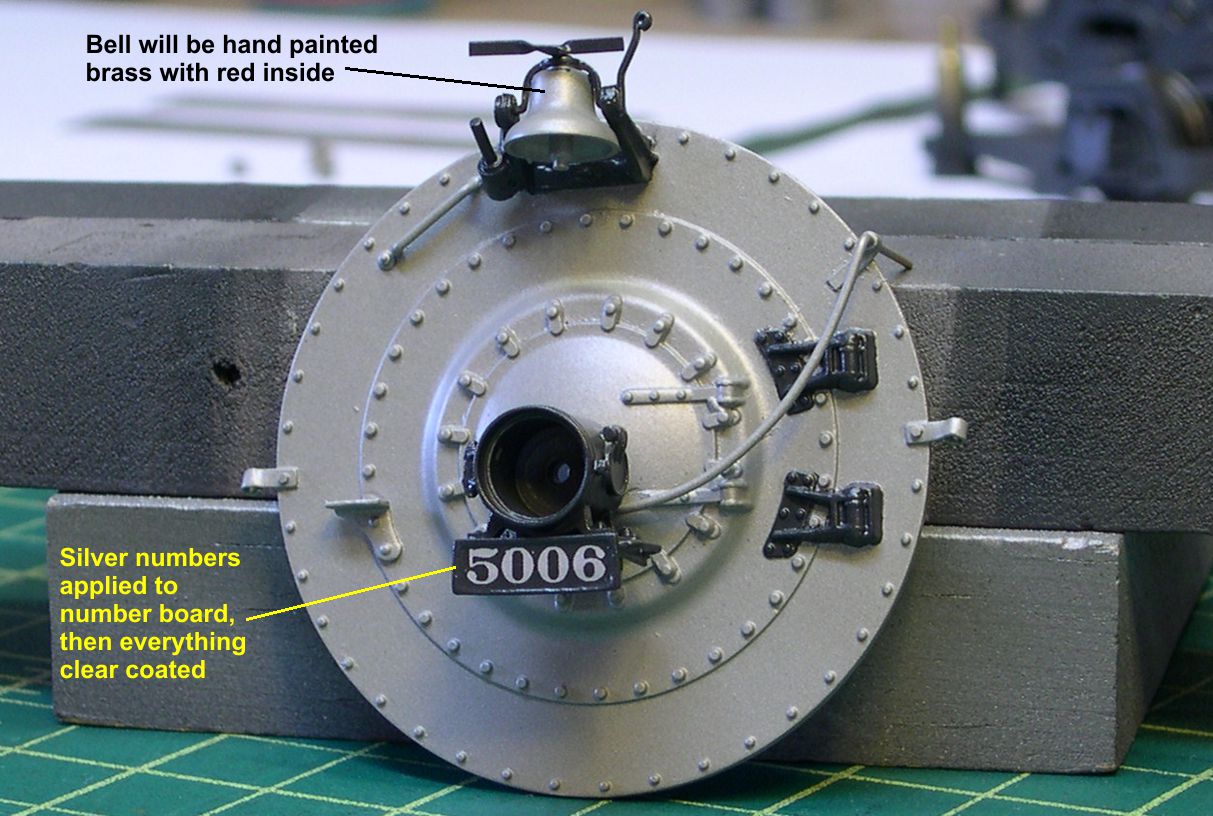
I find that brass does better painted last with no clear coats over it. Clear coats tend to dull the brass color. Also in photo 38, the silver numbers on the number plate below the headlight are really a pretty bright silver. The camera does not pick that up very well. I used metallic silver on my ALPS printer to print that decal. On the Santa Fe , those numbers were highly polished, slightly 3 dimensional castings, so I wanted them to be obviously bright silver.
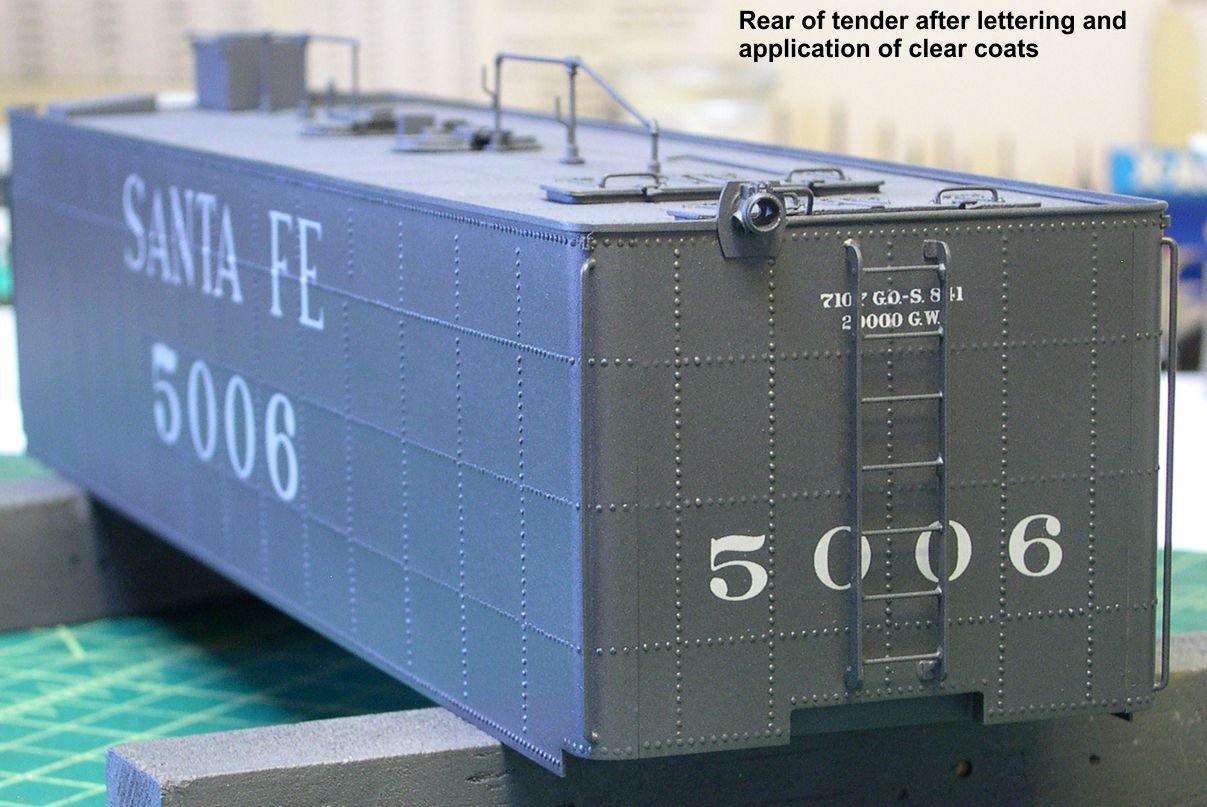
In photo 39, I should mention that I left the top of the tender pretty flat.
paint 39 ⤵
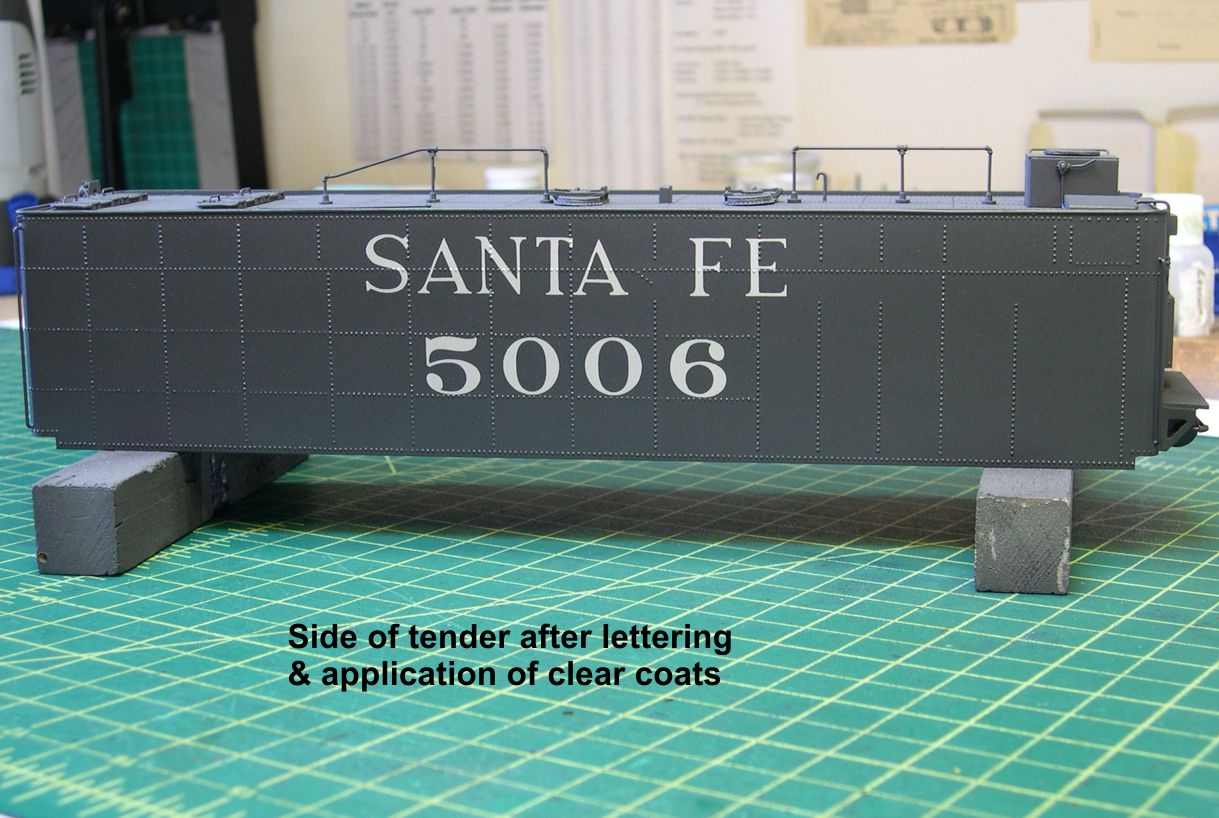
I did not do a clear satin coat on it. The tops of those big tenders got very dirty and flat colored very fast, so I restricted the satin to the sides. The close up of the end of the tender in photo 40 gives a good idea of how thoroughly you can make the decal film disappear using my techniques.
paint 40 ⤵
paint 41 ⤵
In most cases, you cannot see the film, even on those big SANTA FE letters, even when you know just where to look. It is just not visible.
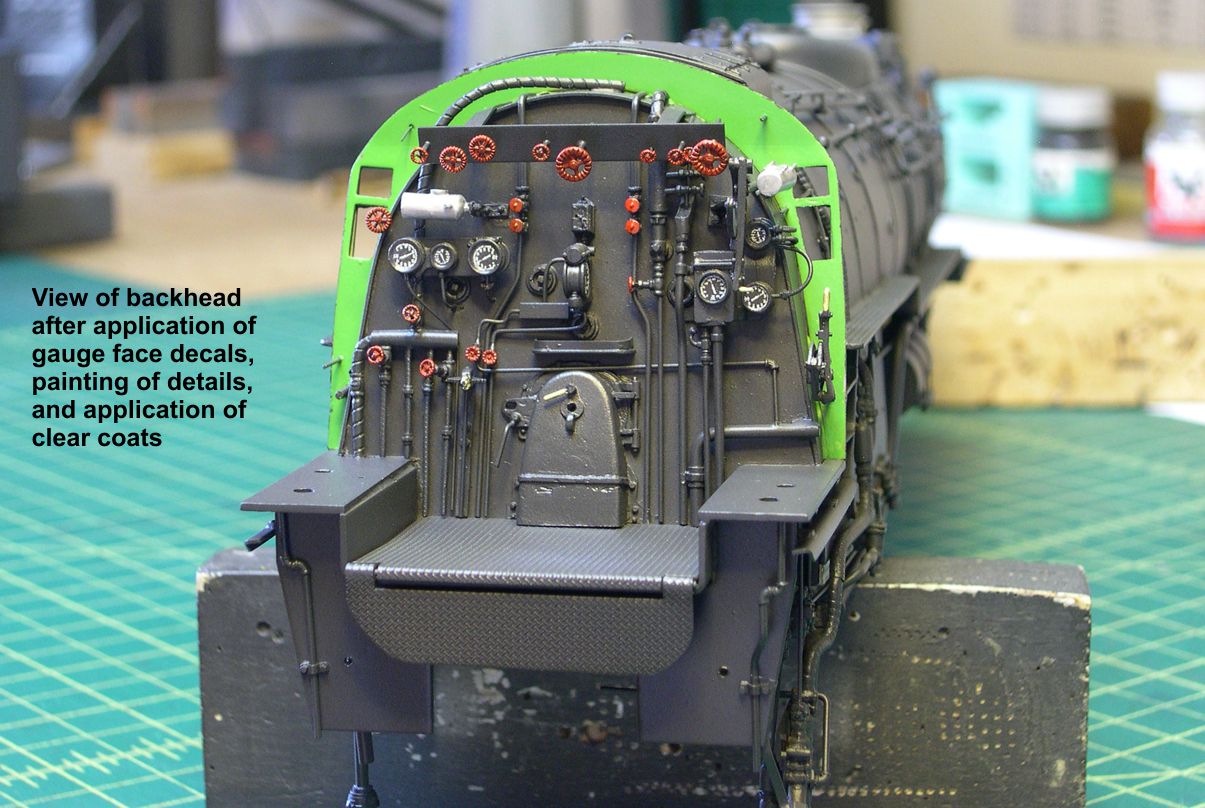
Photos 42 and 43 show how the backhead looks after various details are painted and gauge face decals are applied.
paint 42 ⤵
paint 43 ⤵
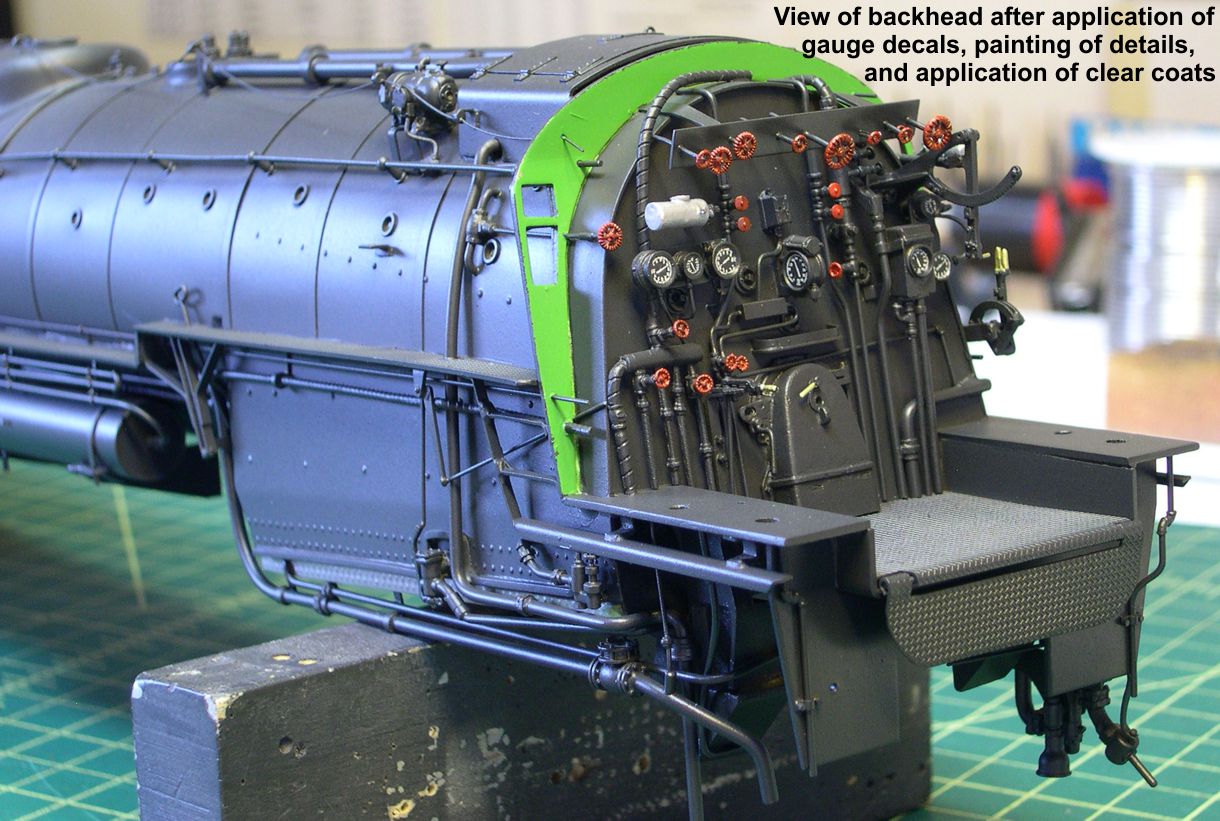
All this is done before the clear coats so everything is protected and blended with the clear coats. And yes, I know not ALL the valve handles were painted red, but I happen to like the way it looks when they are. So rather than do the research to figure which ones should not be red, my shop foreman just paints them all.
The next step is to do a partial re-assembly of both the engine and tender and revisit the paint booth for some airbrushed weathering prior to electrical wiring, glass windows, cab curtains, etc., etc.