AT&SF Class 5001 Passenger Steam – Complete Locos
One of the trickier parts of super-detailing one of these large ATSF engines is replicating the jointed passenger steam pipe that goes back to the tender. There are 3 universal joints, or swiveling steam joints, in that pipe. There are no commercial parts available to make the u-joints, so I have to make my own in order to have connected working steam pipes. Since I have had years of experience putting together the PSC castings for working steam pipes to the trailing truck booster engines on SP models, I have developed my own technique for making similar u-joints in a smaller size for my ATSF models. There are 7 files attached, “Psgr Steam-1 through Psgr Steam-7”, that show how I do this. File -7 is a drawing I developed several years ago and have used since. No point in re-inventing the wheel each time.
passenger steam 7 ⤵
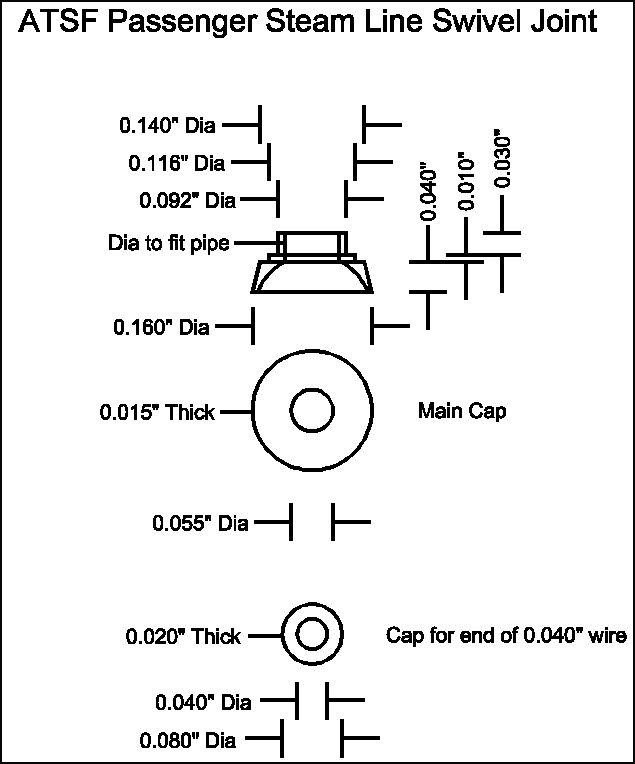
All the parts are turned on my Sherline lathe. Note that the main body is hollowed out to provide a housing for the pivoting parts.
For this project, and in general, the steam pipe is a scale 3″ diameter or 0.063″ brass wire. A start on machining the components is shown in photo 1, where the main housings and retainer caps have been completed.
passenger steam 1 ⤵
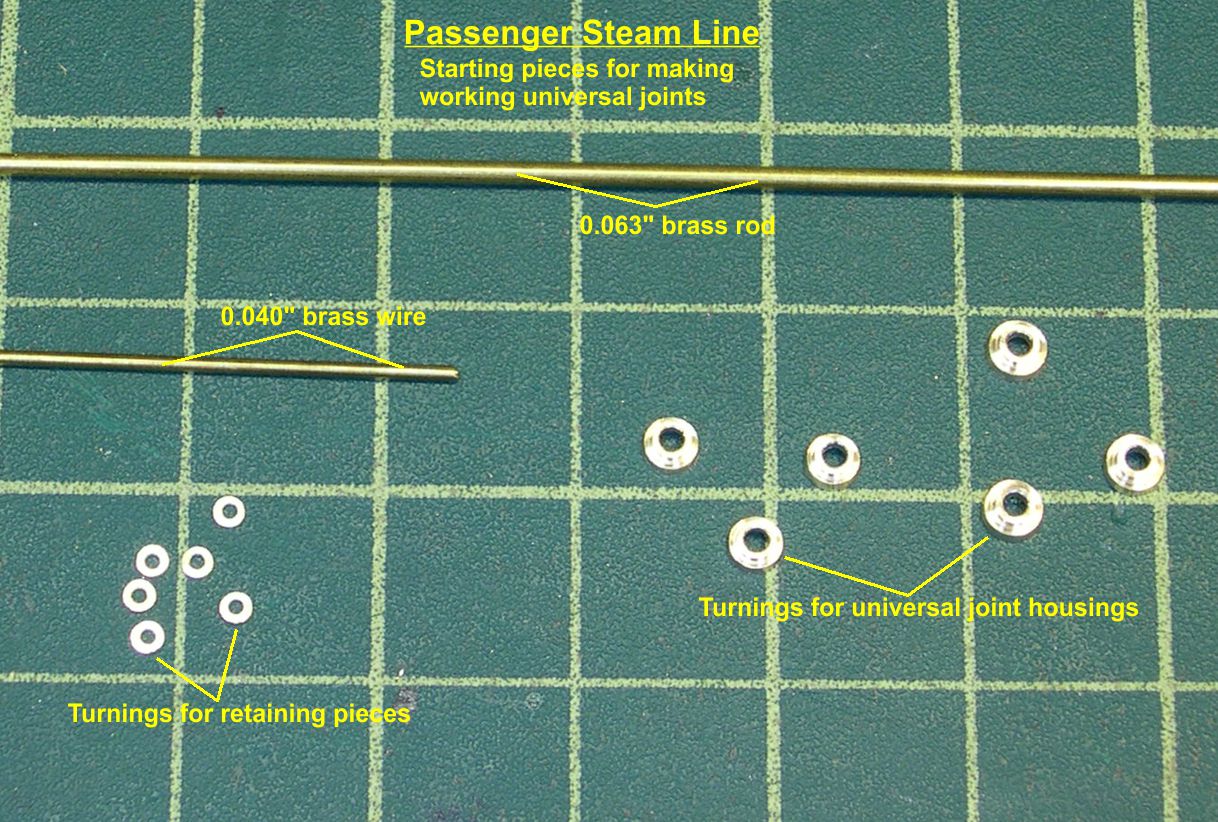
The 0.040″ brass wire will form the pivots held inside the main body by the small retainers. Most of the rest of the pieces are shown in photo 2.
passenger steam 2 ⤵

The insulation stripped off of electrical wire is used to connect the engine and tender by slipping it onto the 0.025″ wire. You have to use insulating material, of course. Otherwise, your nicely built up passenger steam pipe becomes a dead short in operation. In photo 2, the 0.025″ wire has been soldered into the end of the pipe that will go back to the tender. The other wires soldered into the ends of pipes are the 0.040″ pivot pieces. Also new in this photo are the caps for the housings.
Photo 3 shows how I assemble the pivot points.
passenger steam 3 ⤵

The end caps are slipped onto the 0.040″ pivots, then a piece of cardstock with a 0.040″ hole drilled in it is slipped over that as a solder block. The cardstock allows a larger gap between soldered parts than thin paper does. You need the larger gap so the pipes can swing apart at an angle. Next, the small retainers are slipped onto the 0.040″ wire and soldered in place. Finally, the excess wire is clipped off and filed flat on top. Now the u-joints are ready for assembly.
Photo 4 shows the final assembly of the u-joints and make up of the passenger steam pipes.
passenger steam 4 ⤵
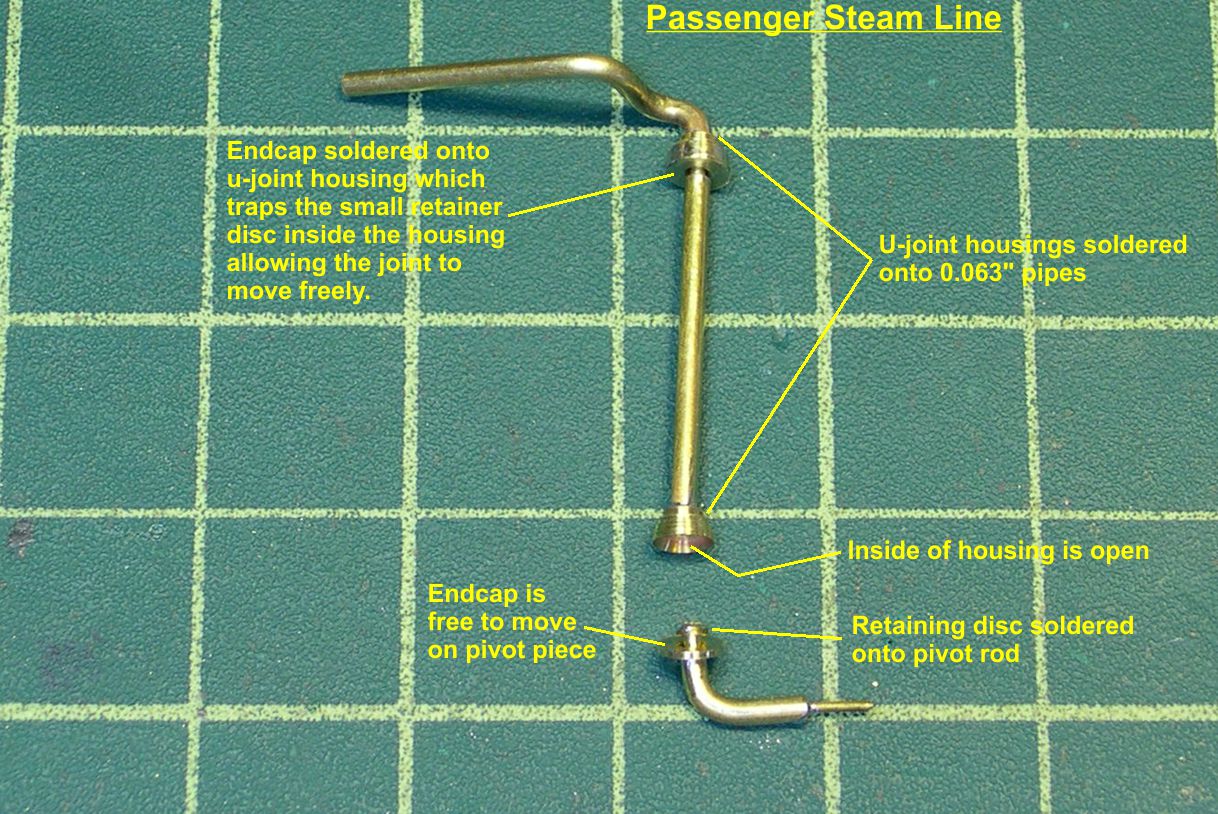
That top pipe has to be carefully bent and fitted into the area under the cab where it goes. The bends get it behind some other pipes as required. Then the main housing for a u-joint is soldered to the end of the pipe. The pipe only goes into the top part of the housing leaving the hollow inside of the housing clear for movement of the pivot. Then the assembled pivot is inserted into the housing and the cap is soldered to the edges of the housing. Some delicate soldering is required here to avoid soldering everything solid. The vertical pipe between the two u-joints has to be carefully sized to make sure the whole assembly comes out at the right height above the rail. Measure several times before cutting on this. A LOT of rework is necessary if you make a mistake on this length. (Guess how I know that.)
Photo 5 shows the completed passenger steam pipe assembly installed on the model.
passenger steam 5 ⤵
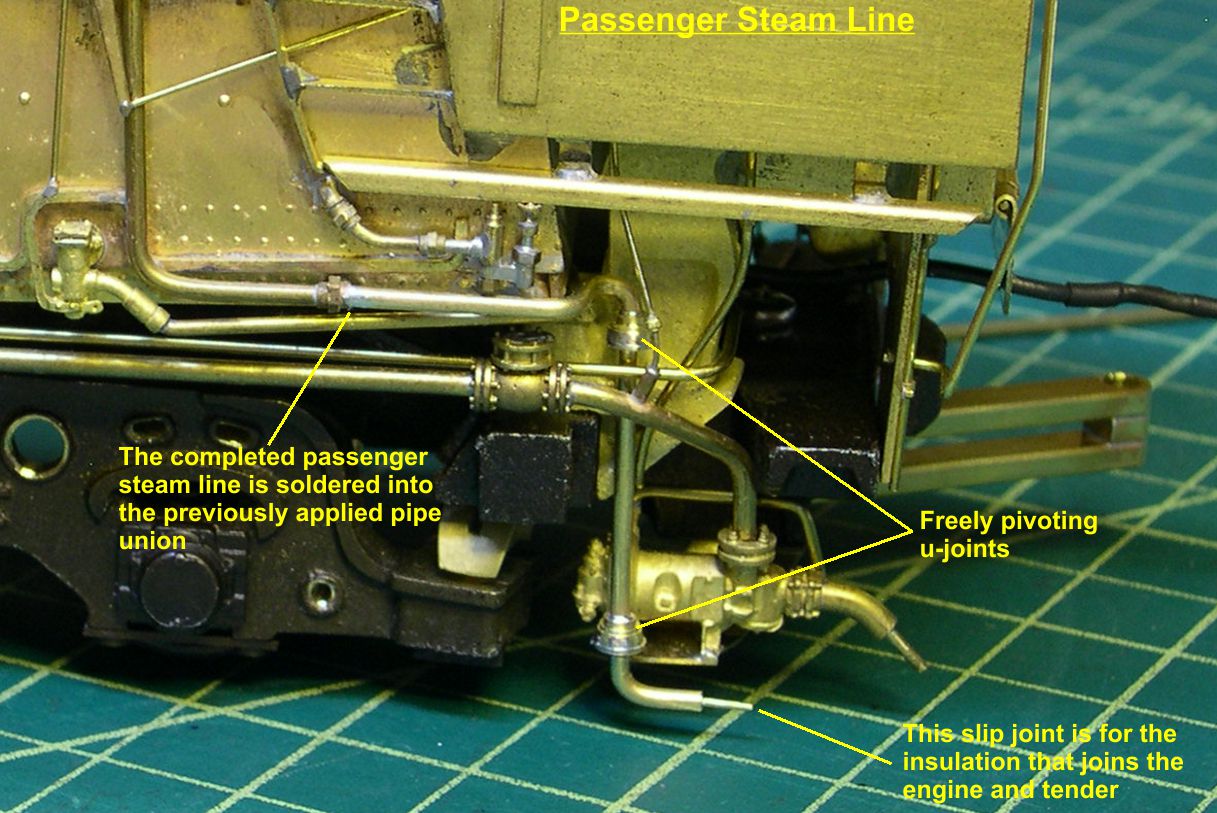
I had previously installed the upper end of the pipe and left it terminated in a pipe union casting from PSC. That union is used to connect the steam line assembly to the engine as shown. In photo 6, I have shown how the passenger steam pipe pivots forward and reverse when the engine goes through curves.
passenger steam 6 ⤵

Remember that there is a 3rd u-joint on the tender that helps with the needed flexibility. I have installed a number of these steam pipes, and they operate nicely and are reliable.
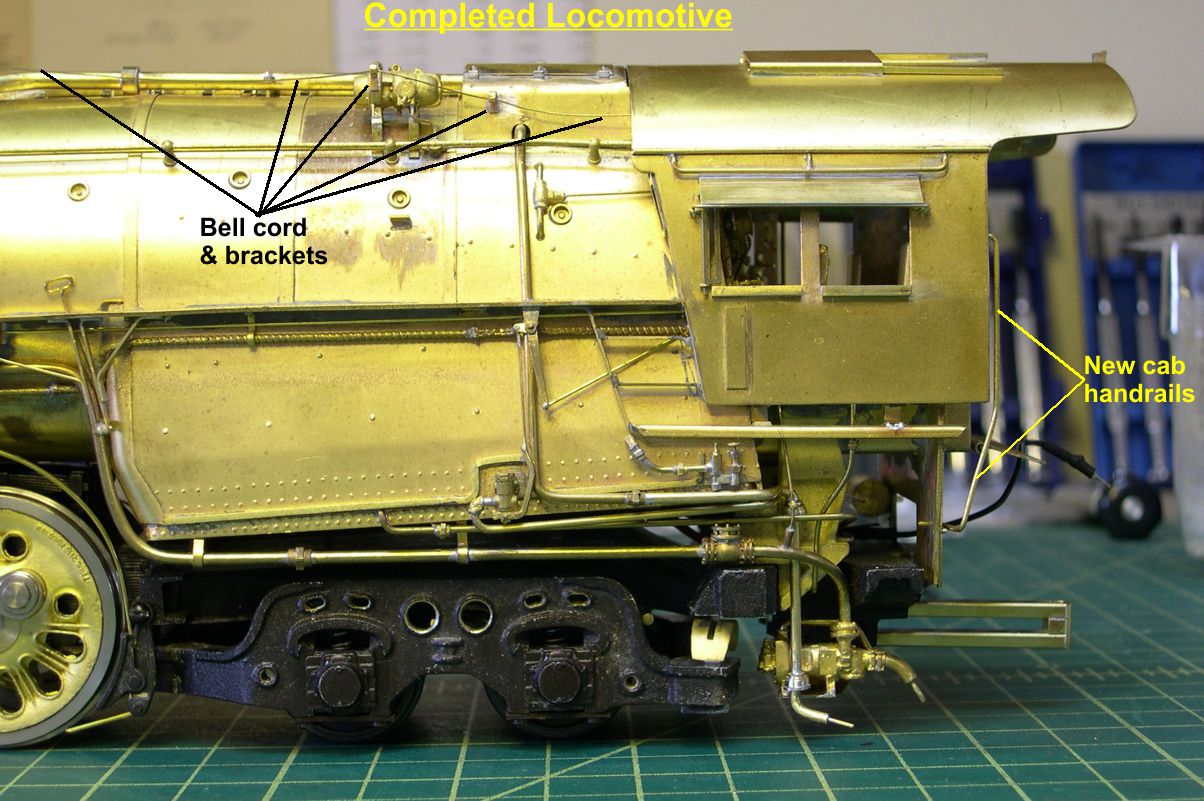
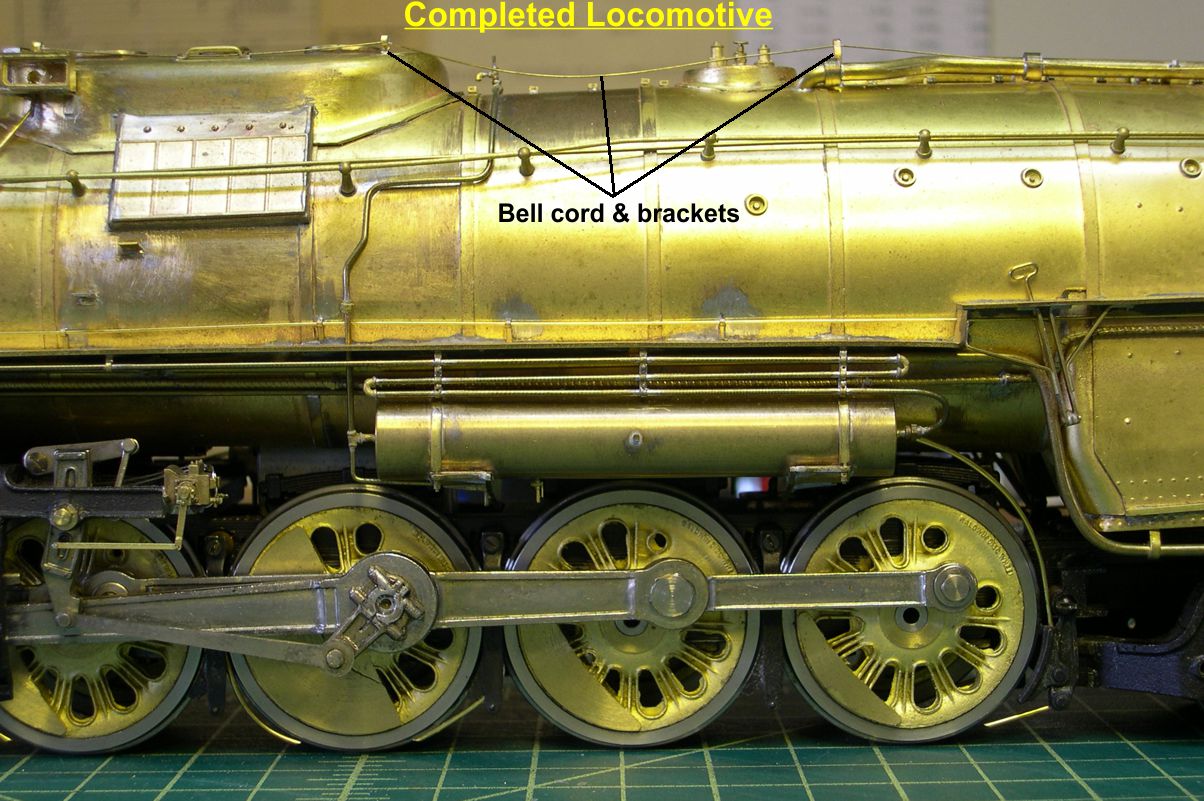
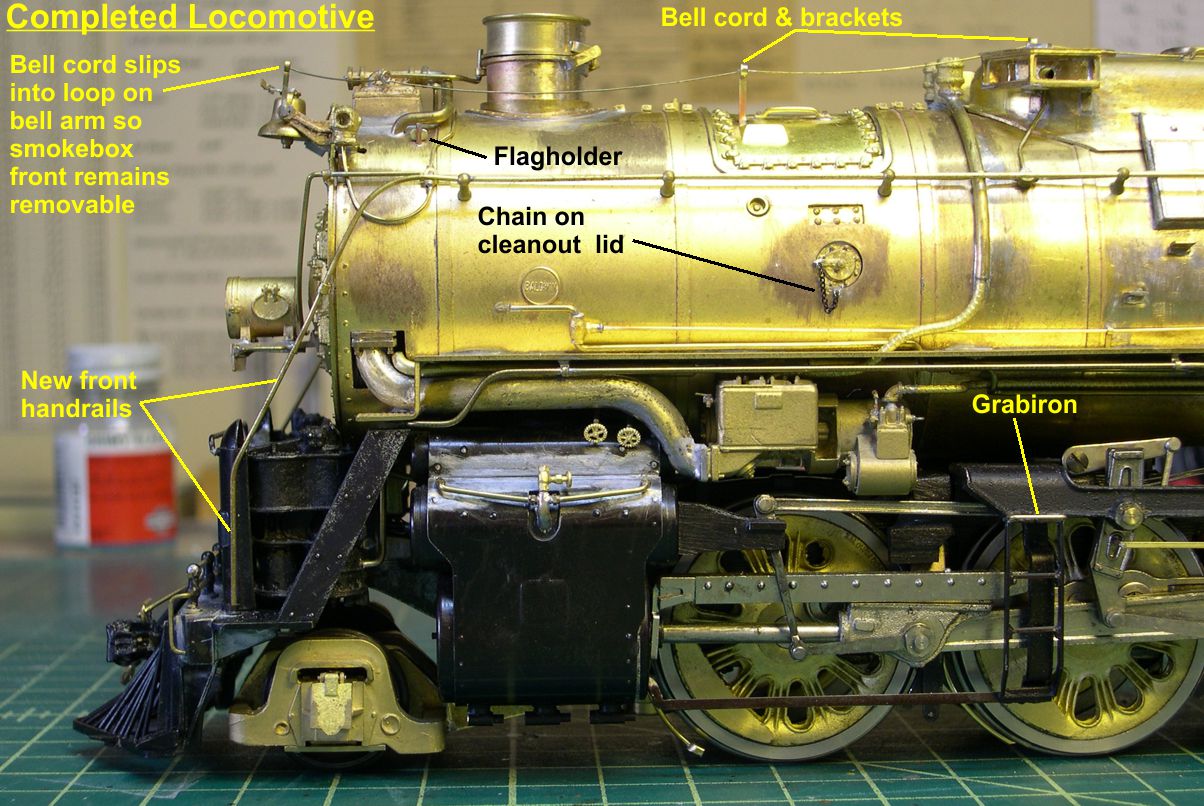
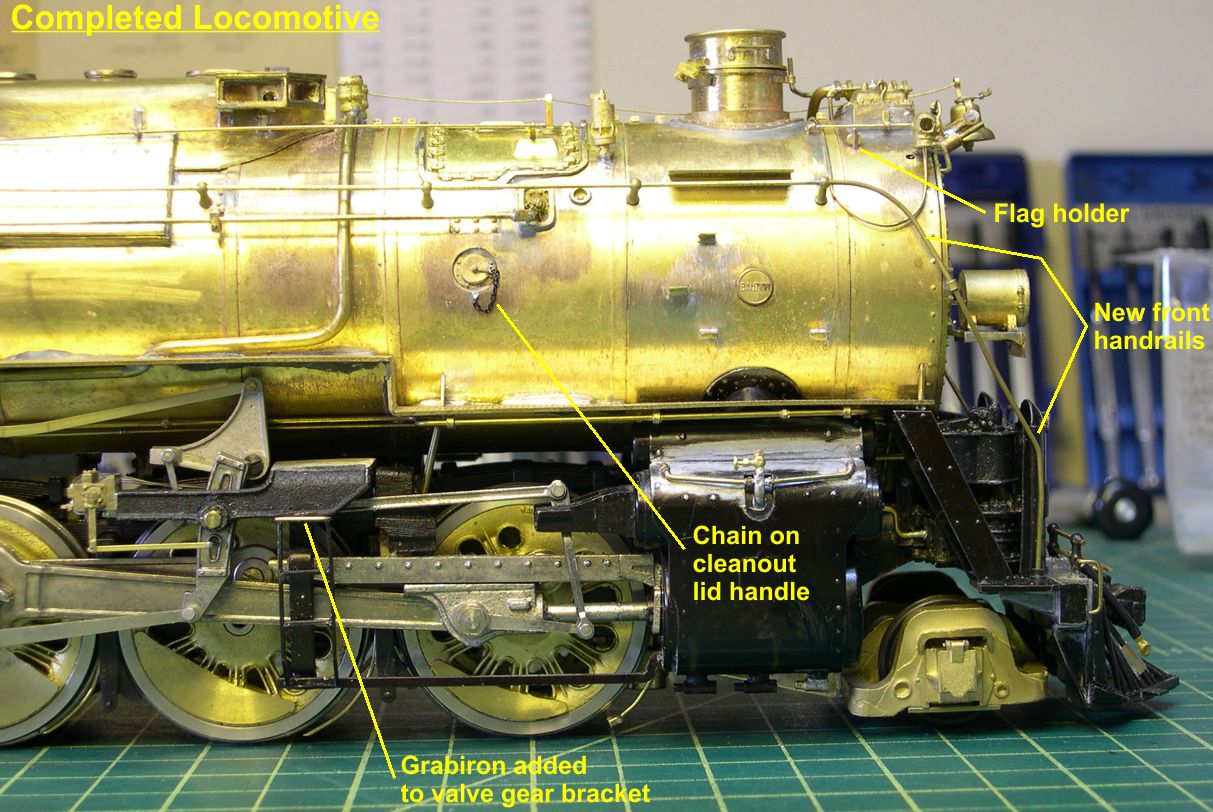
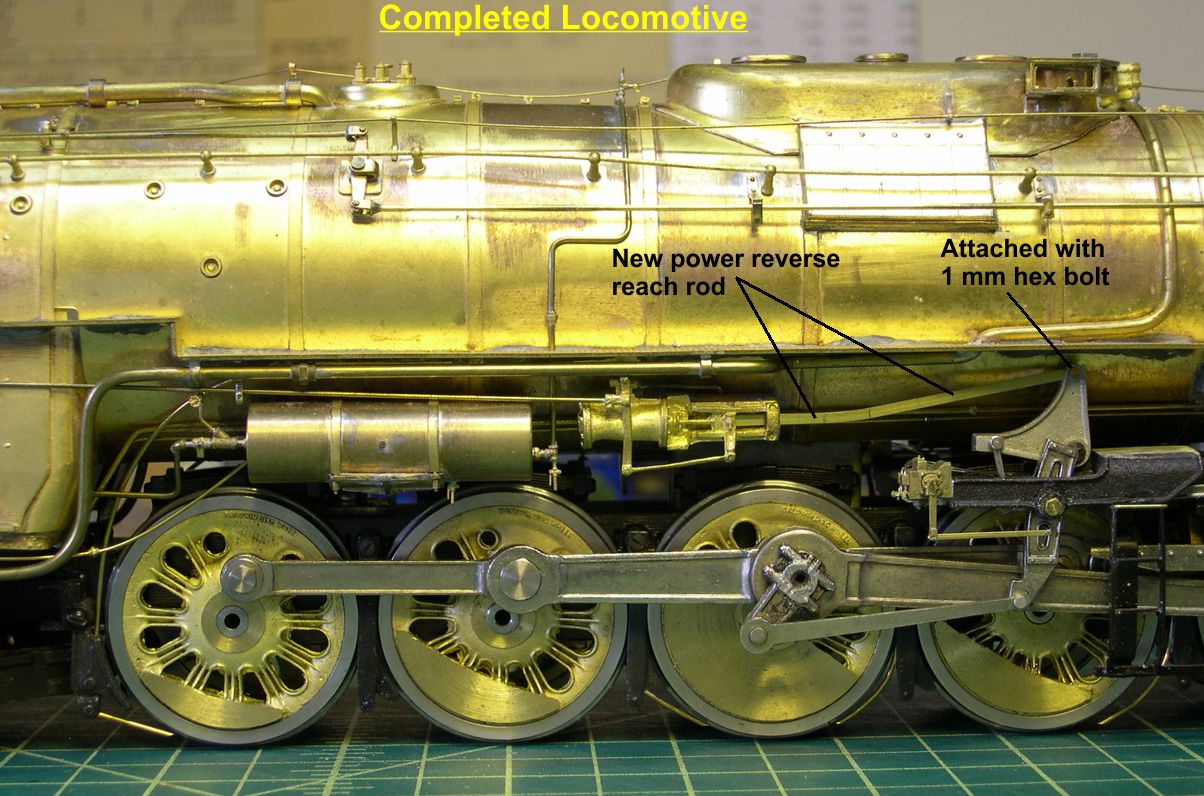
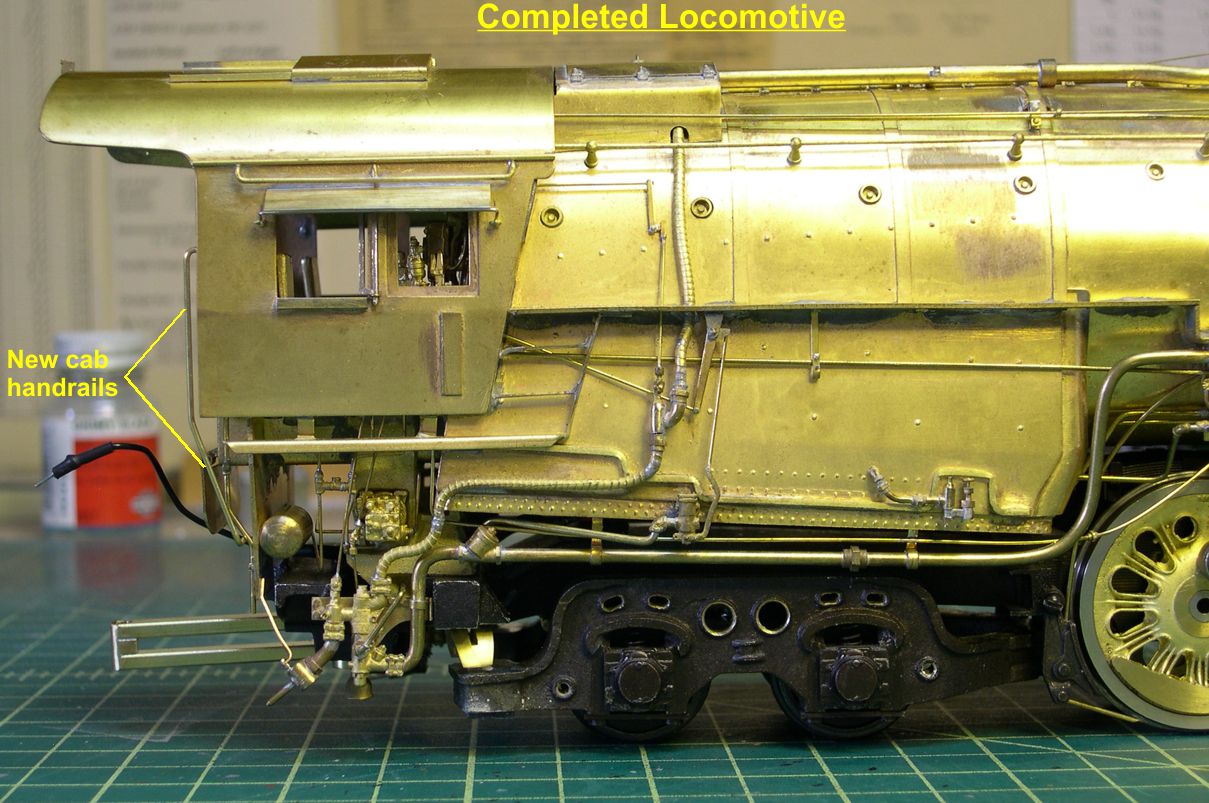
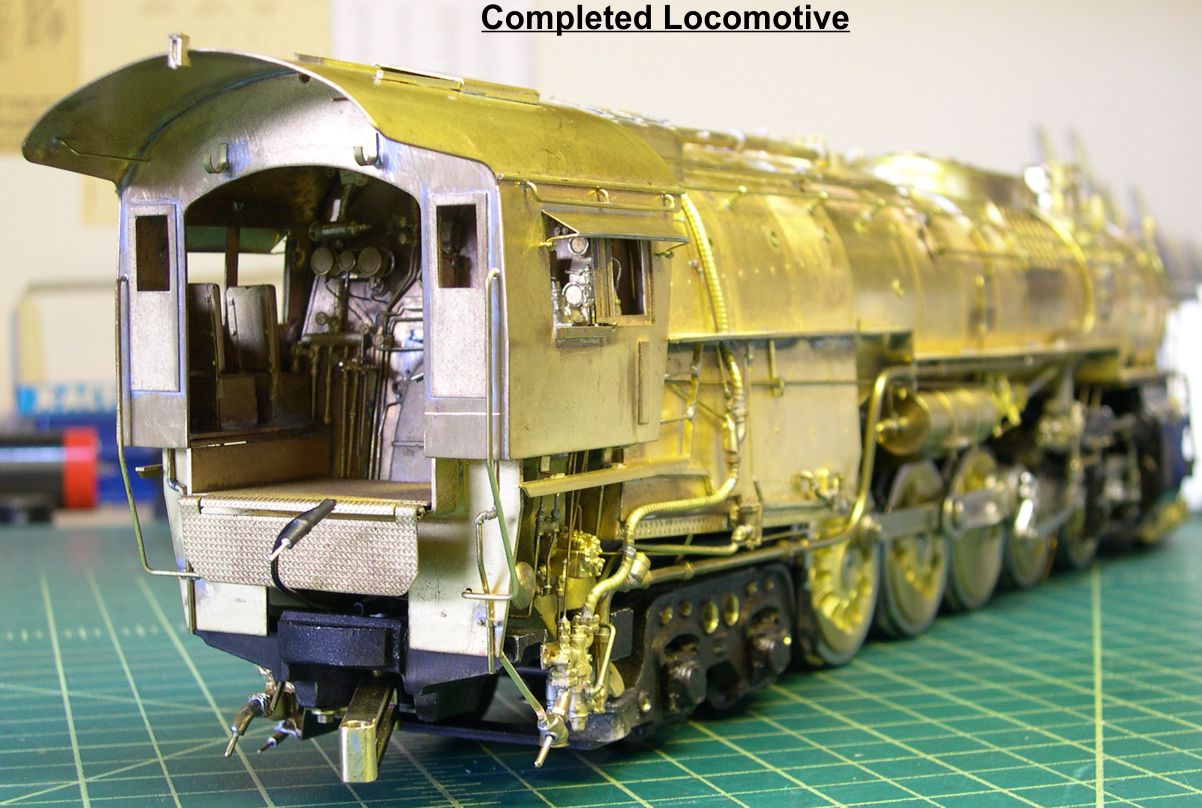
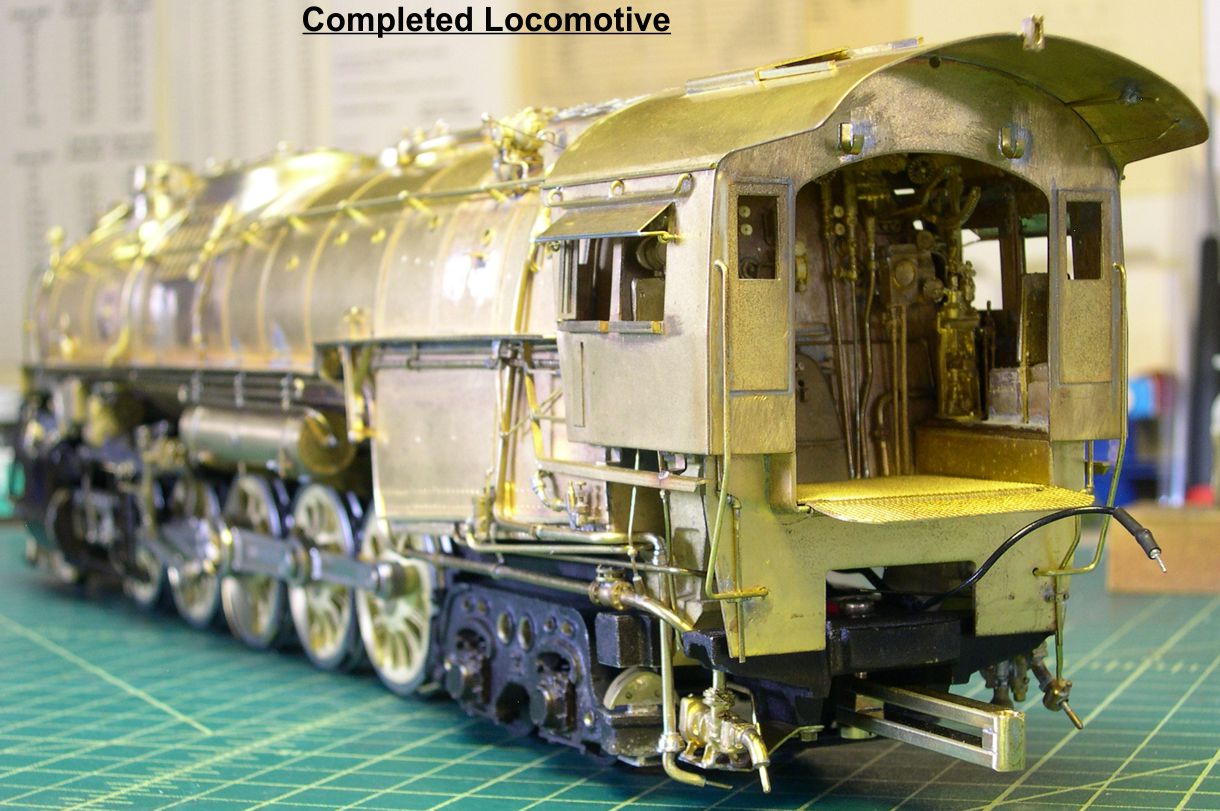
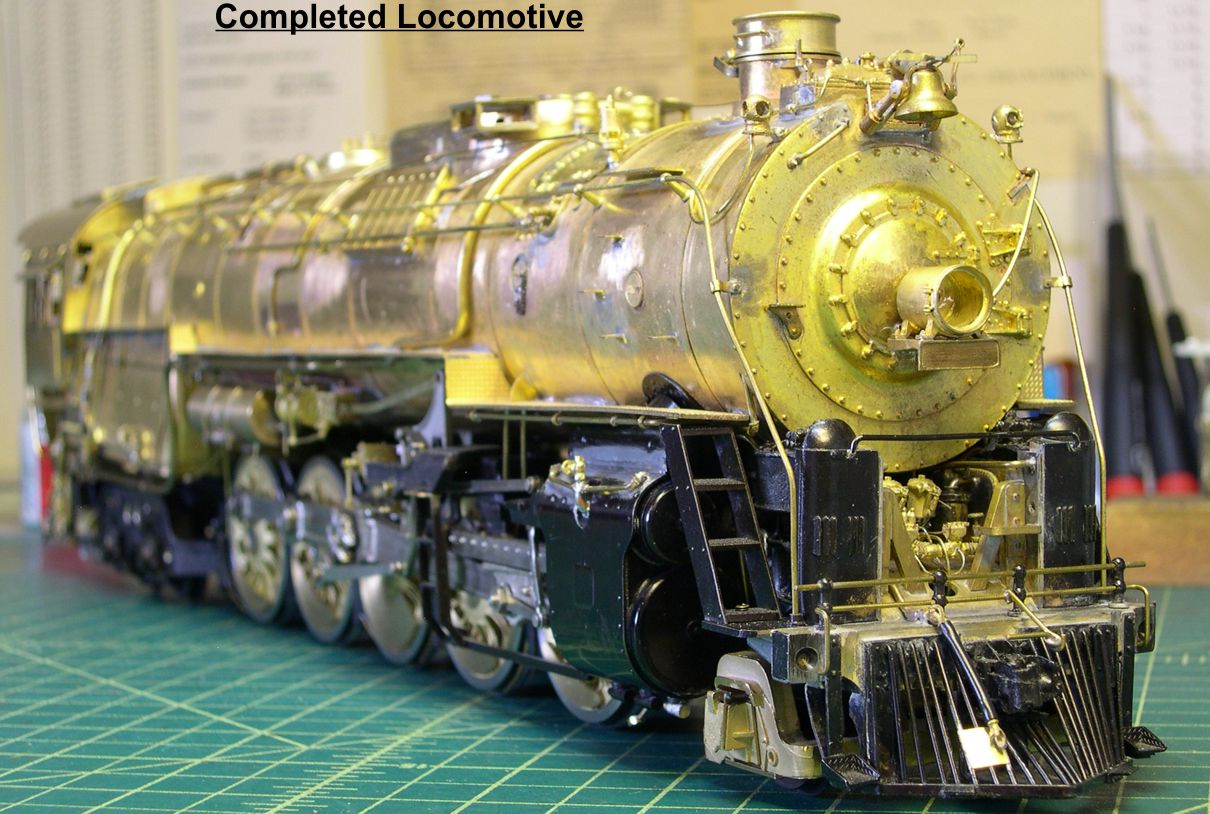
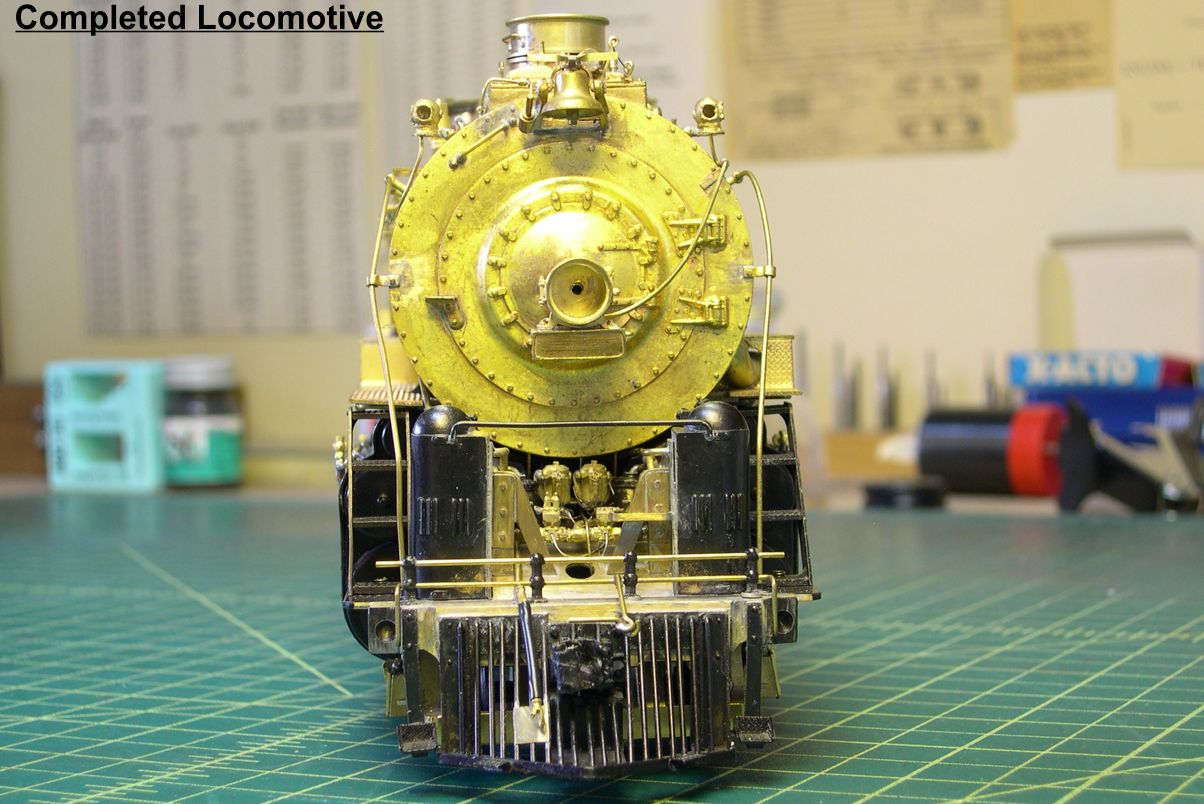
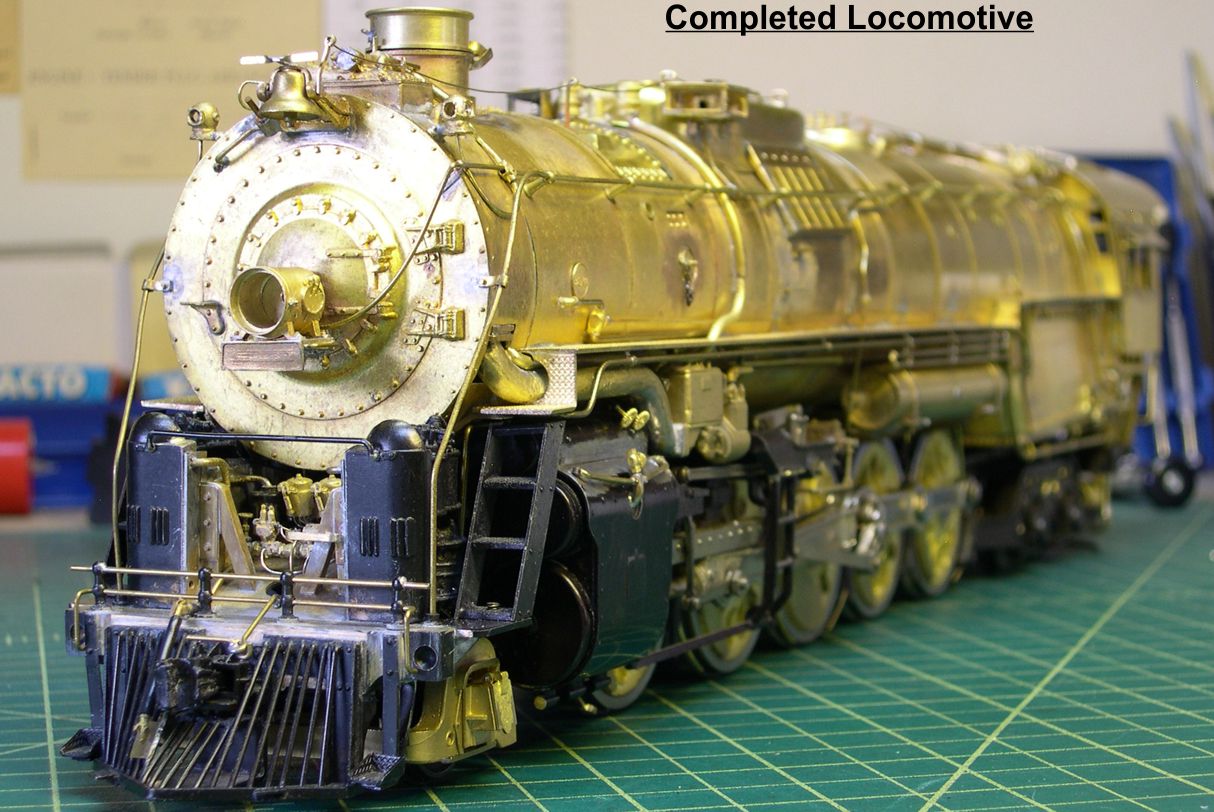
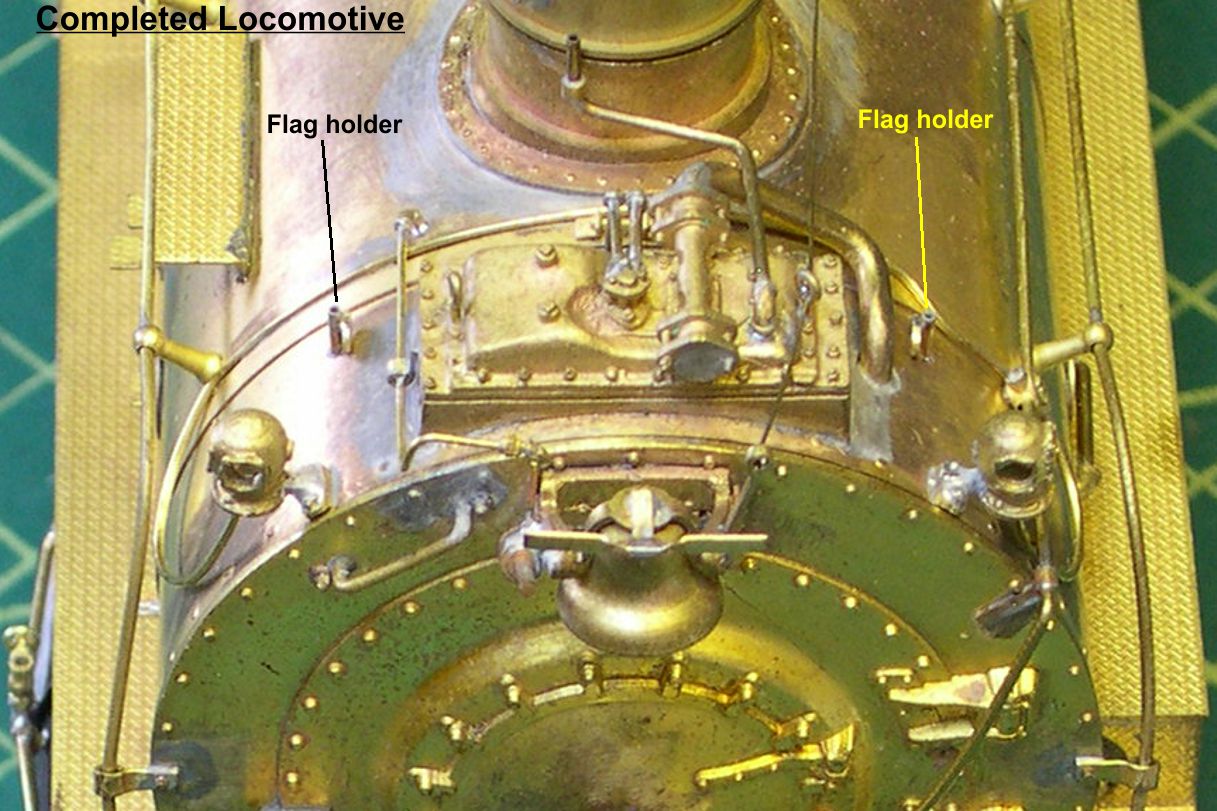
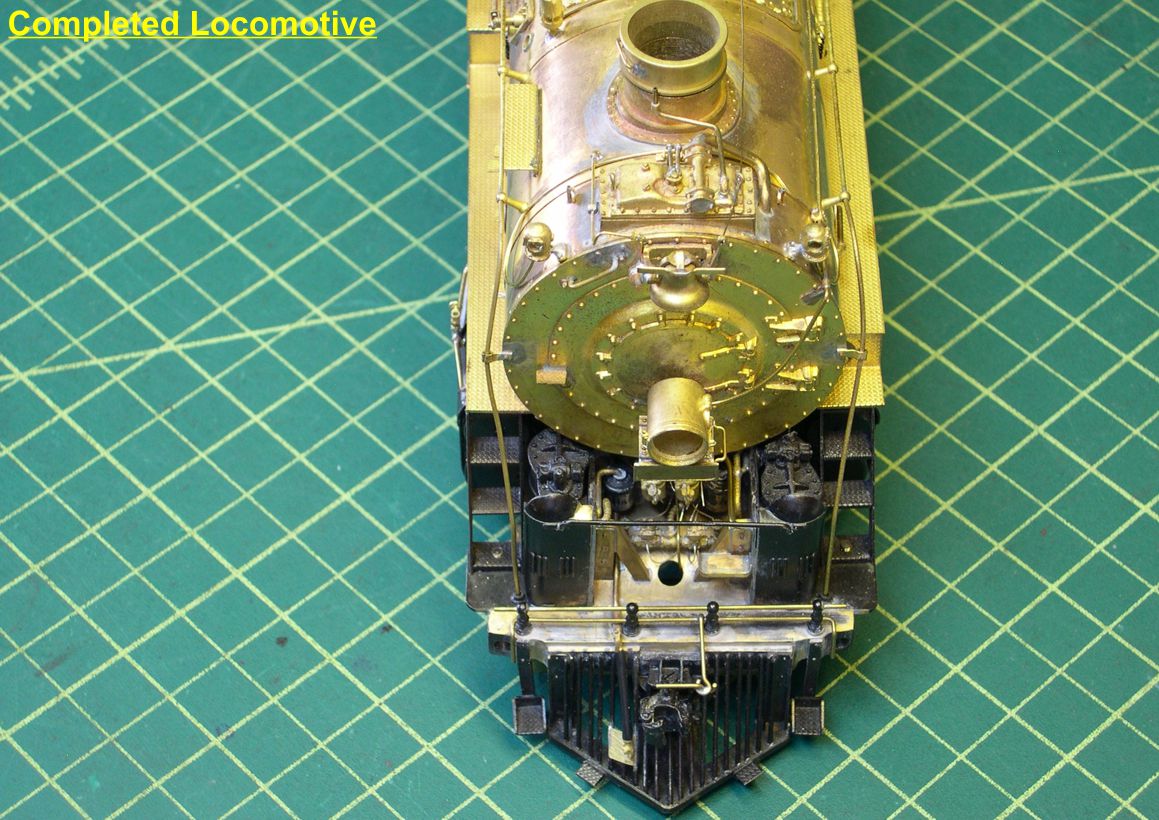
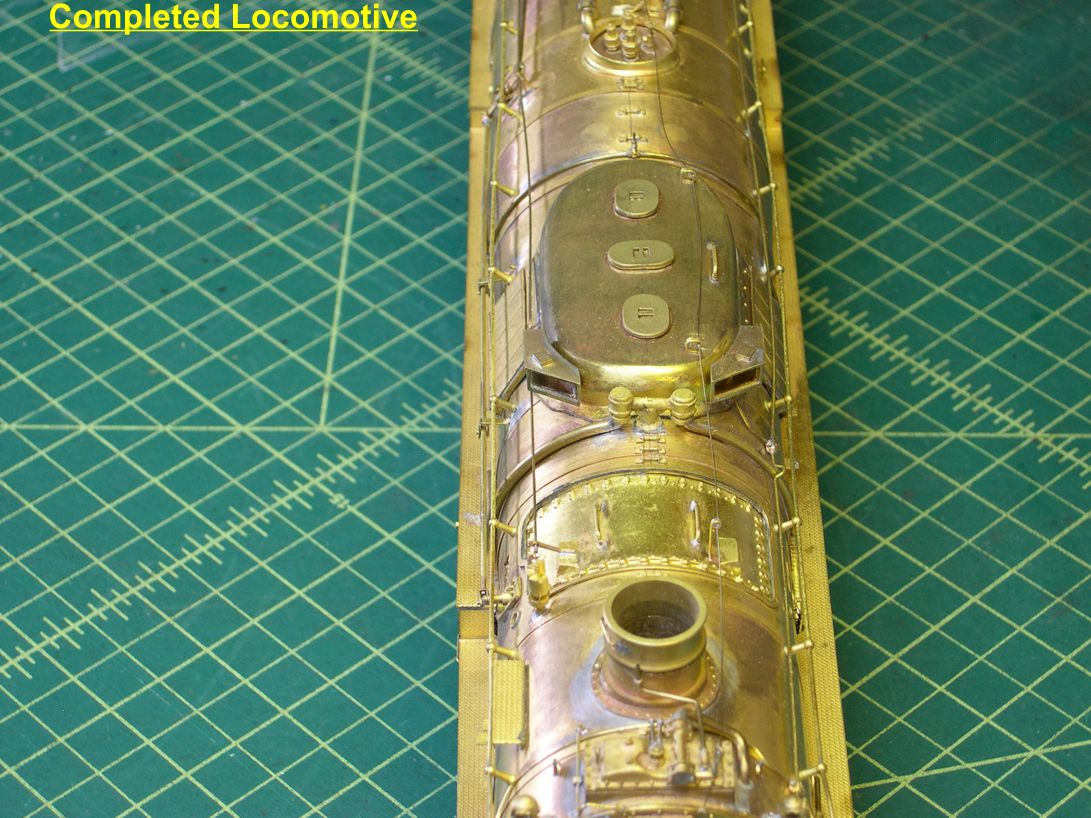
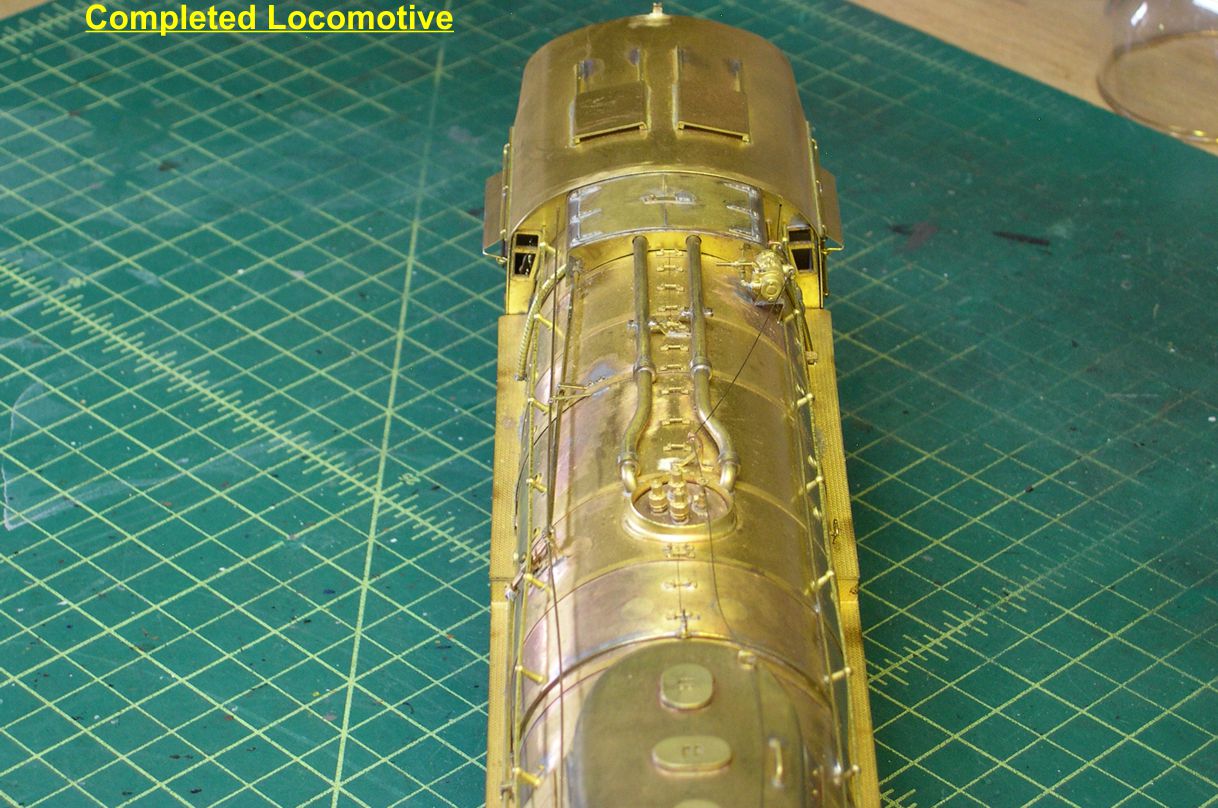
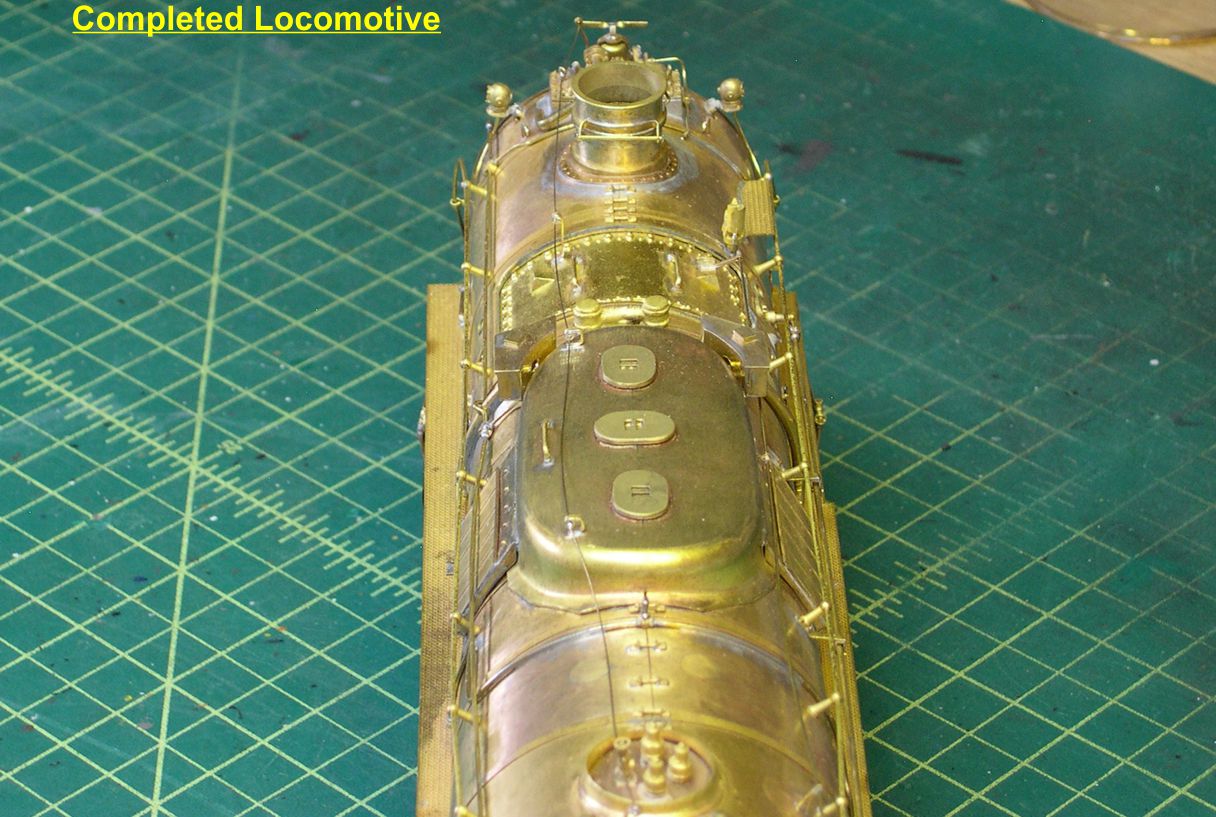
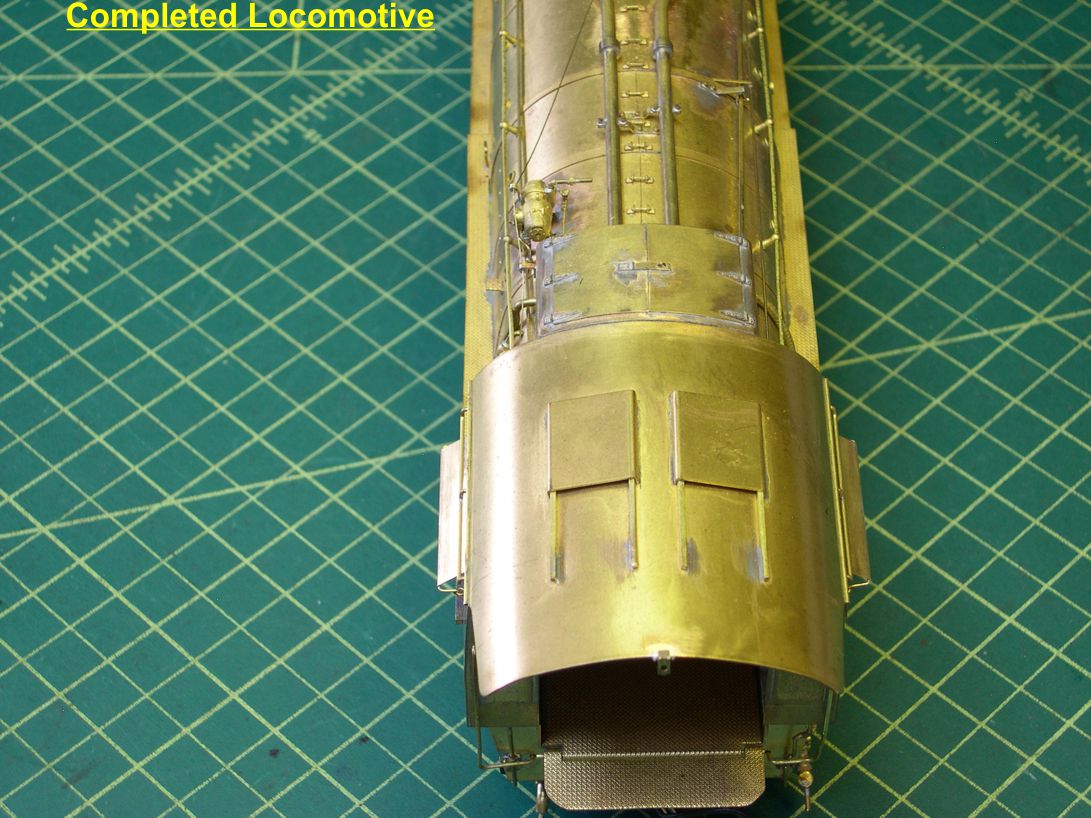
I have attached an additional 19 photos in the series “Complete Loco-1 through Complete Loco-19”. As implied by the titles of these photos, the locomotives are now complete, and I will be moving on to the tenders next. In this series of photos, I have annotated several additional items I added before declaring completion. These include new cab handrails, new front handrails, the bell cord and its support brackets, flag holders up near the Worthington FWH, grabirons at the top of the ladders on the valve gear brackets, correct power reverse reach rods, and the small chains connected to the cleanout lid handles. The flag holders are actually hollow tubes, so it would be possible to insert flags in them. The power reverse reach rods are attached to the valve gear with 1 mm hex head bolts from Scale Hardware. That single wire sticking out from under the gangway is for hooking up the tender for DC testing. The engines will eventually get DCC and sound after painting. Mostly, the 19 photos are a record of how the models looked just before painting.
complete loco 1 ⤵
complete loco 2 ⤵
complete loco 3 ⤵
complete loco 4 ⤵
complete loco 5 ⤵
complete loco 6 ⤵
complete loco 7 ⤵
complete loco 8 ⤵

complete loco 9 ⤵
complete loco 10 ⤵
complete loco 11 ⤵
complete loco 12 ⤵
complete loco 13 ⤵
complete loco 14 ⤵
complete loco 15 ⤵
complete loco 16 ⤵
complete loco 17 ⤵
complete loco 18 ⤵

complete loco 19 ⤵
Now it’s on to the tenders.