AT&SF Class 5001 Electric Cables – Whistle – Cold Water Pump
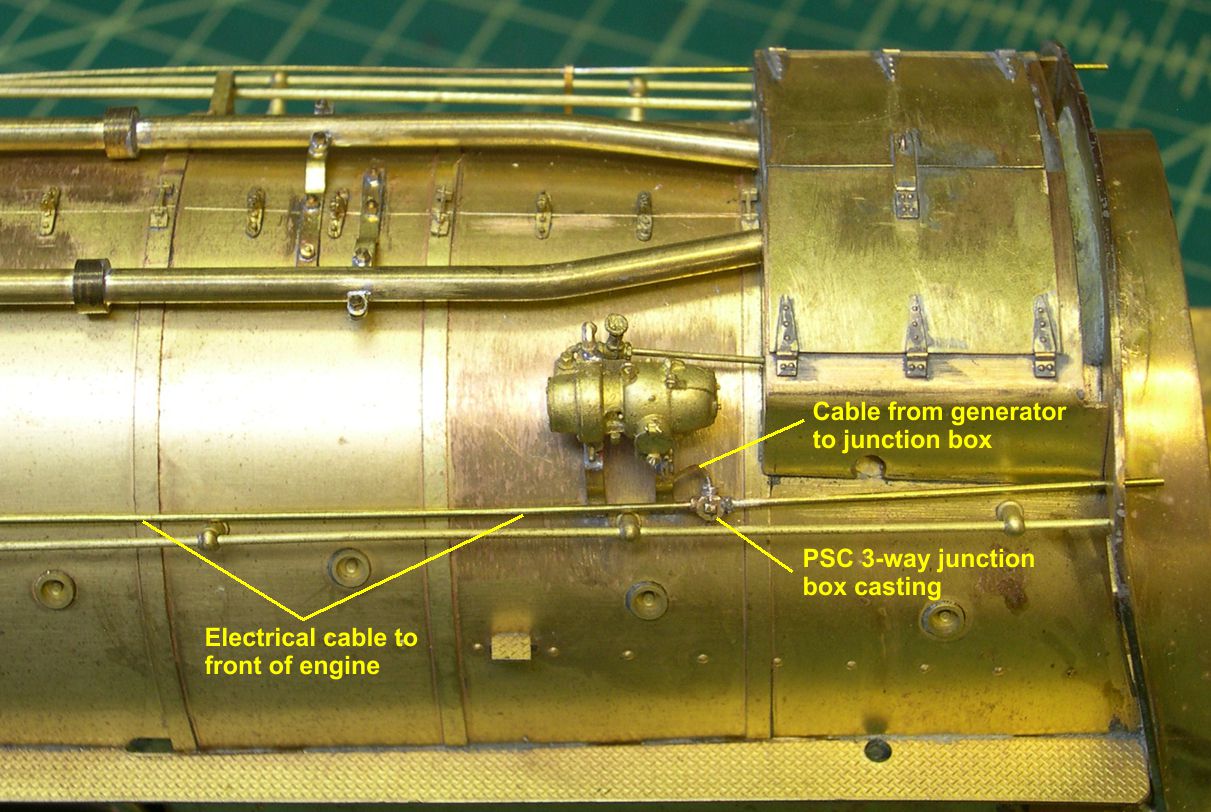
In this installment of the Texas saga, I installed the electrical cables running along the boiler to the class lights, headlight, etc. I used PSC junction box castings for the 3 junction boxes located along the boiler. As seen in photos “Elec Cable-1, 2, and 3”, the cable form the generator goes into a 3-way junction box connecting to the cab and the front end of the locomotive.
electric cable 1 ⤵
electric cable 2 ⤵
electric cable 3 ⤵

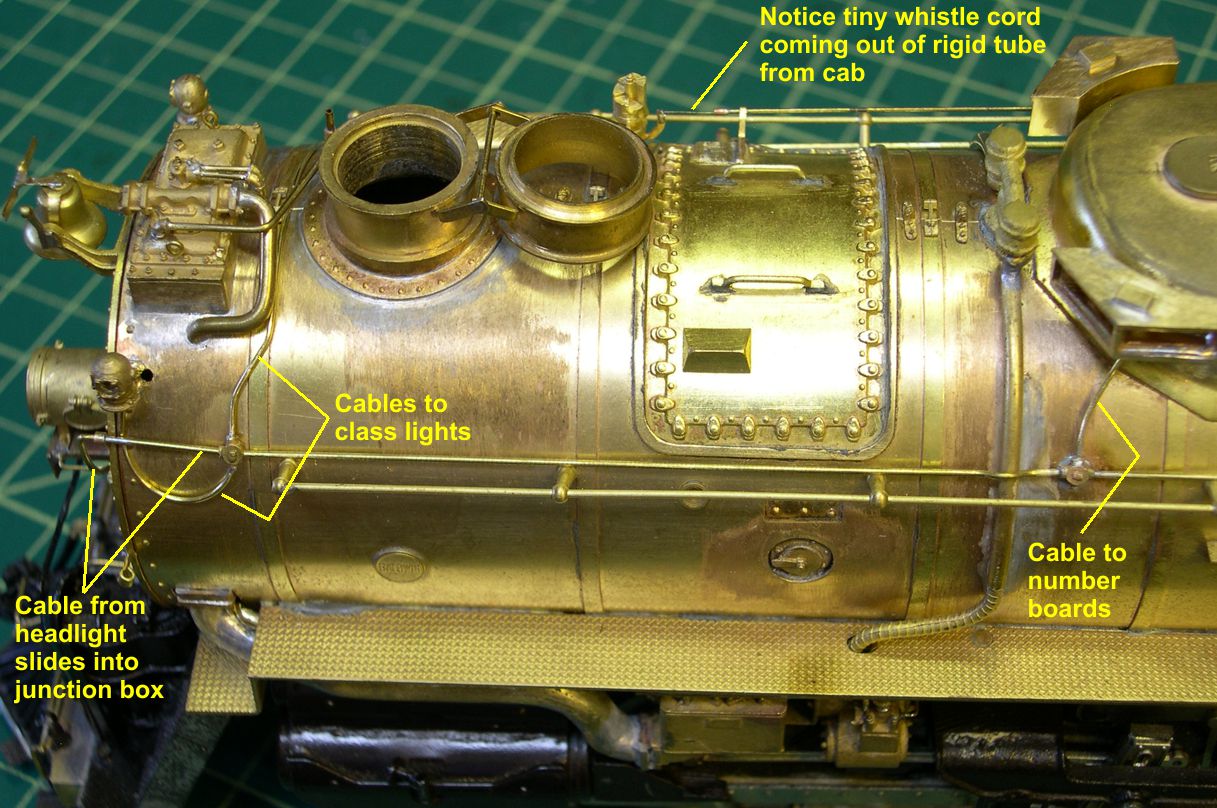
On the way to the front end, another junction box sprouts a cable for powering the number boards. At the front end, a 4-way junction box provides cables to the headlight and both class lights. The class lights are new PSC castings with modified mounts. Note that the cable from the headlight just slips into the junction box so the smokebox front can remain removable.
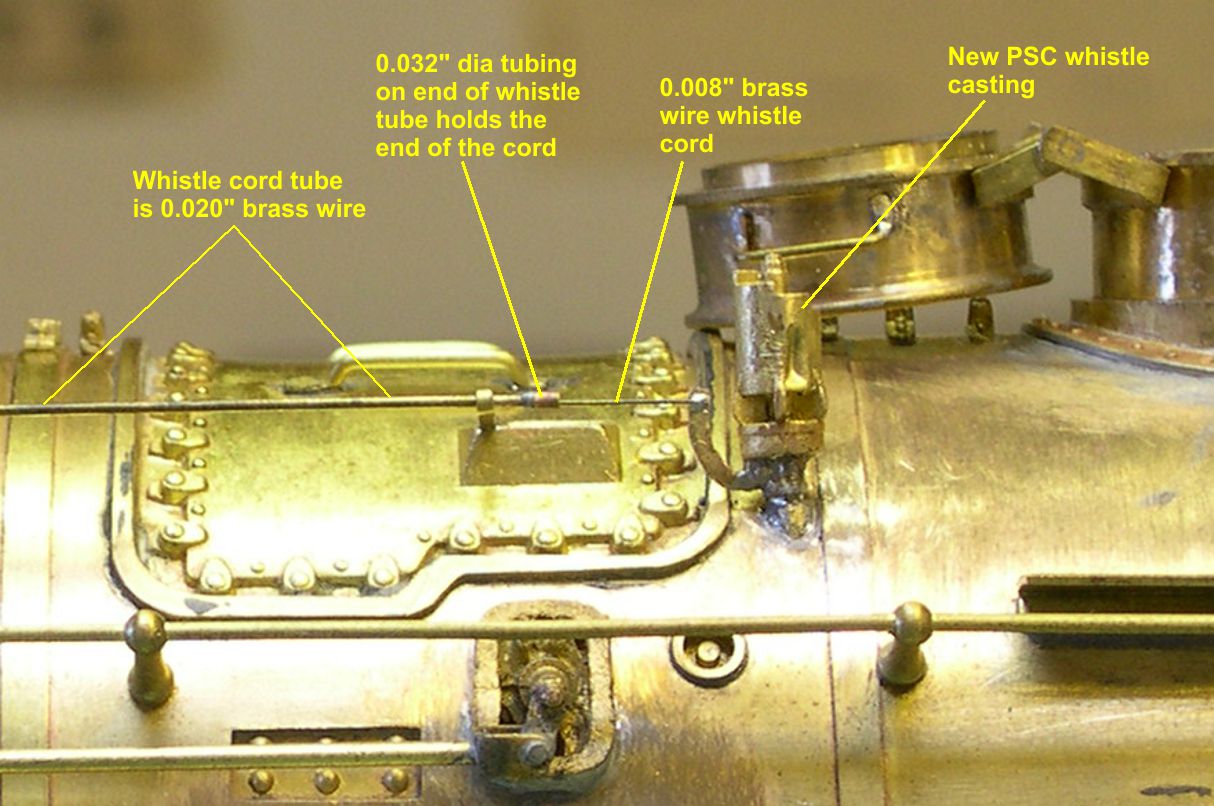
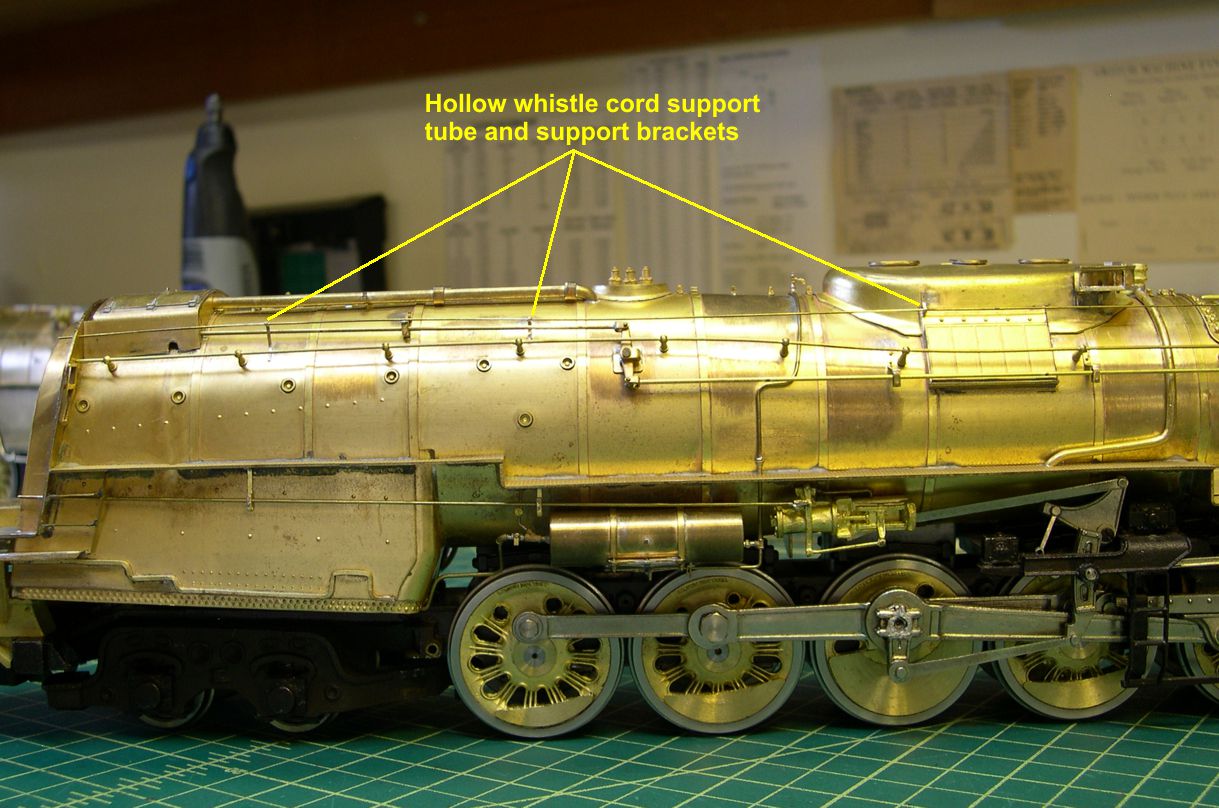
On the right side of the boiler, I added the new PSC whistle casting and the whistle cord with its supports. I was surprised by what I saw in several photos of these 5001 class engines. I had always thought the rods going to the whistles of Santa Fe engines were just solid reach rods. Turns out I was wrong. They are actually hollow tubes that support the whistle cord. In many cases, the hollow tubes end so near the whistle it looks as if they are connected directly to it. However, after the 5001 class whistles were moved forward, the tubes were ended about a foot back of the whistle activation lever, and one can plainly see the whistle cord coming out of the hollow tube and connecting to the whistle lever. There was a short section of larger diameter tubing right at the end of the long tube. I represented that with a short section of 0.031″ thin wall brass tubing, so the end of the tube actually appears hollow. The 0.008″ whistle cord rests in that hollow section so it appears to come out of the hollow tube. Photos “Whistle-1,2,and 3” show the new whistle and detailed whistle cord arrangement.
whistle 1 ⤵

whistle 2 ⤵
whistle 3 ⤵
(Gad! When I think of all the ATSF whistle cord arrangements I’ve done wrong . . .)
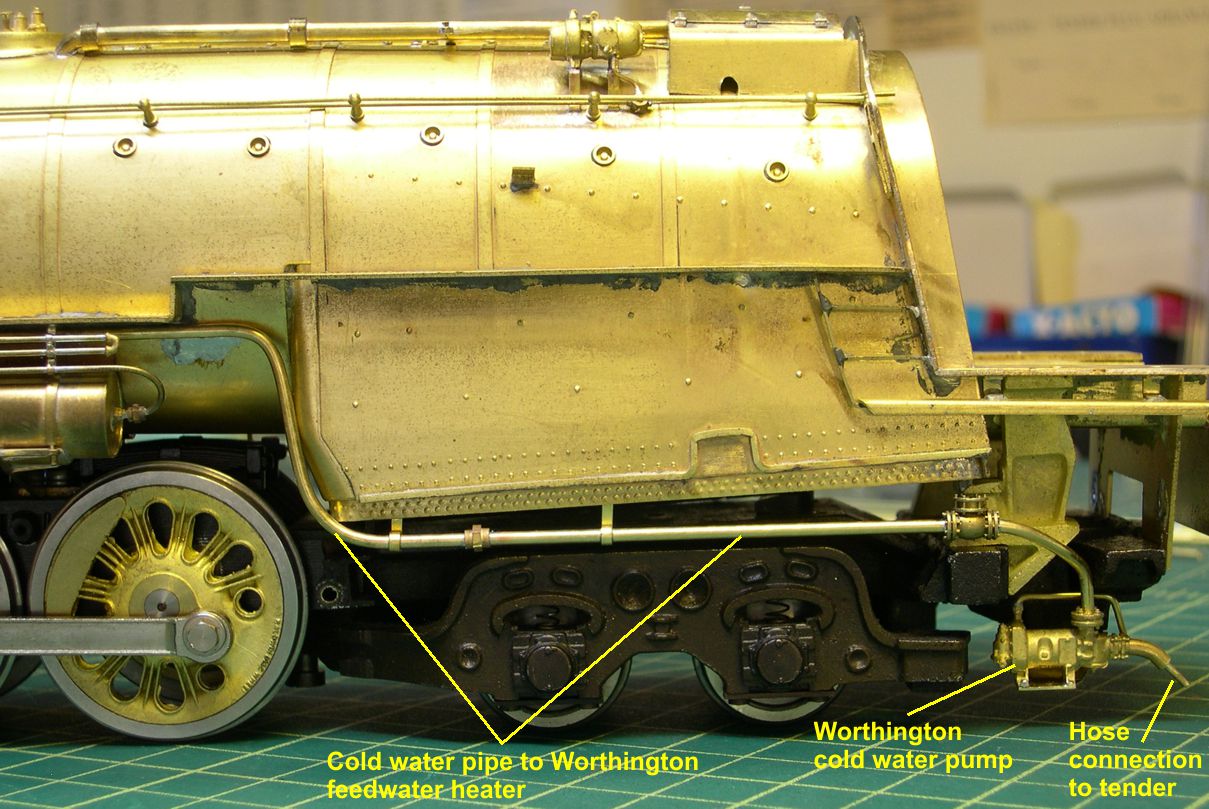
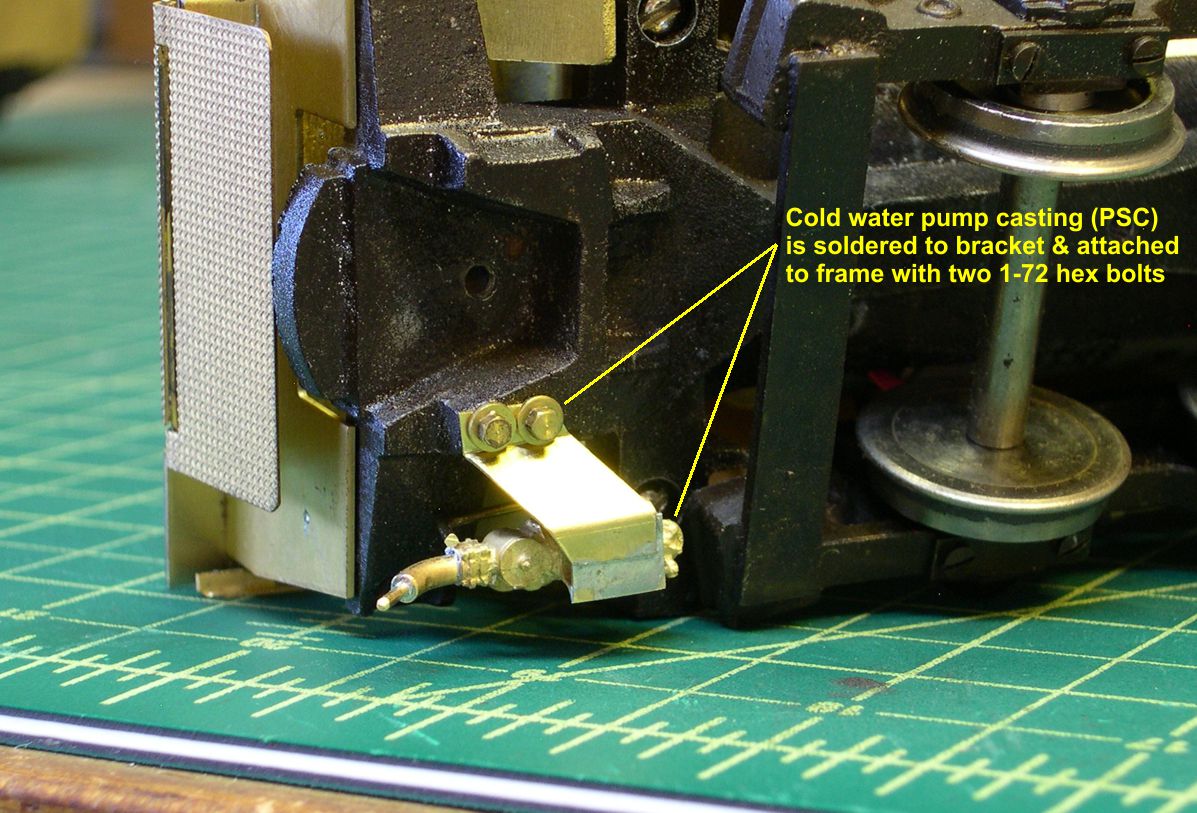
The next thing I tackled was the Worthington cold water pump and cold water piping to the feedwater heater. There is a lot of prep work to do on the pump casting before it is ready to be installed. Holes for the pipes have to be drilled out and the pump has to be attached to a bracket. You also have to add the large pipe and hose fitting that goes to the tender. It turns out that the pump and bracket will not fit up between the two rear beams on the frame of this model, so the pump has to be attached to the frame with a slip joint to the cold water pipe. Otherwise, you could not disassemble the frame from the boiler due to clearance issues. That meant I had to drill and tap a couple of holes in the frame for mounting the cold water pump. With the pump mounted, I then fitted up the piping as shown in photos “CW Pump-1, 2, and 3”.
cw pump 1 ⤵
cw pump 2 ⤵

cw pump 3 ⤵
The spare parts box came in handy for the odd attachment on the cold water pipe. I think it’s some kind of access hatch for cleaning out the cold water pipe, since it is just a flat plate bolted onto an opening in the pipe. Fortunately, I had two of everything I needed for these fittings, so I could do both engines the same way. The cold water pipe runs up to the smokebox where the pipes enter the smokebox just under the running board.
I continue to learn more and more about these engines as I try to get every detail done on them. That’s a large part of the fun involved.