AT&SF Class 5001 Smokebox
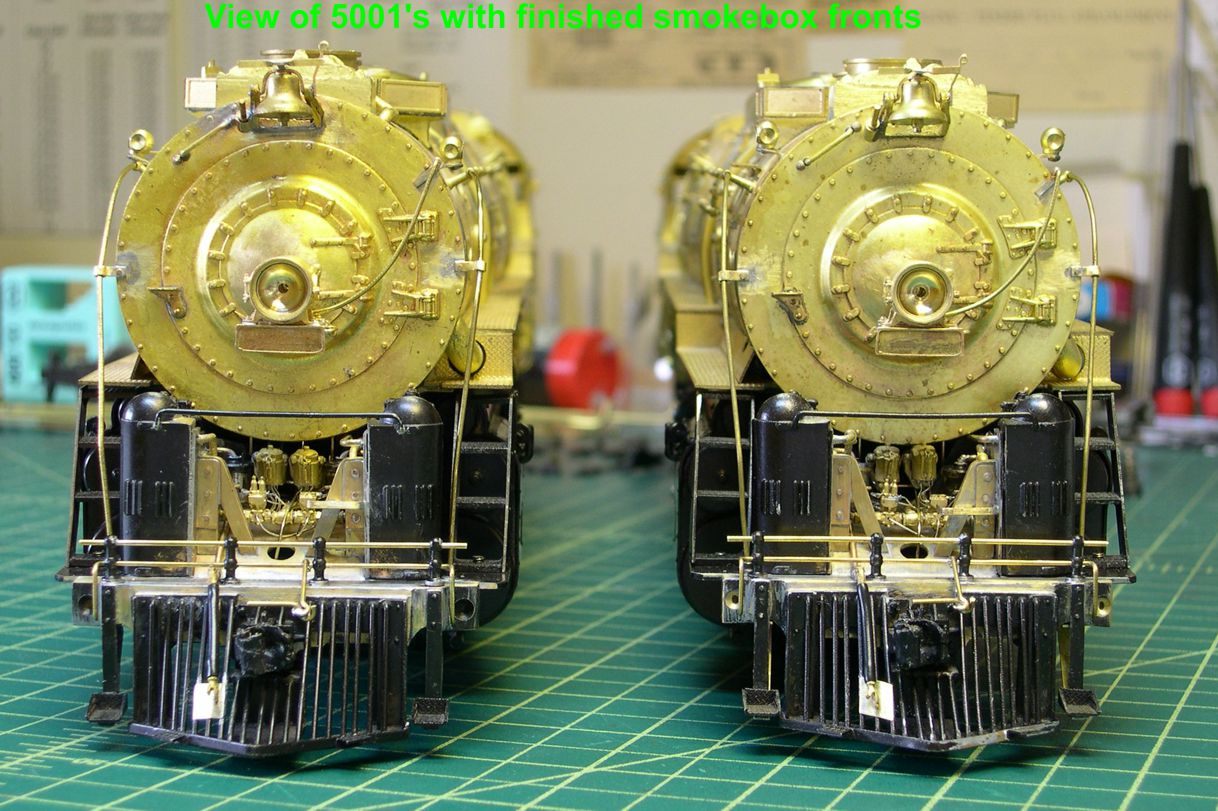
In this installment of the 5001 saga, I show the finishing touches to the smokebox fronts. There are 6 photos attached showing the completed fronts installed temporarily on the engines, so you can get an idea of what the final model will look like. Photo 1 just shows a front view for a general impression.
photo 1 ⤵
In the remaining photos, I have pointed out the additional details I have changed or added since the last installment.
photo 2 ⤵

The braces for the handrails were very crudely done and nothing like the real thing, so I replaced them using Scale Hardware 0.7mm simulated hex bolts for the bolts that held the prototype braces in place. The handrails just slip through these braces and are not soldered to anything. They slip into a handrail post at the top and into a stanchion on the bottom. That way, they can be removed anytime the engine needs to be disassembled.
photo 3 ⤵

There was a grabiron on the side of the headlight bracket, but only on the side where the access hatch is on the headlight, so I fabricated that and soldered it in place. I then fabricated a bracket for the electrical cable to the headlight and soldered it in place as shown. The cable was then shaped and soldered to the bracket. I left the cable a little long at the top end so I can fit it exactly to the junction box on the cable from the generator and cab (to be added). It will just slip into that junction box, so the smokebox front can come off as needed.
photo 4 ⤵

Years ago, I picked up a tip from narrow gauge scratchbuilders in some article about how to simulate the bolted ends of grabirons without having to bend and drill the grabirons and insert bolts in them – a tedious business at best. If you just install nut-bolt-washer castings right against the ends of the grabirons, you get a very nice illusion of bolted ends. I used PSC NBW castings to achieve that on the upper left grabiron. I have shown it in high magnification so you can see exactly what I did, but at regular viewing distances without magnification, and especially after painting, it is really hard to tell that those are not actually bolted ends. It certainly is a lot faster and easier.
photo 5 ⤵
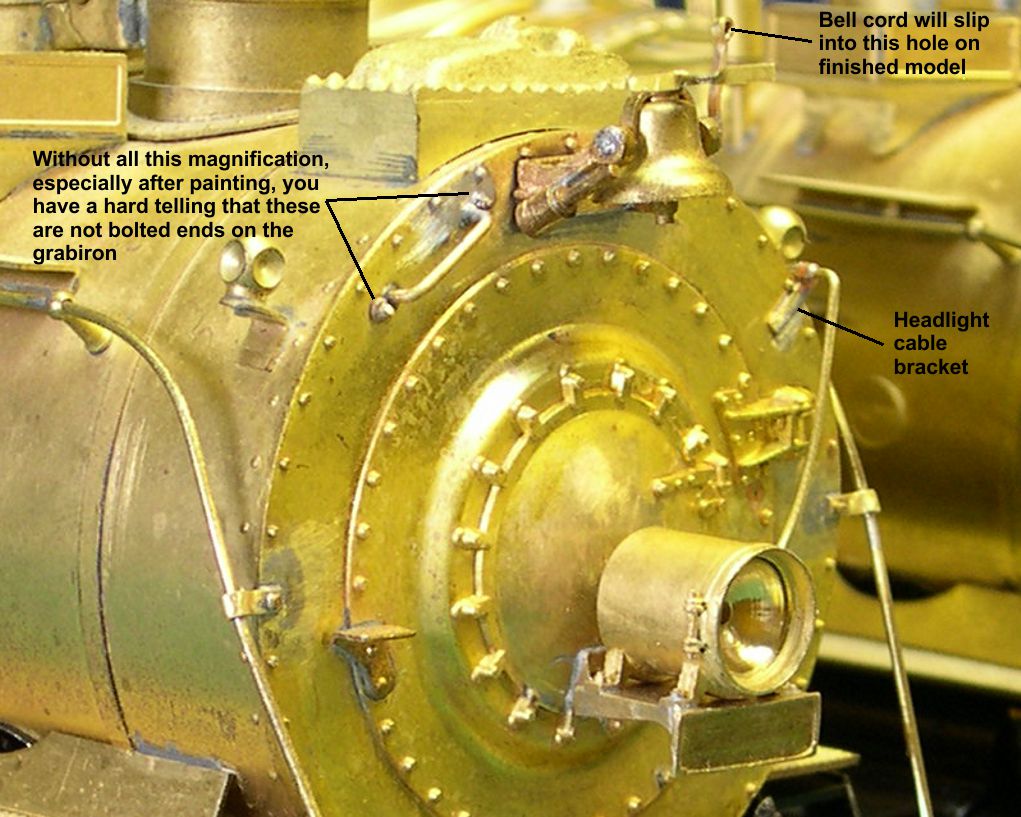
photo 6 ⤵
The Santa Fe used an interesting anti-rotation device on their bells. If the automatic bell ringer or the fireman using the manual cord got too enthusiastic with the bell, it could rotate up over the top and jam there. To prevent that the Santa Fe installed a tee shaped device on the top of the bell that would strike the bell bracket and prevent the bell from rotating any further. I fabricated that device from 0.010″ X 0.042″ brass strip. I also had to add the manual ringer arm, as the model did not have that. Eventually, the hole in the top of that arm will accept the bell cord as the smokebox front is assembled to the boiler. It will not be soldered at that point, so disassembly will still be possible. Given this extra detailing, a rotating bell is terribly impractical, so I soldered in a fixed position.