AT&SF Class 5001 Awnings – Cab Curtains – Lights
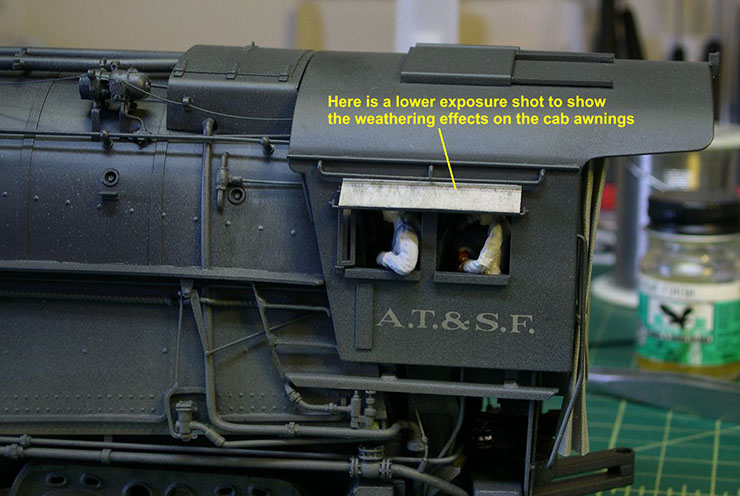
In this episode, I finish up the last few items on 5006. First, I took a lower exposure photo of the cab awnings, so the weathering effects on those could be seen. That photo is the file “Awnings”.
awnings ⤵
Those nice white canvas awnings would rapidly collect a messy coating of sooty, oily water residues courtesy of the blower forcing a lot of stuff up the stack. If you doubt the amount of stuff blown out the stack when the blower is turned on, I will relate an anecdote told me by my father. He was a young fireman just learning his trade on the ATSF when this happened. The fireman was always supposed to check down both sides of the engine before turning on the blower. He had to make sure no one was near the front end. In this case, the engineer, who just happened to have worn a brand new set of overalls this day, was apparently crossing from one side to the other in front of the engine as my father crossed from one side of the cab to the other, so my father never saw him right at the front of the engine. My father turned on the blower, which was soon followed by a bellowed “You sonofabitch!” from the front of the engine. The engineer was thoroughly splattered by oily, sooty water, and his brand new overalls were anything but at that point. My father was never able to convince the “old head” that he did not do that on purpose. Anyway, that’s the source of all that black, mucky stuff on the awnings.
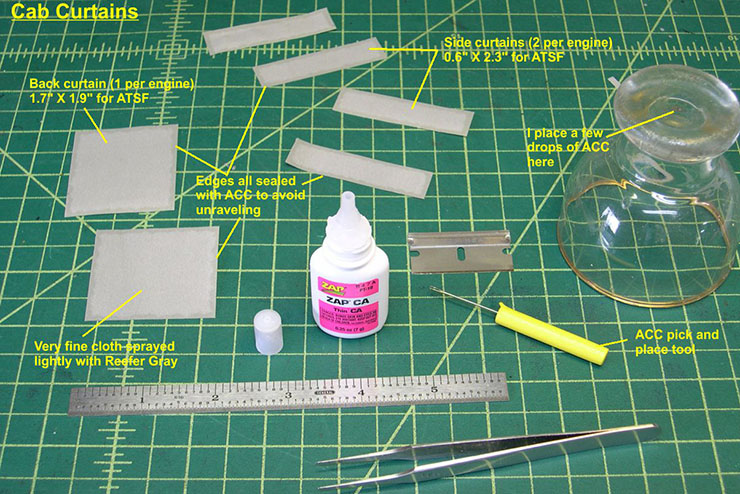
The final touch for the engine is the cab curtains. Photos “Cab Curtains-1 thru 8” show how I make real cloth cab curtains. I use real cloth for two reasons. First, it is very hard to make folded shim brass look like cloth. Second, ATSF curtains hang down between the engine and tender and can easily short the two together if made of metal. The cloth is not only an insulator, it can move aside quite easily as it gets pushed going around curves. The cloth I use is the finest weave I could find in a yard goods store a number of years ago. There’s no point asking me what it’s called or what it cost, as I have no recollection by now. I just went in and asked the lady for the finest weave cloth she had in a neutral beige or off white color. Then I bought a foot or so of it, which is a lifetime supply for cab curtains. Spare no expense – it’s for me.
I prepare the cloth by tacking a piece of it to a board and lightly spraying it with Reefer Gray to give it the color I want. Most any medium to light gray would work just fine. In photo 1, I have shown all 6 pieces of cloth for the two engines (might as well prepare them all at once).
cab curtains 1 ⤵
You need two side curtains and a back curtain for each engine. The ATSF dimensions are shown in the photo. SP side curtains are shorter and slightly wider. They do not hang down below the deck the way Santa Fe ones do. Each road is probably different depending on preferences. It is important to immediately seal all the edges of the cloth with ACC to prevent fraying or unraveling. That will happen quickly without the sealing. Don’t worry about the ACC staining the cloth a slightly darker color. By the time the curtains are installed, all the cloth will be soaked in ACC and the color will be much more uniform. The little applicator for ACC shown in that photo is really simple. A friend of mine, Eric Bracher, made up some of these for a bunch of us years ago, and I have used the same technique ever since. All you do is cut through the eye of a needle with a cutting disc in your Dremel, then push the sharp end of the needle into a short length of dowel. Eric dressed it up by dipping the dowel in some of that rubber like tool handle dip for insulating metal tools. It makes a great applicator, and you can vary the capacity of the applicator by using larger or smaller needles to begin with. I keep a selection of these handy at all times.
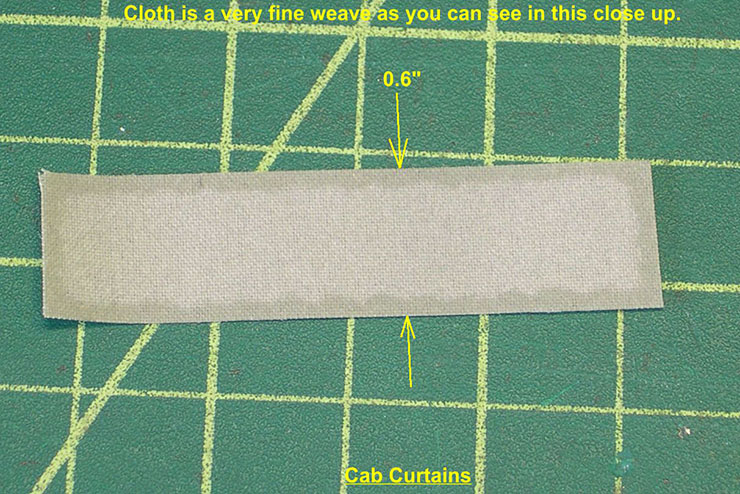
In photo 2, I have shown an extreme close up of the cloth so you can see how fine the weave is, bearing in mind that the piece shown is only 0.6″ across.
cab curtains 2 ⤵
The finer the better for this application. 1/48th the weave of standard canvas would be mighty fine.
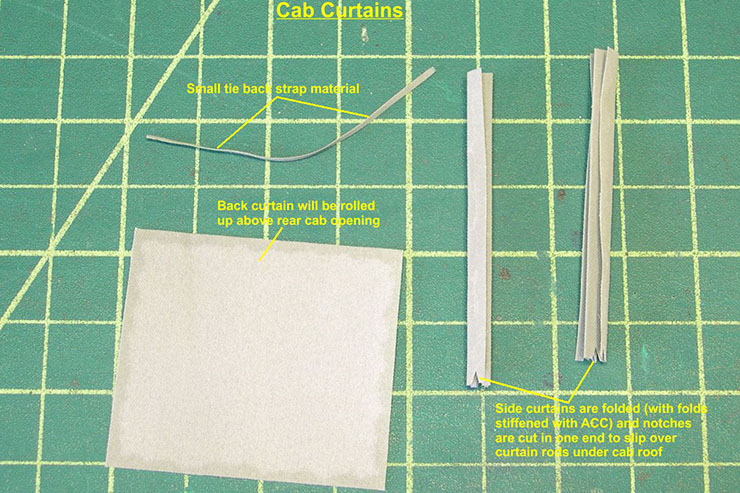
In photo 3, you can see how I have folded the side curtains so they will appear to have been pushed up together on the curtain rods.
cab curtains 3 ⤵
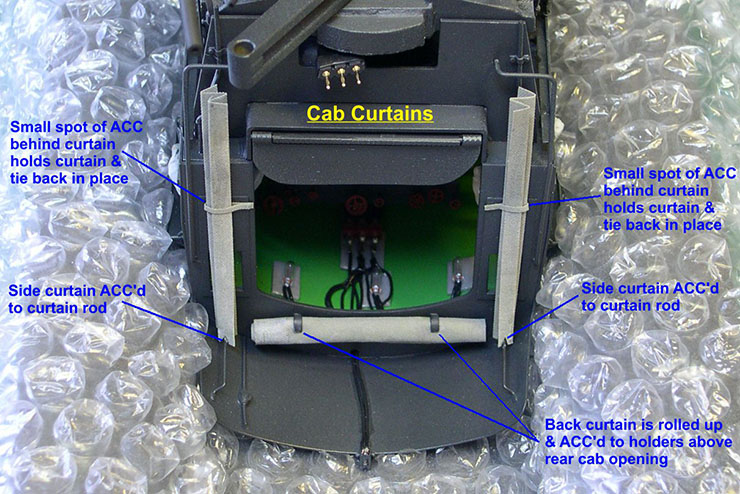
I apply ACC along each fold to stiffen the fold and help it keep its shape. It’s also necessary to cut a notch in the top end of each set of side curtains so they can be slipped over the curtain rods under the cab roof. Photo 4 shows how the curtains are installed on the model.
cab curtains 4 ⤵
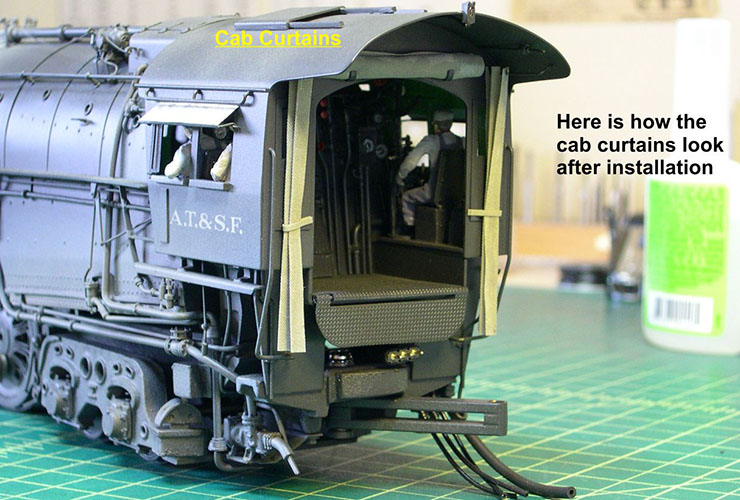
I change to gap filling ZAP ACC for this stage. I apply ACC on both the curtain rod and in the notches in the curtains, then place the notches over the curtain rods. A trace of ZAP accelerator immediately hardens the ACC so the curtains are held in place. The tie back strips are placed around the curtains and pushed back into a drop of ACC behind the curtain. That way, one cannot see any ACC film holding the curtains. The back curtain is tightly rolled, fitted into the brackets on the back of the cab as shown, and ACC’d permanently in place. As you can see, I have pretty well soaked all the cloth in ACC by this time, so the color is fairly uniform again. The cloth remains flexible enough to give if it needs to going around curves but stiff enough to retain its shape indefinitely. I have engines with a decade or more of service with these cab curtains, and none have ever come off or unraveled. Photo 5 shows the cab curtains in place with the engine right side up.
cab curtains 5 ⤵
Photo 6 shows the completed engine with the cab curtains in place.
cab curtains 6 ⤵
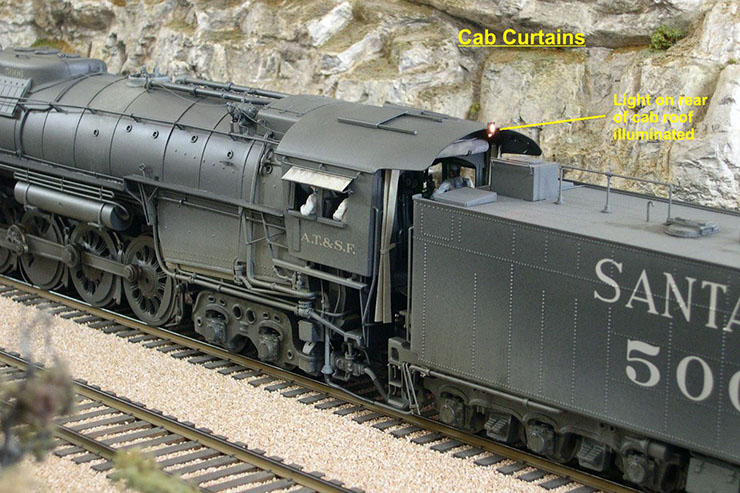
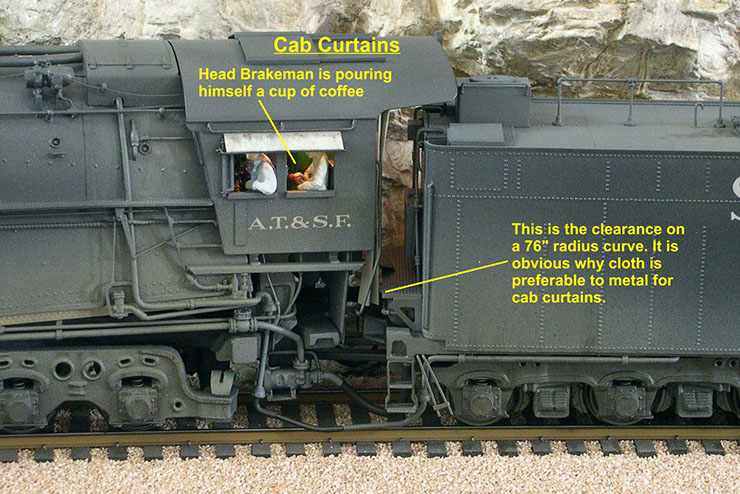
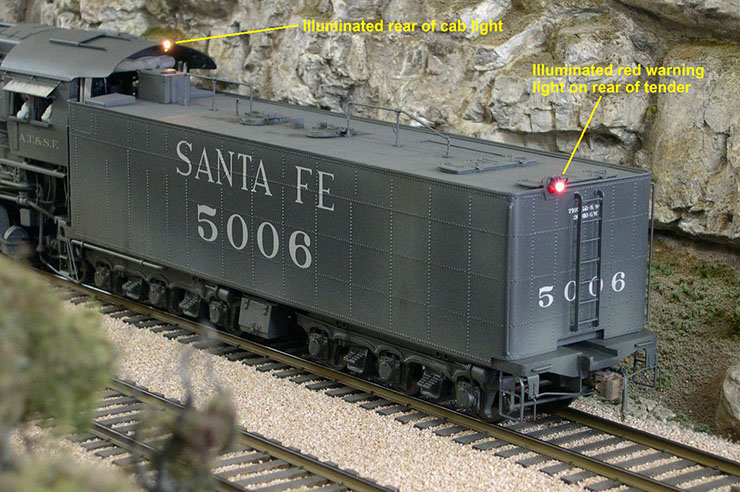
I also turned on the light on the back of the cab roof so you can see how that looks. In photo 7, the engine is on a 76″ radius left hand curve, and the tender deck is touching the cab curtain.
cab curtains 7 ⤵
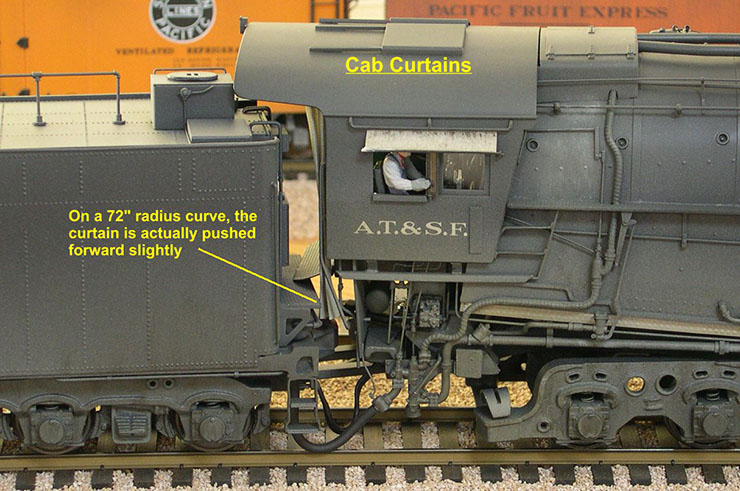
Obviously, this would not be good if the curtain was metal. Photo 8 shows the engine on a 72″ radius right hand curve.
cab curtains 8 ⤵
The tender deck is pushing the cab curtain slightly forward. The advantages of cloth curtains are obvious at this point.
Finally, I took a photo called “Lights” in which I turned on both the rear of cab roof light and the rear of the tender red warning light so you can see what they look like in operation.
lights ⤵
You can see the light from the cab roof light reflecting off the top of the tender. That would be most welcome for a fireman trying to find the oil and water hatches in the dead of night. The next issue of this saga will be a photo spread on the completed 5006.
